Tag: Makeover
Inviting Entryway Makeover
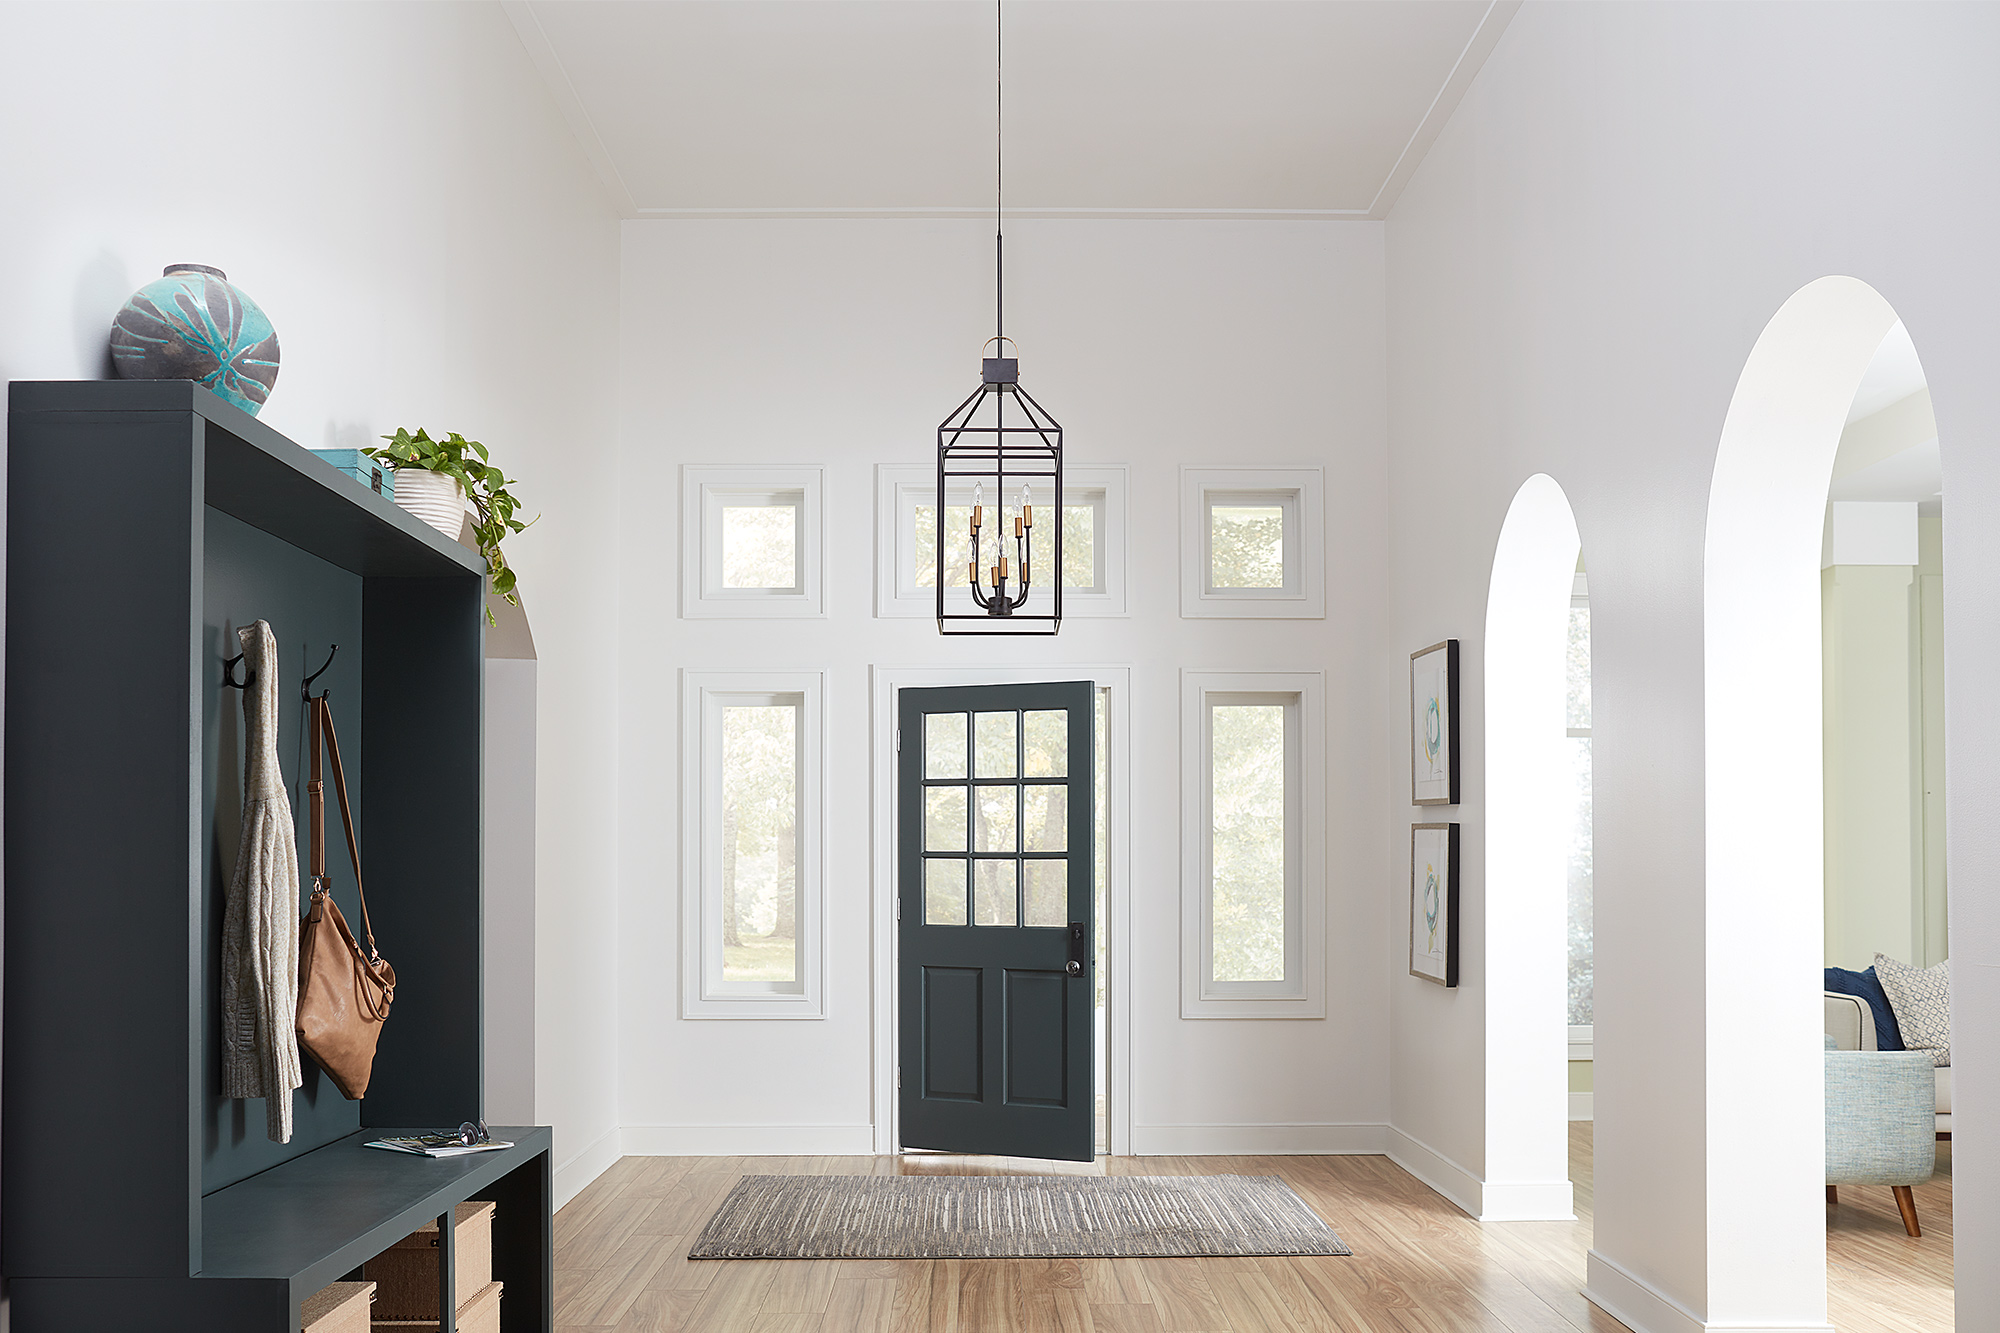
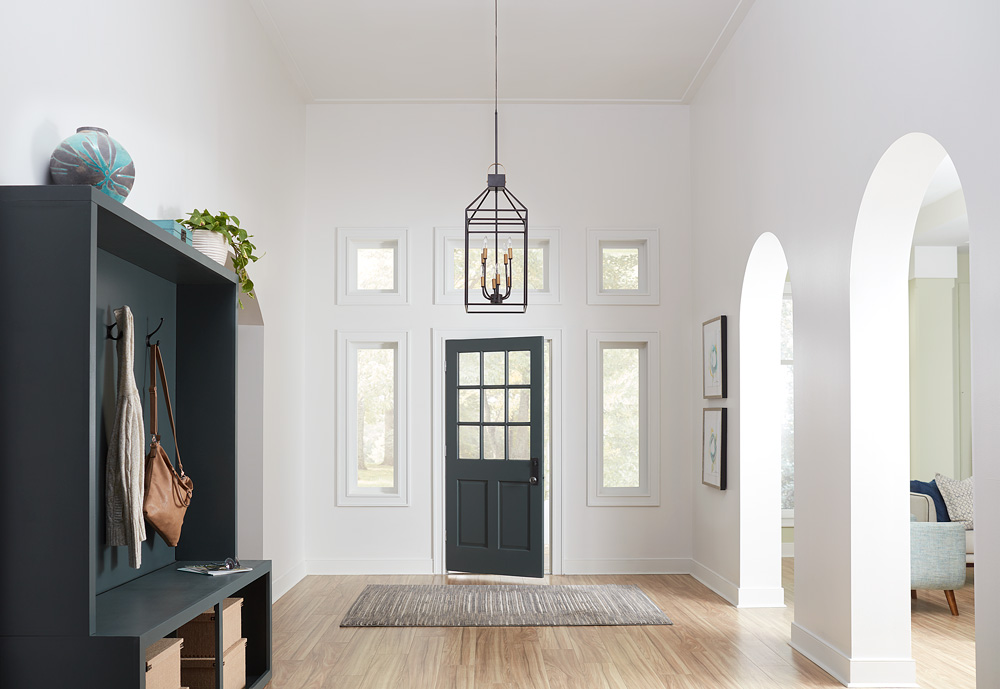
September 20, 2021A drab and functionless entryway transforms into an inviting and inspiring multi-use space in this entryway makeover. Plain, dated, and without focus, the original entryway neither served the homeowner nor did much to accentuate the natural views outside. To brighten up the space and make the area as useful as it is beautiful, we chose a fresh white hue for the walls and created a functional mini-mudroom to add much needed storage and a pop of color that we also tied in with the front door.
DIYers often overlook entryways and hallways when remodeling their homes, thinking of them simply as connectors for other rooms. Yet, these spaces can be among the most important in a property and can impact both how your home feels and functions. Keep reading to find out how we created a minimal yet practical space in this entryway using KILZ® Primer and two different paint colors – a fresh white and a nature-inspired deep green.
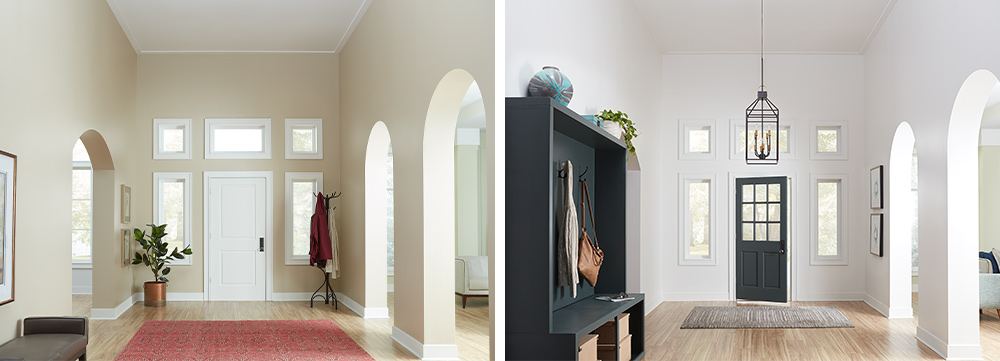
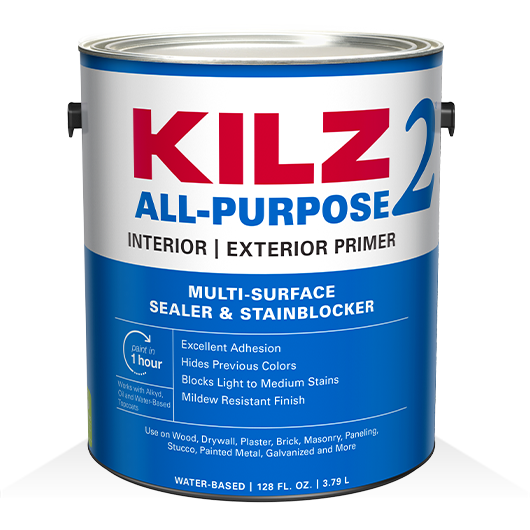
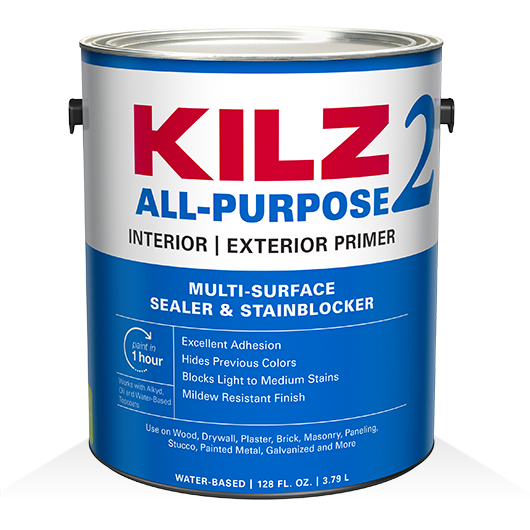
Entryways see some of the greatest foot traffic in a house, and for that reason, it is important to choose a primer that will help your final paint job last for years to come. KILZ 2® All-Purpose Primer was the perfect choice for the paint job’s foundation here, with its stain-blocking properties that help to hide stains and cover the old drab color.
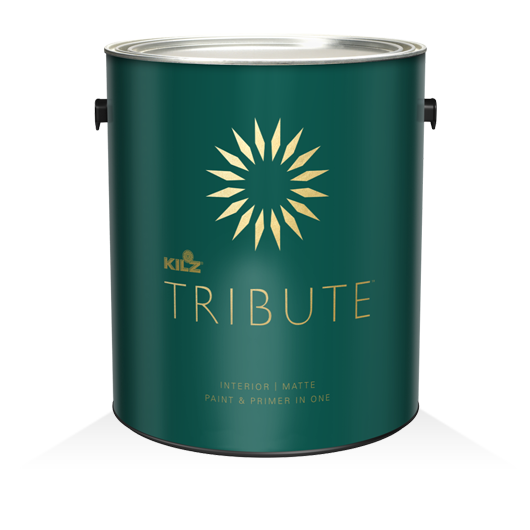
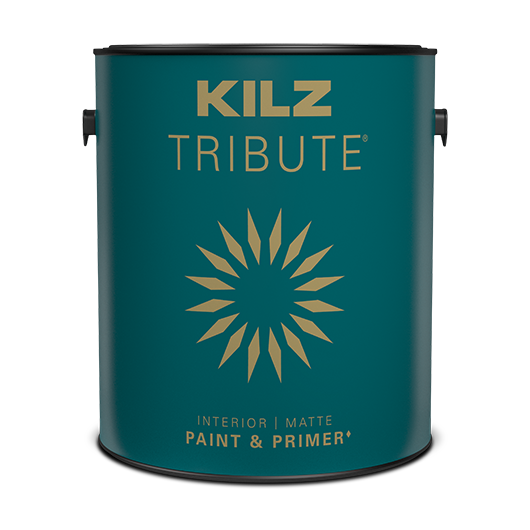
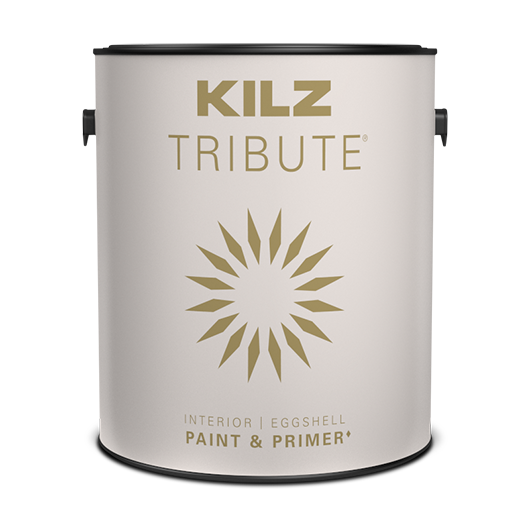
Starting with KILZ 2 as a base for any surface (you can even use it on brick, wood, and drywall), the next step is to choose a color palette that freshens up your space and draws out its best features. Here, we chose KILZ® Tribute® in White Modern for the walls because the color white elicits a sense of calmness, purity, and order. Whether you are heading out for the day or coming back home, a white entryway can help to reset your mind and refocus your attention on whatever is coming next. In our makeover, the white walls act as the perfect canvas for the windows, drawing the eye outside and inviting in the natural colors of branches and leaves as they change throughout each season.
With the white paint providing an airy base tone, and a darker color for the new front door, the mini-mudroom creates a striking yet clean contrast. KILZ® Tribute® in Typewriter is a deep and almost industrial color, yet it has subtle shades of green that add the perfect pop of nature-inspired color.
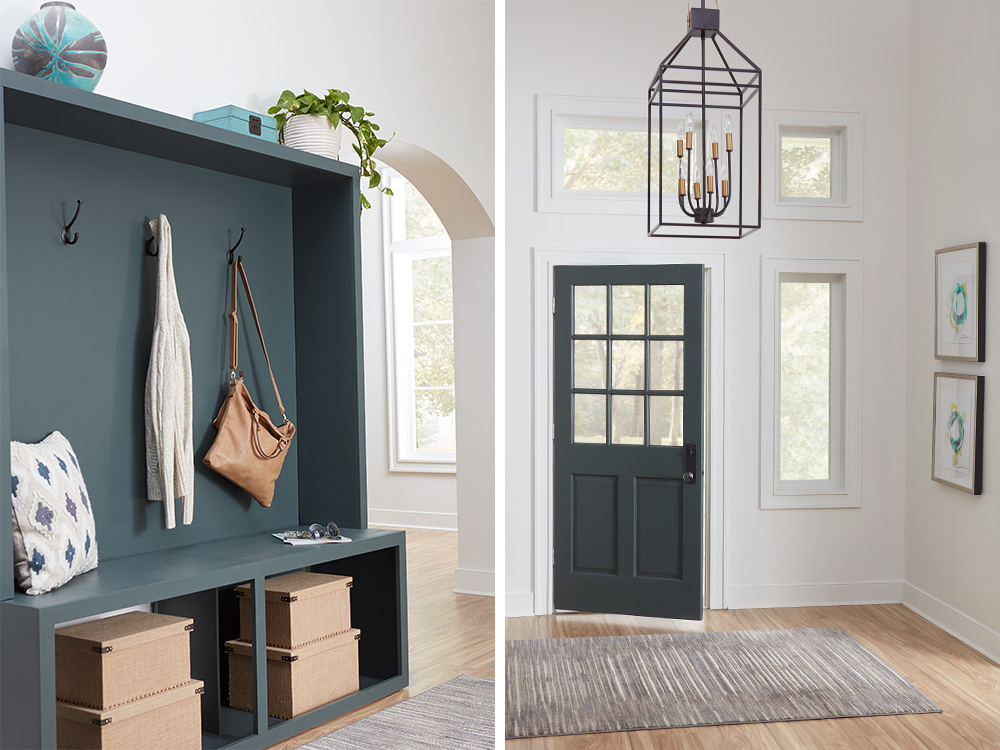
The mini-mudroom unit itself offers plenty of storage space for shoes, coats, and outdoor equipment, making it easy to keep the whole space tidy and organized. Adding storage boxes in the bottom section for shoes also helps to keep mud and dust off your floors, which means no more dirt trailing throughout the house.
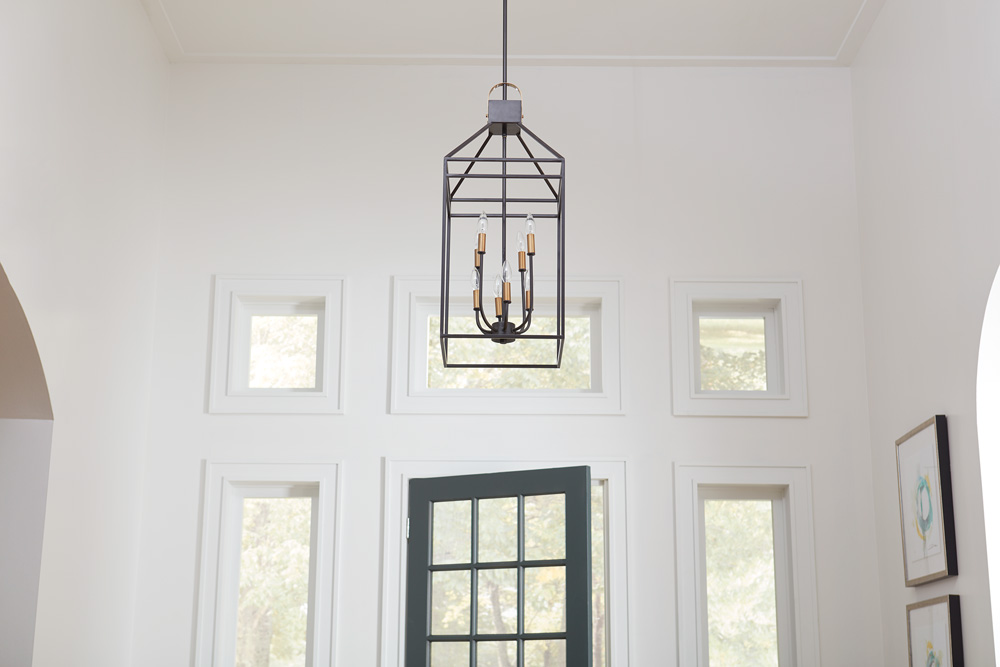
Finally, we chose a handful of stylish accessories like a caged light fitting, a potted plant, natural-colored rugs, and contemporary framed artworks to finish the transformation. These small accent pieces work in harmony to ensure warmth and welcome in an otherwise clean and cool space.
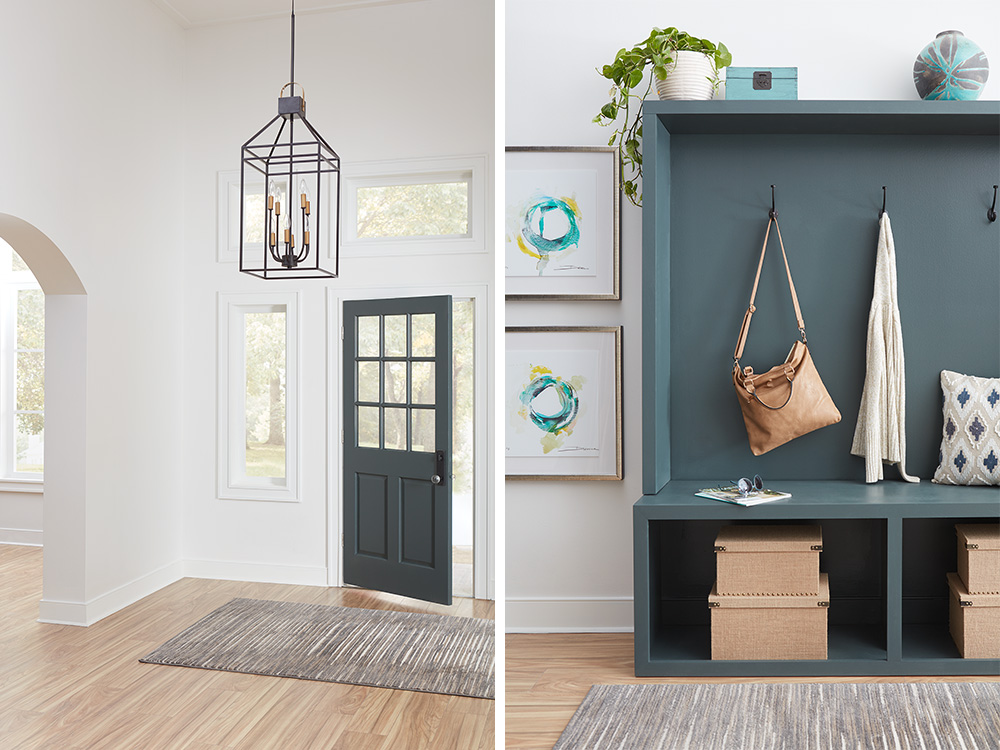
If you are considering ways to update your home, a relatively simple entryway transformation project could make all the difference.
Always remember to refer to our website kilz.com or product back labels for additional information on which primer is right for your project and detailed instructions on how to apply our products.
Pro Spotlight: Ryka Builders
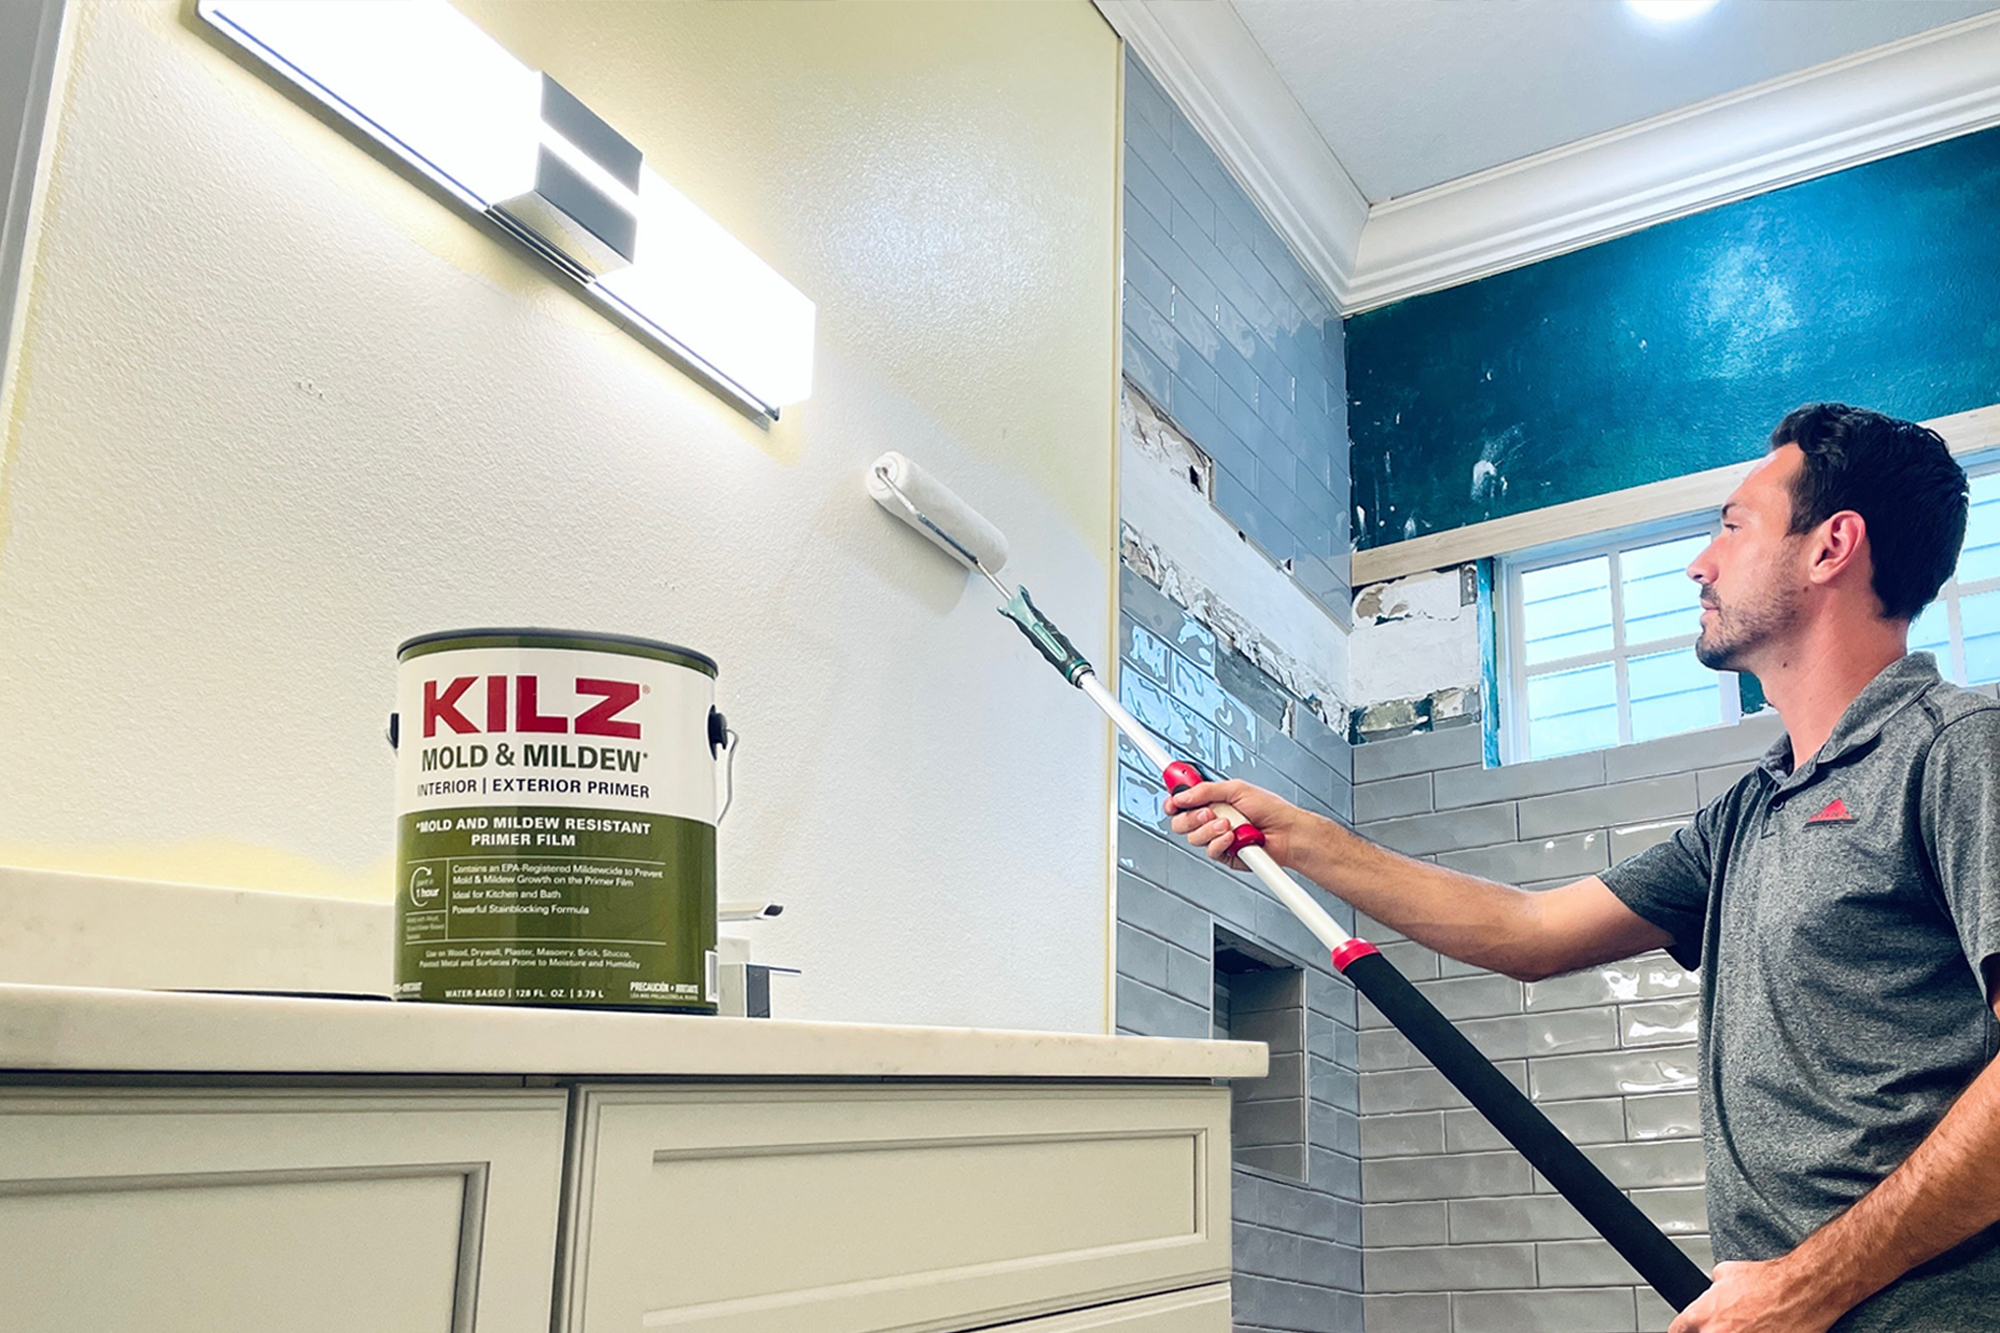
June 21, 2021 This month on The Perfect Finish we’re spotlighting Ryan from Ryka Builders. A veteran contractor with experience in both commercial and residential construction, Ryan recently completed a bathroom remodel with the help of KILZ® Mold & Mildew Primer and we are excited to share it here. Read on to hear from Ryan on why he chose KILZ primer for this job and get a glimpse into how he completed this stunning remodel.
Upscale Your Throne Room
By: Ryan, Ryka Builders
In this day and age, between social media, magazines, and television, beautiful home renovations are everywhere to be seen! The magnificent end results are truly inspiring, however there are proper steps that need to take place in order to get these reno jobs done efficiently and effectively. One of these important steps is the use of primer – KILZ® brand has multi-surface and specially engineered primers suited to take on any type of issue and best prepare surfaces before painting. Whether you’re a DIY’er or are planning to hire a contractor, you must be sure that the right steps are taken to keep your newly renovated home looking great for years to come.
I’m Ryan with Ryka Builders, and I’m a licensed general contractor with over 30 years of experience. Ryka Builders is a family-owned business that has been developing close, trustworthy relationships with our commercial and residential clients for many years. We are passionate about our jobs and care that they are done to the upmost standards. If you are looking to update your bathroom, I’m here to help share the proper steps and to make sure you have a quality finished product.
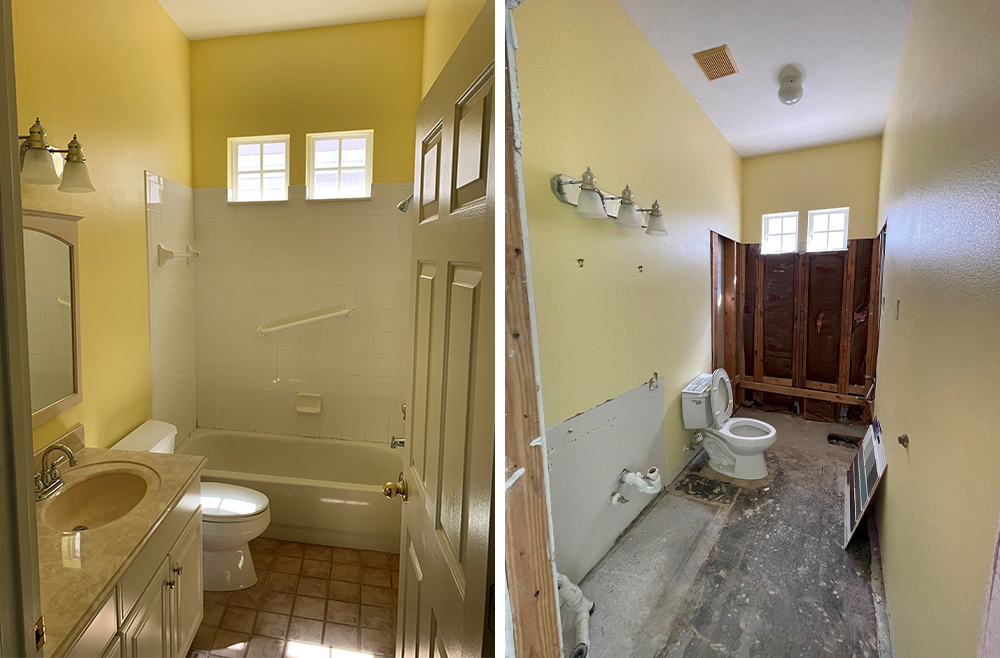
A recent client of ours bought a house sight unseen in Florida while residing in New York. She researched contractors in the Central Florida area and was impressed with our reviews and referrals from previous customers. After a video call with the owner, we were able to provide design guidance and expertise to help the client achieve her dream home makeover, and she awarded us the opportunity to do some major renovations on her entire home including this bathroom.
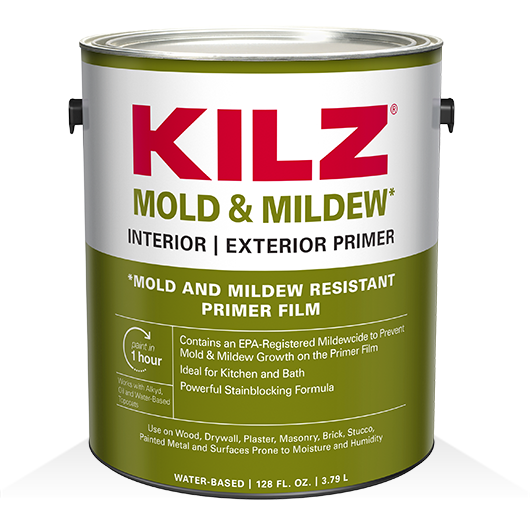
Once we started demolition, we discovered a great deal of mold present on the drywall, behind the old cabinets and on the baseboards. We knew right away that a mold and mildew remediation was a necessity; safety first. We brought in our licensed remediation specialist to do the necessary repairs. It is critical that whenever there is any sign of mold or mildew, it is always effectively removed from the surface and that the water damage that caused the mold or mildew damage is appropriately remediated as well. After this step was taken care of, we decided to go in and apply KILZ® Mold & Mildew Interior & Exterior Primer. This primer contains an EPA-Registered Mildewcide to prevent mold and mildew growth on the primer film, ideal for spaces like bathrooms and kitchens.
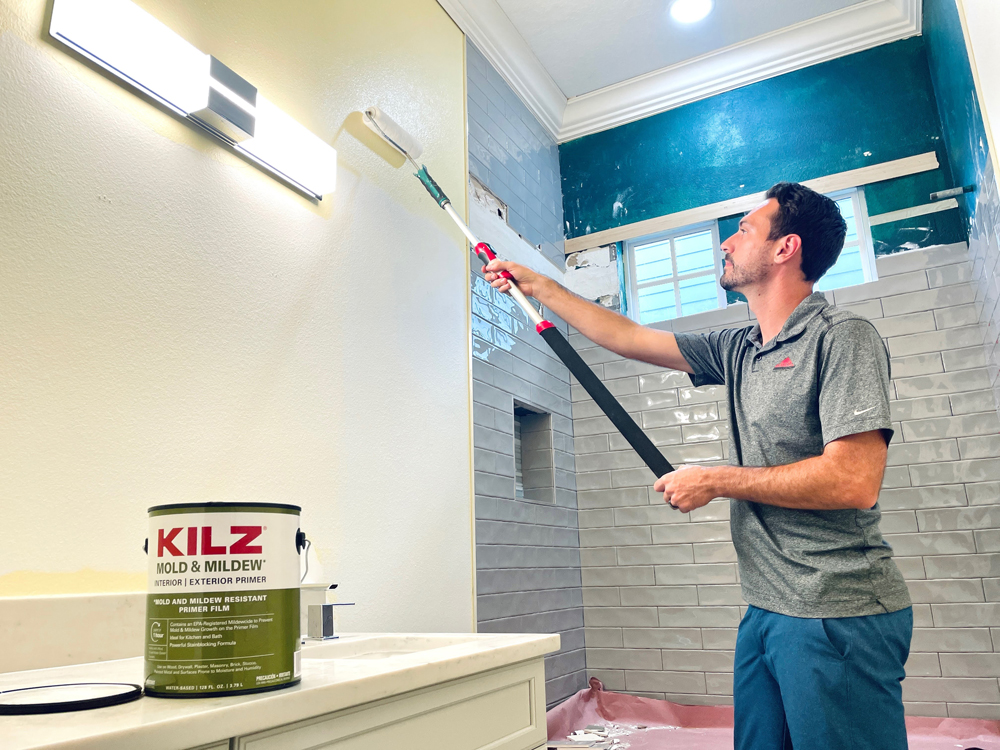
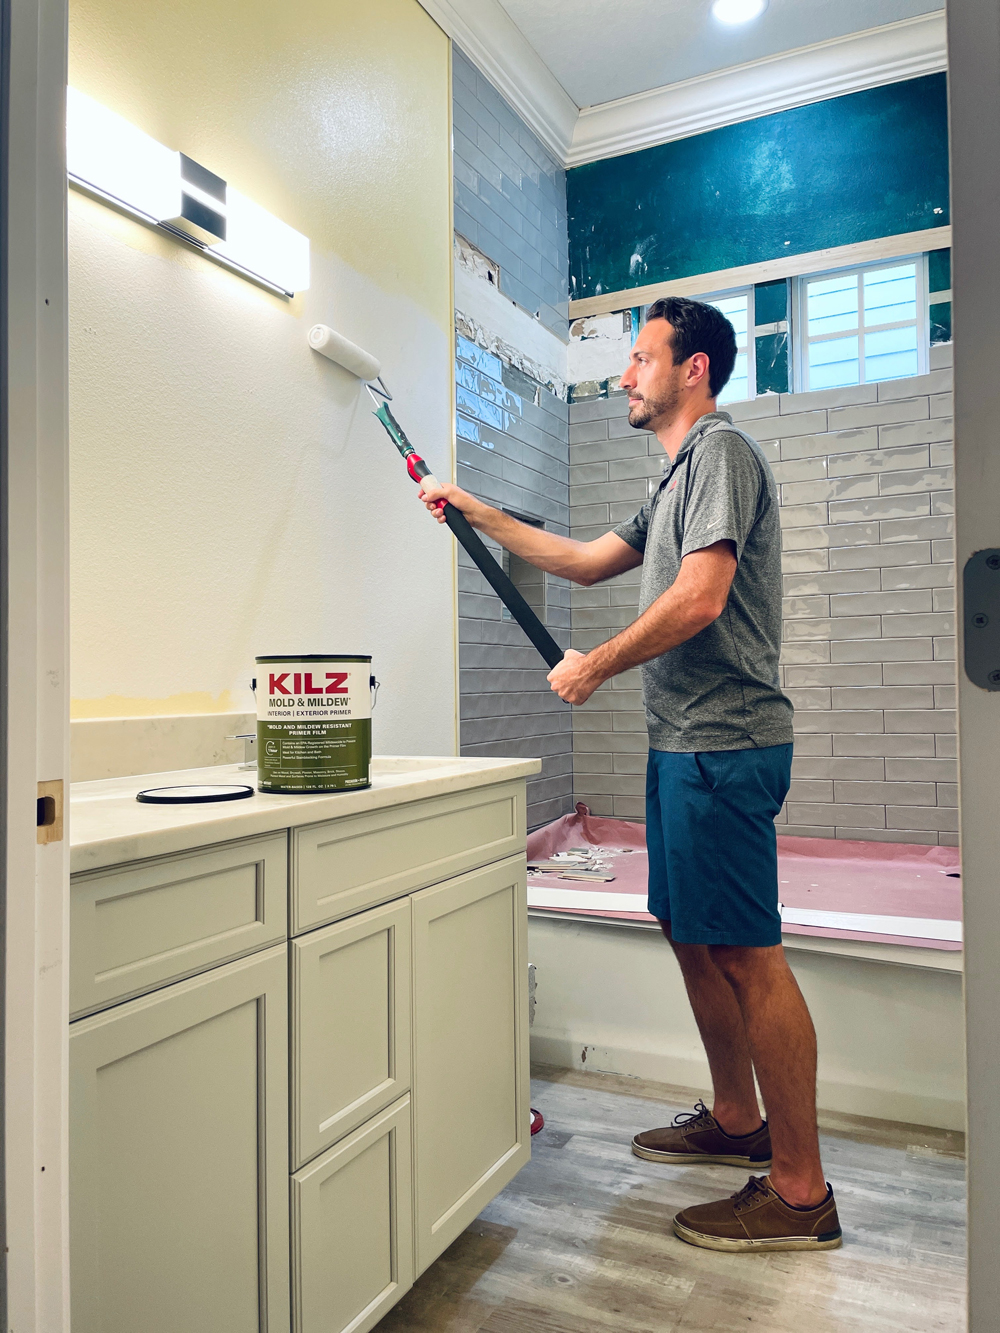
Using KILZ Mold & Mildew primer on all of the new drywall, as well as affected areas on the studs in the bathroom, sets a great base to start any bathroom remodel. For a bathroom paint project, not all primers are appropriate for the moisture and humidity that occur daily in this type of space. Bathrooms can be a breeding ground for mildew, if the proper products aren’t used. As a bonus, this amazing product also has a fast-drying agent with low odor, a very low VOC and has a water-based formula, making clean up a breeze with just soap and water. One of the many positive advantages of KILZ Mold & Mildew primer is that it is a water-based primer-sealer-stain blocker specifically designed for residential surfaces in high humidity, moisture and temperature environments such as bathrooms, powder rooms, kitchens and laundry rooms.
“KILZ primer products have been around for more than 40 years and is a brand we trust. We always look to them for products, because we know they have been tested and built for the challenges we come across in the industry.”
We also used KILZ Mold & Mildew primer on the ceiling of the bathroom where there was an old water stain from a previous roof leak that was repaired. The stain blocking agent in the primer worked wonders. With only one coat, the stain was eliminated. In fact, KILZ Mold & Mildew primer will also block medium to heavy stains such as felt marker, grease, ink, pencil and tannin as well. KILZ primer products have been around for more than 40 years and is a brand we trust. We always look to them for products, because we know they have been tested and built for the challenges we come across in the industry.
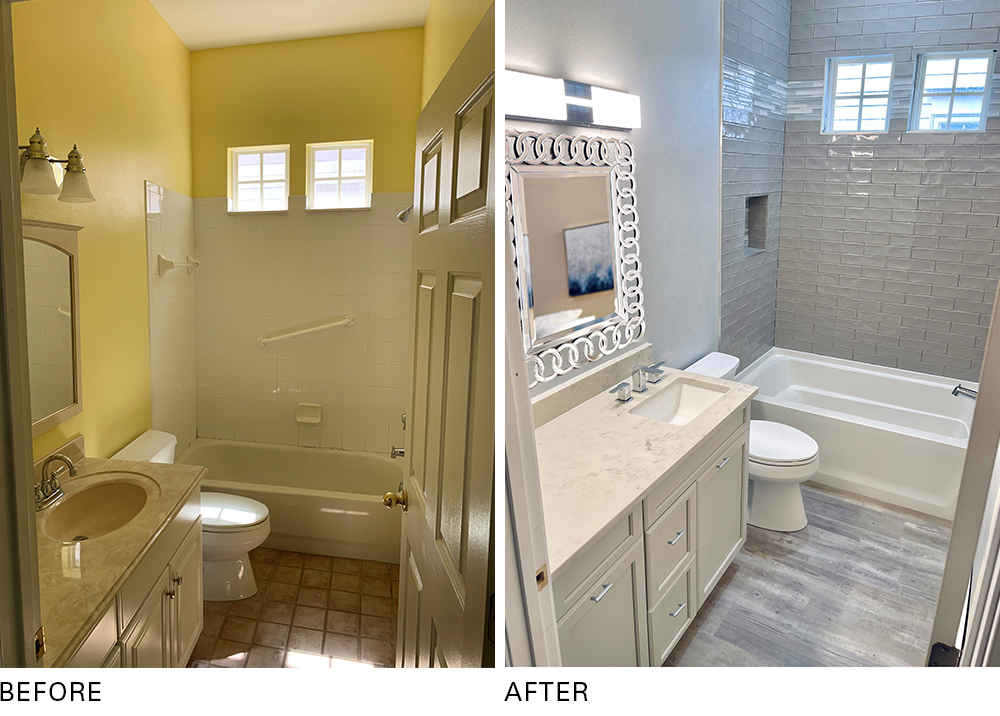 After we are confident that we have a great foundation and clean slate with the KILZ products, it’s time for the fun part – selecting tile, paint colors, hardware and plumbing fixtures, so that the client can see their vision come to life. Our client chose a very simple and sleek grey subway tile for the tub area and a beautiful complimenting shaker style vanity with chrome finishes and fixtures. For the walls, we went with a very appealing grey paint color (Silver Bullet N520-2 by BEHR®). For the flooring, the client decided on a waterproof, wood plank look, luxury vinyl that we used throughout the rest of the home as well.
Our client loves the end result, and this bathroom is ready to be made homey with plush towels and her favorite scented candles and possibly a cute little Pinterest-y bathroom sign. In the end, we’re confident that she will love it for years to come, because we took zero shortcuts to make this bathroom a success.
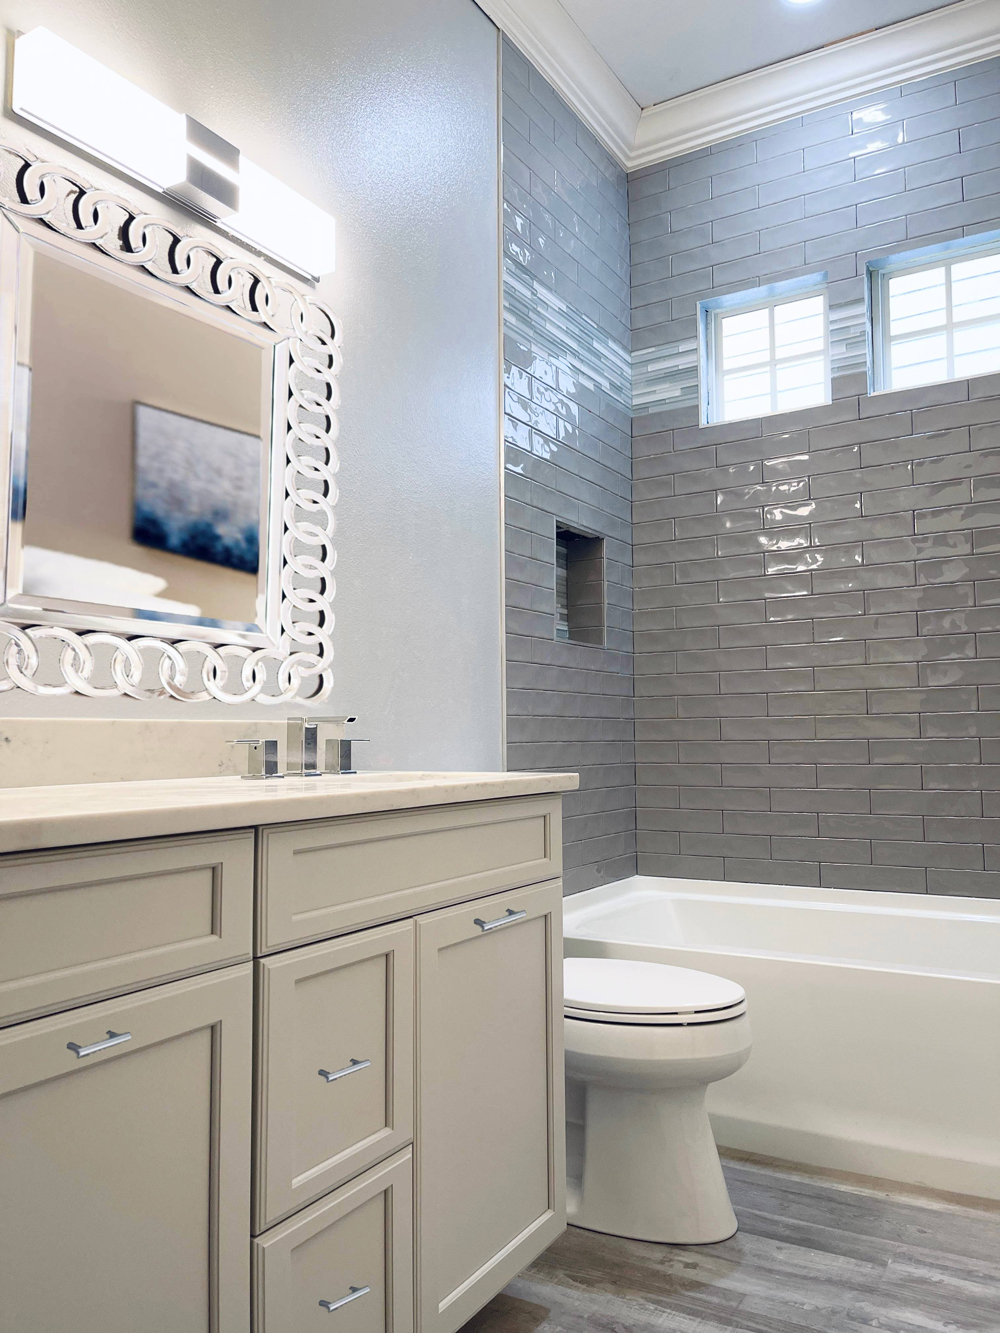
As you can see the finished product came out just how we wanted, and we feel good knowing that we took the additional steps to provide a better built product for our client. Many contractors just try to get through the job quickly, however, we know that if we exceed our client’s expectations and provide additional customer service and quality control elements, we will build strong and lasting relationships. This has helped us grow our business over the last 30+ years with many returning customers and strong referrals. A big thanks to KILZ for helping us get this bathroom project completed. Now, on to the next one!
Always remember to refer to our website kilz.com or product back labels for additional information on which primer is right for your project and detailed instructions on how to apply our products.
Turn a Bland Bathroom into a Serene Spa
May 11, 2021Who wouldn’t love to have an elegant, relaxing spa in their own home? If you’re in need of a little extra rest and relaxation these days, we hope you’ll be inspired by this next transformation – where we took an outdated and sad-looking bathroom and transformed it into a bright and spa-like retreat. The essential first step? You guessed it, primer and a fresh coat of paint!
We decided upon a modern Scandinavian-meets-coastal theme to evoke the perfect spa setting and started with the walls, because color is the single component that makes the biggest impact in one’s perception of a room. The right colors can relax the mind while stimulating the senses, and that’s what we were aiming for — the sensation of being relaxed and refreshed, exactly the way you should feel after a spa treatment.
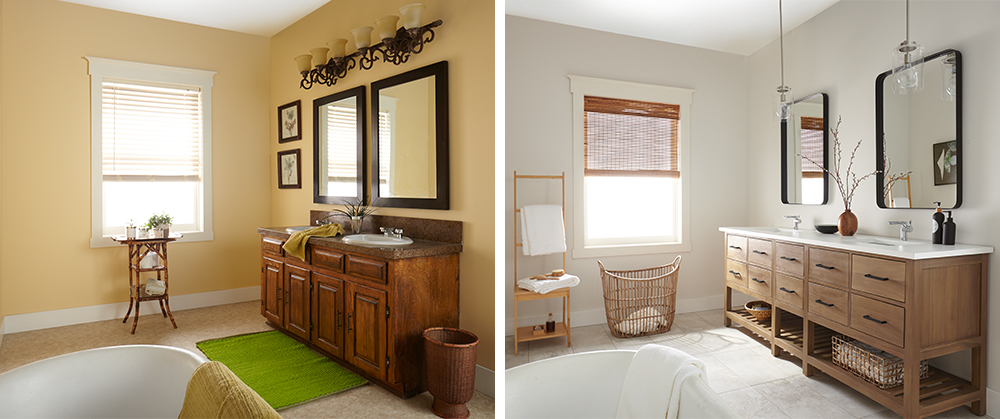
The first step was a coat of quality primer. Our choice, KILZ® Mold & Mildew Primer, has an EPA registered active ingredient that creates a mold and mildew-resistant film that protects the primer film from mold and mildew growth. KILZ Mold & Mildew Primer also provides complete coverage that hides old paint, ensuring the previous butter yellow paint color would be a thing of the past. In addition, it helps the new paint adhere beautifully, so your paintbrush or roller will glide with ease.
After the primer dried it was time for the topcoat paint. We opted for a classic – Magnolia Home by Joanna Gaines® paint in Shiplap, which is a creamy weathered white. There’s not a hint of harshness in this white, with the creamy undertones softening the color throughout, even when sunlight fills the room.
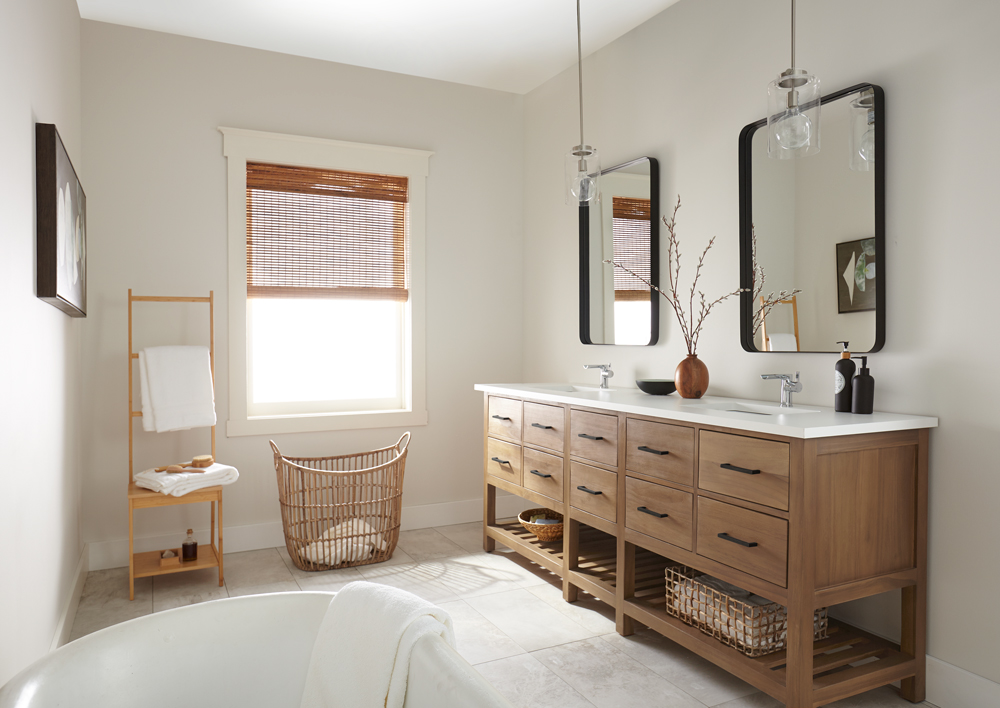
We were going for a total overall in this project, so we didn’t stop at the walls. For the flooring, we replaced the outdated laminate with gleaming white marbled tiles flecked with gray. Fortunately, we were able to keep the existing bathtub, because its elongated oval contours provided an elegant counterpoint to the rest of the room.
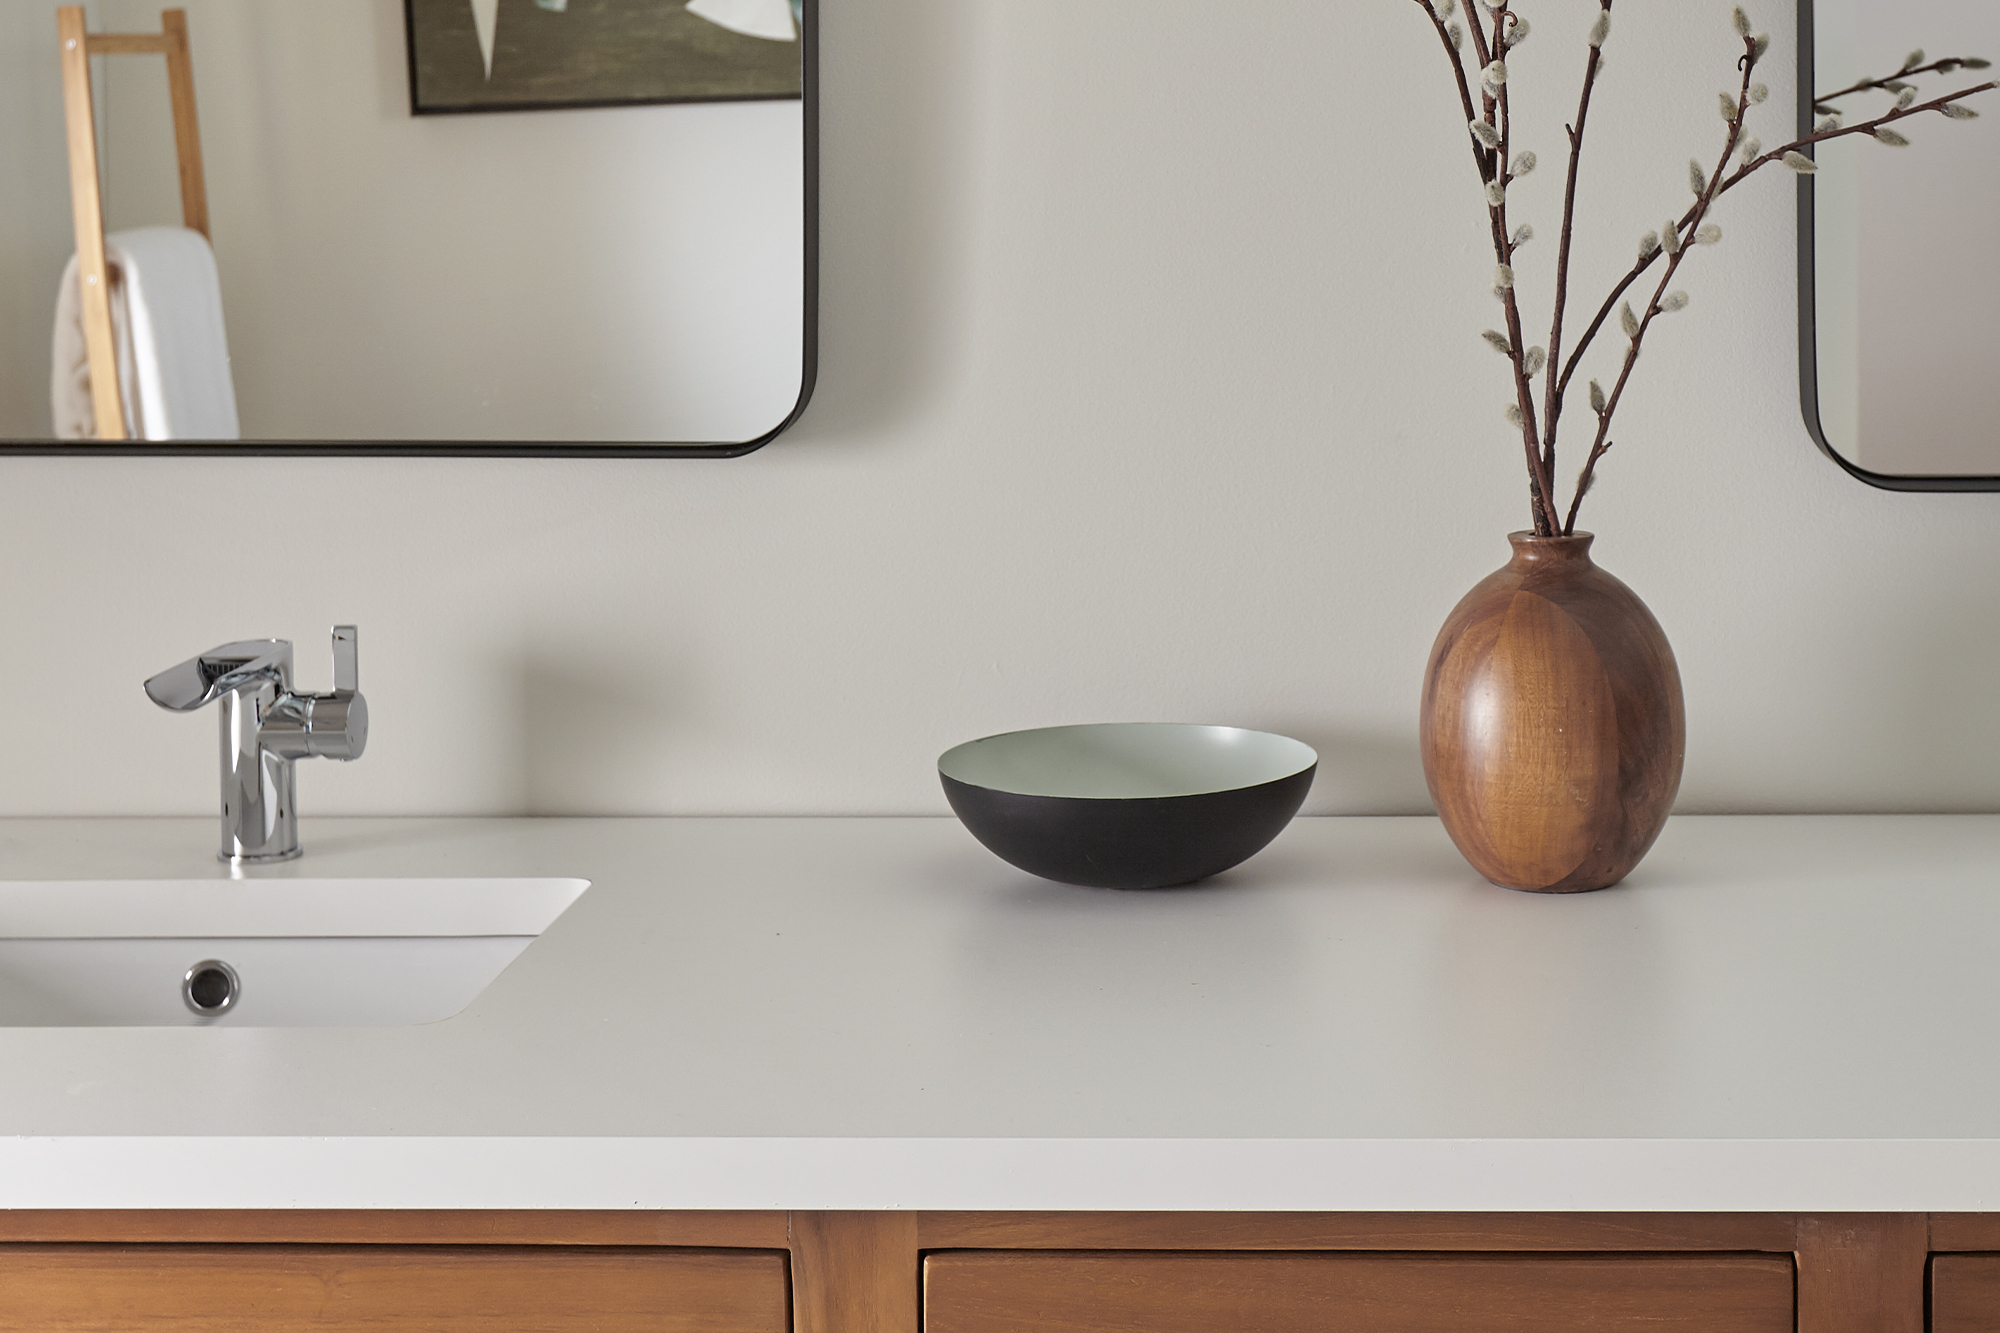
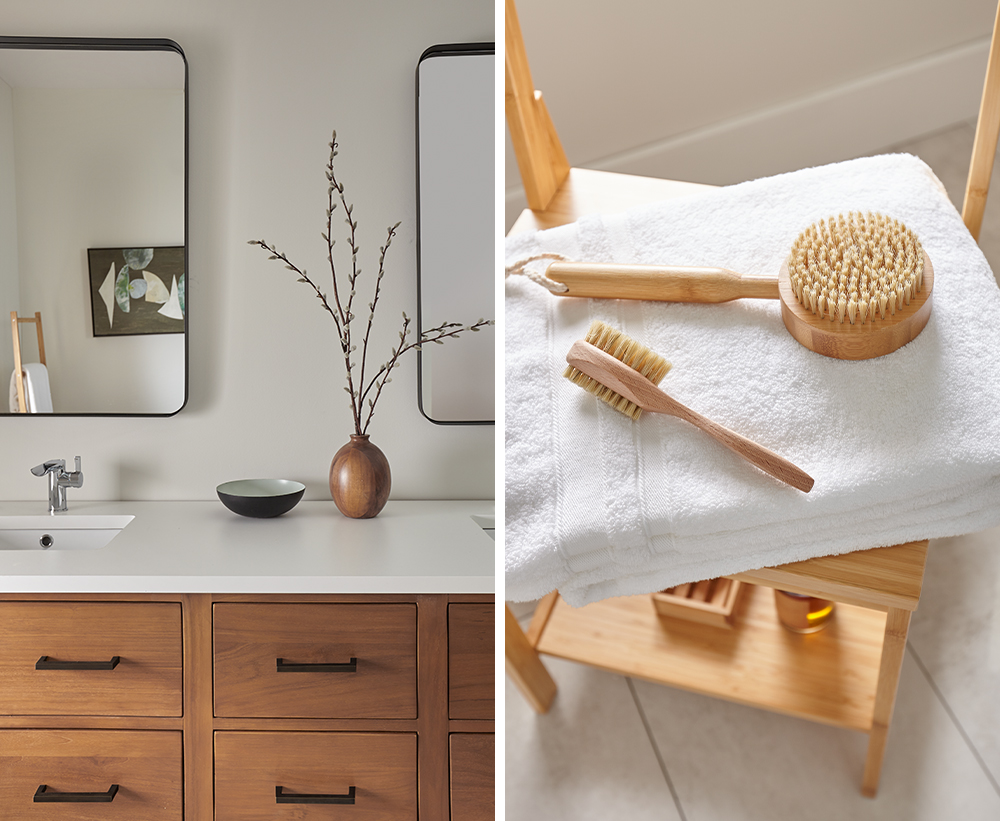
To enhance our spa look, we choose natural wood furnishings that evoked the Scandinavian theme. For the focal point, we installed a heavy farmhouse-style sink cabinet in warm natural wood with a white countertop, brushed silver faucets and brushed black drawer pulls.
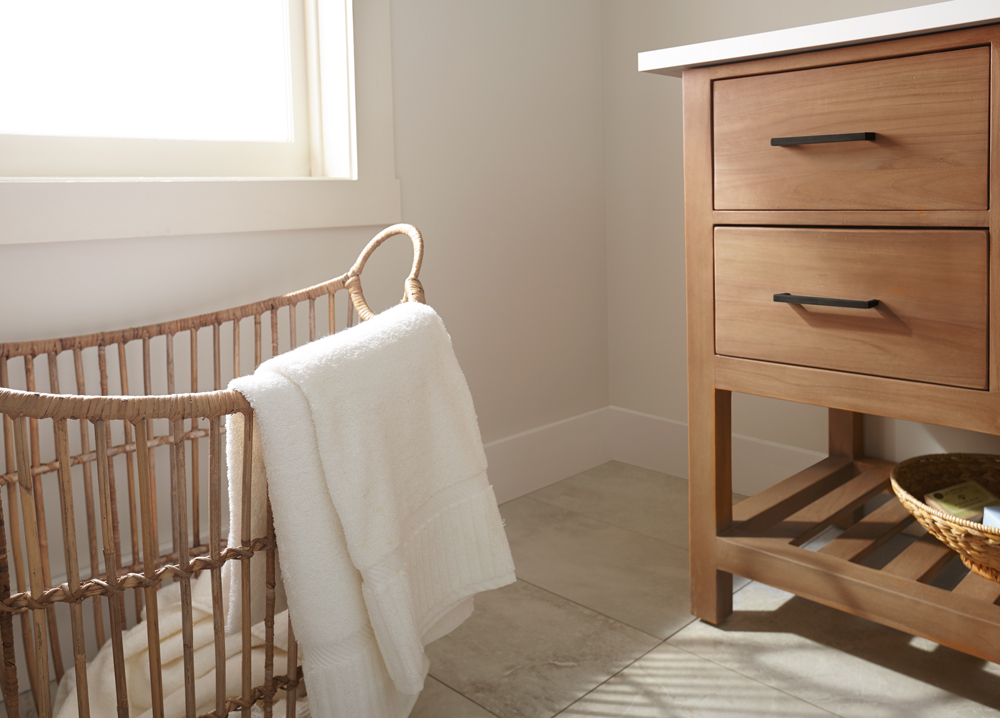
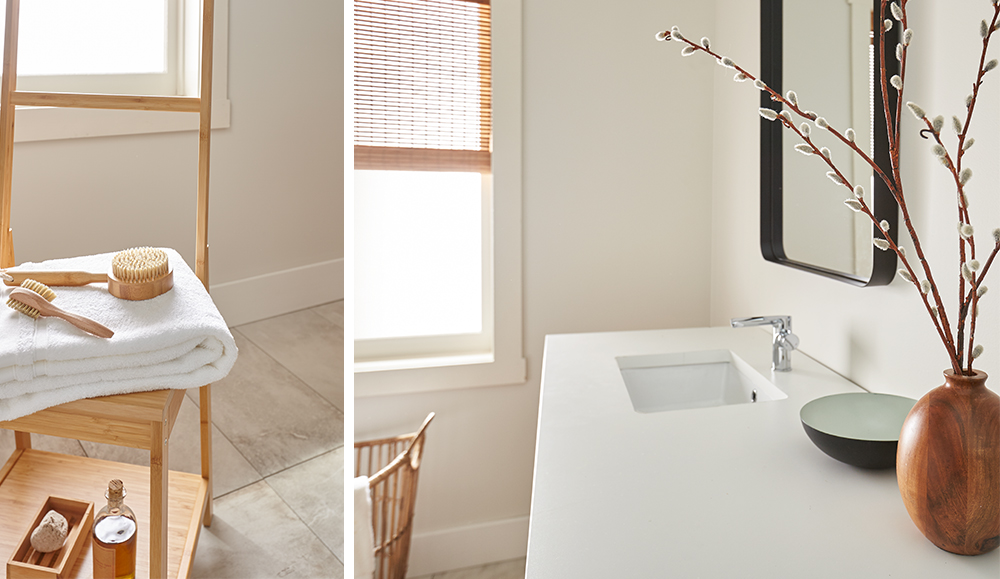
To add to the authenticity, we brought in a natural wood towel stand (complete with spa brushes) and a large seagrass laundry basket. For a touch of Danish Modern, we included a set of handsome mirrors with thin black frames and added a few modern cabinet accessories in black and gold. To complete our spa transformation, we fitted the window with a vintage-style wooden blind that filters the light beautifully and keeps it from overwhelming the room on sunny days.
As you can see from the photos, the airy, creamy white colors, combined with natural wood furnishings and matching accessories, perfectly create the look of a high-end spa, while evoking feelings of calm and relaxation. Decorative touches such as the wooden blinds and towel rack give the room a sauna-like feel, while the retro curved tub and heavy farmhouse-style cabinetry create the ambience of a luxurious bathroom in an expensive resort.
Most importantly, we managed to achieve our design scheme while also paying close attention to important essentials. In particular, we chose a high quality primer that has an EPA registered active ingredient that creates a mold and mildew-resistant film that protects the primer film from mold and mildew growth.
By starting with primer and a coat of paint, you can transform a dreary room into an interior design masterpiece. Just identify the design scheme you want to follow — vintage, retro, contemporary or eclectic — and choose the right colors to reflect the mood you are hoping to create. After that, just add a few pieces of furniture and accessories within your budget — and voila! A DIY room transformation, in sparkling colors that will raise your spirits every time you enter the room.
Always remember to refer to our website kilz.com or product back labels for additional information on which primer is right for your project and detailed instructions on how to apply our products.
Fun & Functional Home Gym Makeover
March 23, 2021The way we live has changed in the last year and we are doing more at home than ever before. Instead of time spent at yoga studios and gyms, many are streaming workout classes online and rolling out their yoga mats on the living room floor. Not everyone has an extra room waiting to be transformed into a boutique fitness studio, but if you do have an unused guest room, why not convert it into a custom home gym? That’s what we decided to do with this unused bedroom, and the results are stunning. The secret to our success was our quick and easy wall transformation — executed with a layer of primer followed by a vibrant coat of paint in an energizing color. It’s yet another example of how primer and interior paint can make a big impact and transform just about any space.
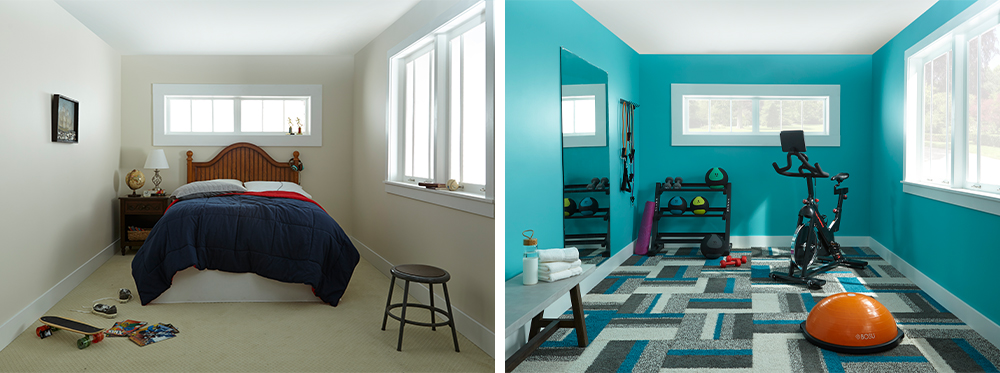
Here’s a look at exactly how we revamped this dull-looking bedroom into a sparkling home gym, using only primer, a coat of paint, a fun square of carpet and a few essential pieces of equipment. First, we tackled the walls, starting off with a coat of KILZ 2® All-Purpose Primer, which was especially ideal for our project because it created a perfect base layer to ensure the new topcoat color would be vibrant and vivid. This all-purpose primer is known for its durability, so you can trust that your paint job will last longer.
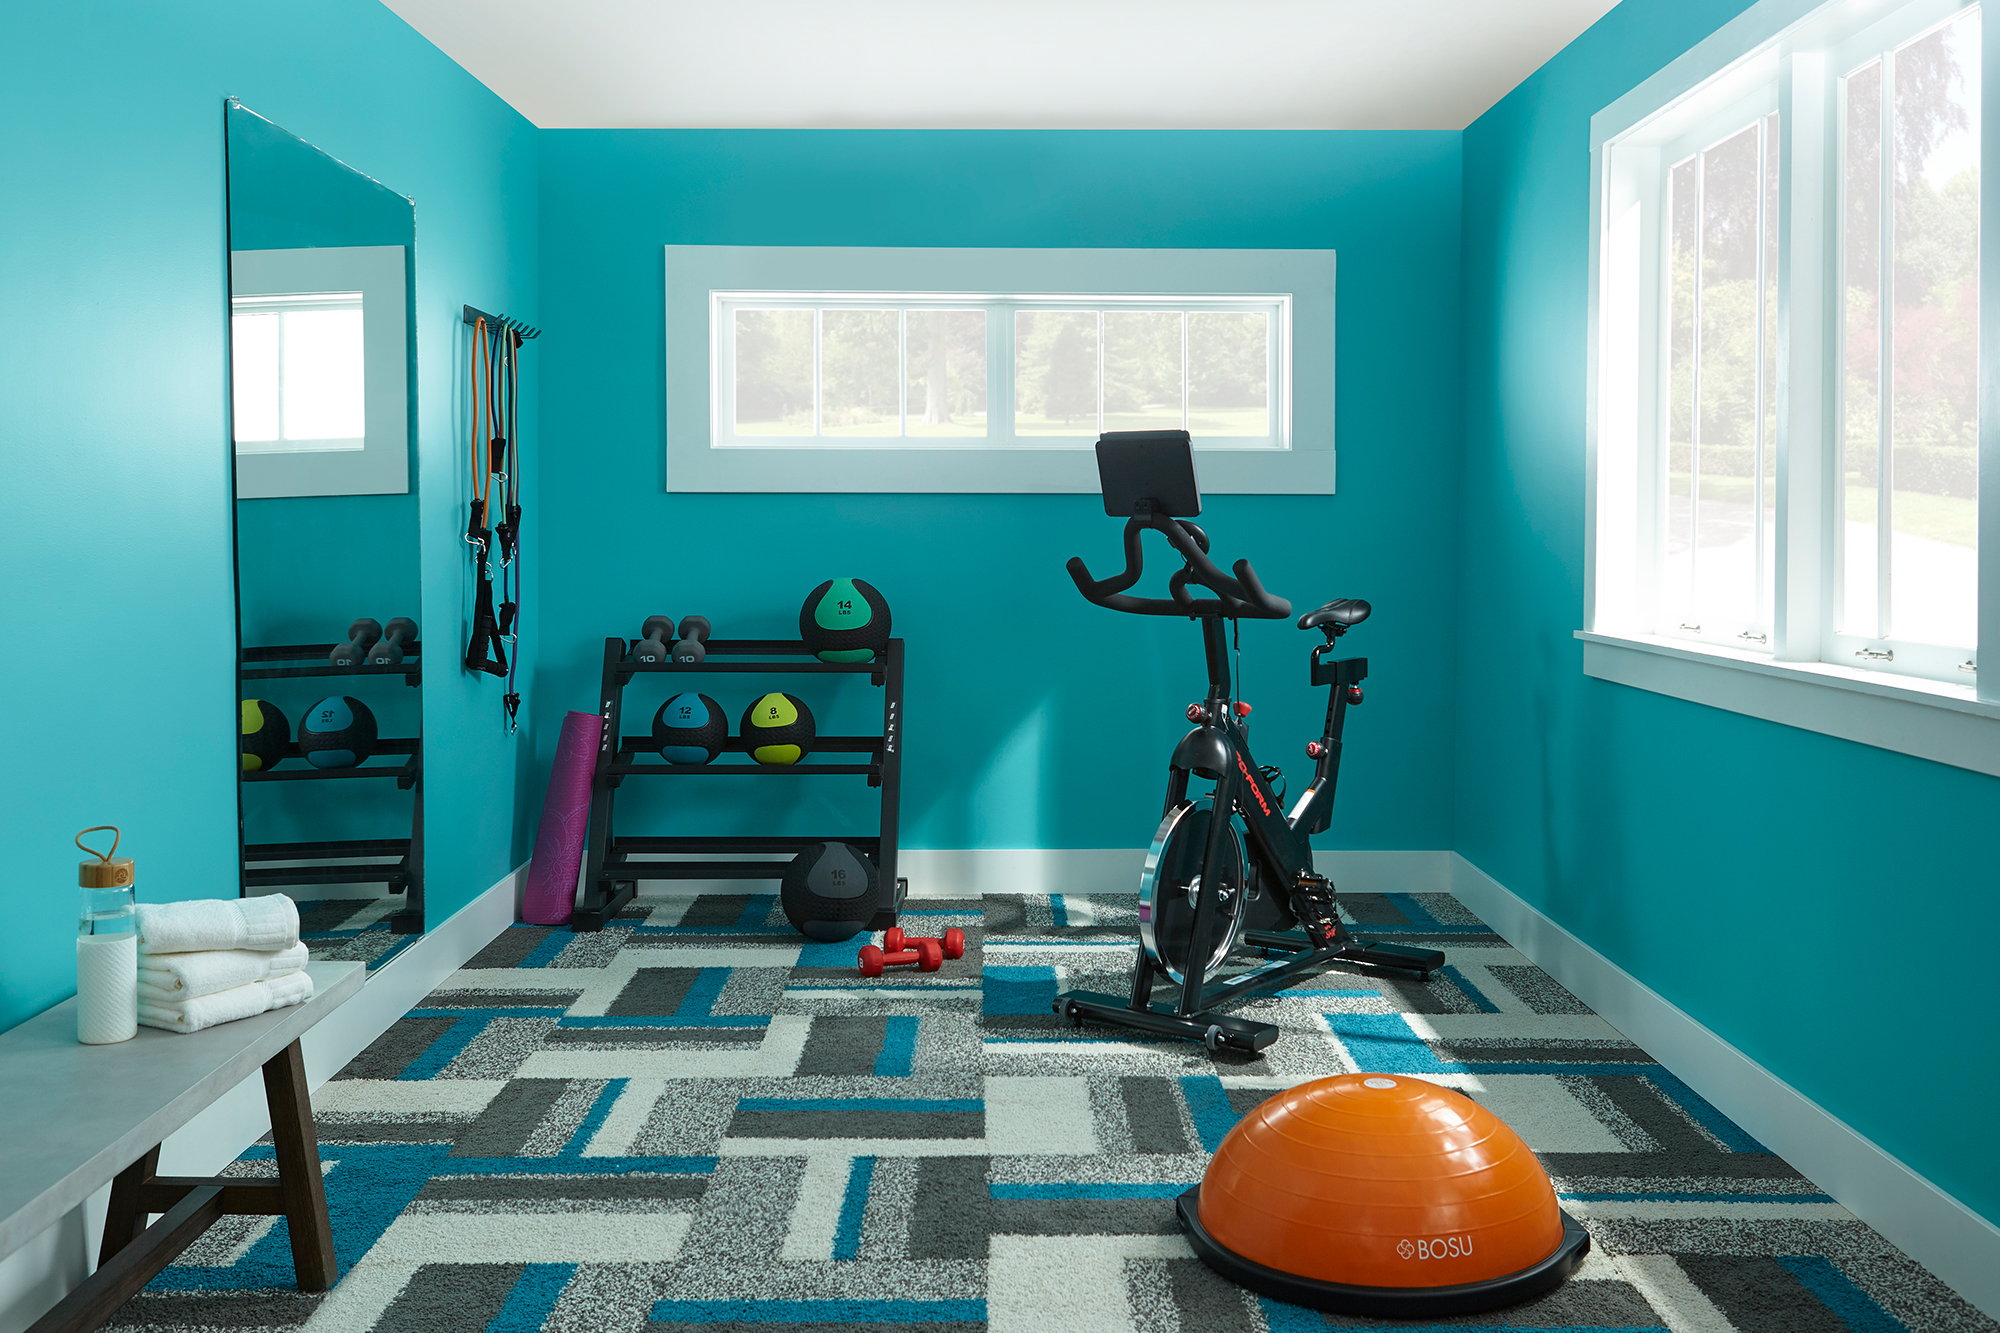
Next came the fun part — choosing a color. We opted for something invigorating, encouraging you to go for that extra 20 minutes on the bike or treadmill. A bold and bright aqua, KILZ® Tribute® Paint in Tropical Escape (TB-56) is so vivid, it almost has a neon vibe. It was the perfect shade to wake up our gym space. As we layered it over our KILZ® Primer, we noticed immediately that the color seemed to pop from the walls, giving an amazing vibe of energy and vitality.
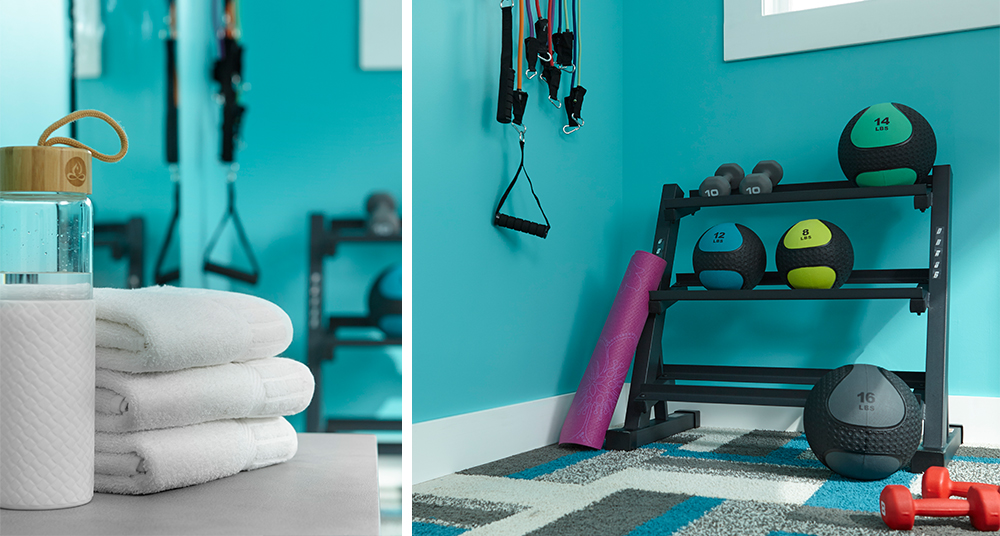
With a color like this, we knew that the flooring had to be something special. This bold geometric pattern caught our eye, and best of all, the colors matched our beautiful paint to perfection, proving that no matter how exotic your paint choices, there’s always going to be a bit of gorgeous flooring out there to match. We think that the combination of patterns and colors really adds a lot of character to the room — something you don’t always think of when creating a gym, but why not make your exercise space as attractive and appealing as the rest of your home? (Hint: The nicer it is, the more time you’ll want to spend there, which might even mean that you’ll exercise more). Another advantage to this carpet is its durability. For a home gym — or any type of space that gets a lot of physical impacts or foot traffic — it’s best to choose a durable, short-pile carpet that’s specially treated to resist stains, odors and moisture.
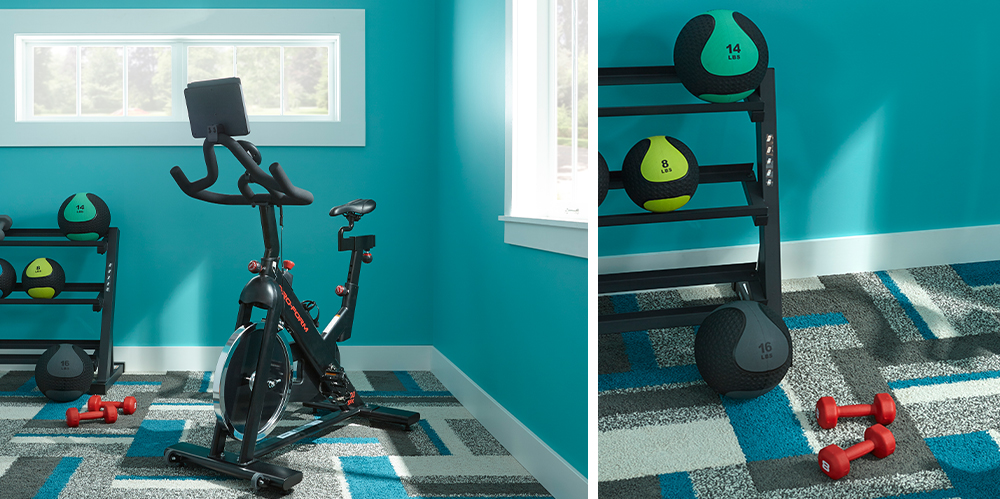
When renovating a room, you’ll want to first look for its advantages and figure out how to make the most of them. We recognized immediately that this room’s biggest assets were its two rectangular windows, so we made them into focal points by refreshing them with a coat of durable primer, followed by a coat of white paint. A good primer will give you that extra added adhesion you need for superior coverage when you’re painting — always a plus when you’re working with light colors because superior coverage will prevent the old colors from seeping through.
Nothing opens up a narrow space better than a full-length mirror (always a great accessory for any home gym), and we found one that added the perfect amount of depth to the room.
As for equipment, we kept it simple with just an exercise bike, along with a balance trainer ball and a few hand weights. The beauty of a bedroom-sized gym is there’s enough space for several pieces of equipment, so you’ll have enough space to add more items later on. We streamlined things even more by adding space-saving floor and wall racks (for equipment, helmets, and shoes) and a versatile gym bench for extra seating as well as storage.
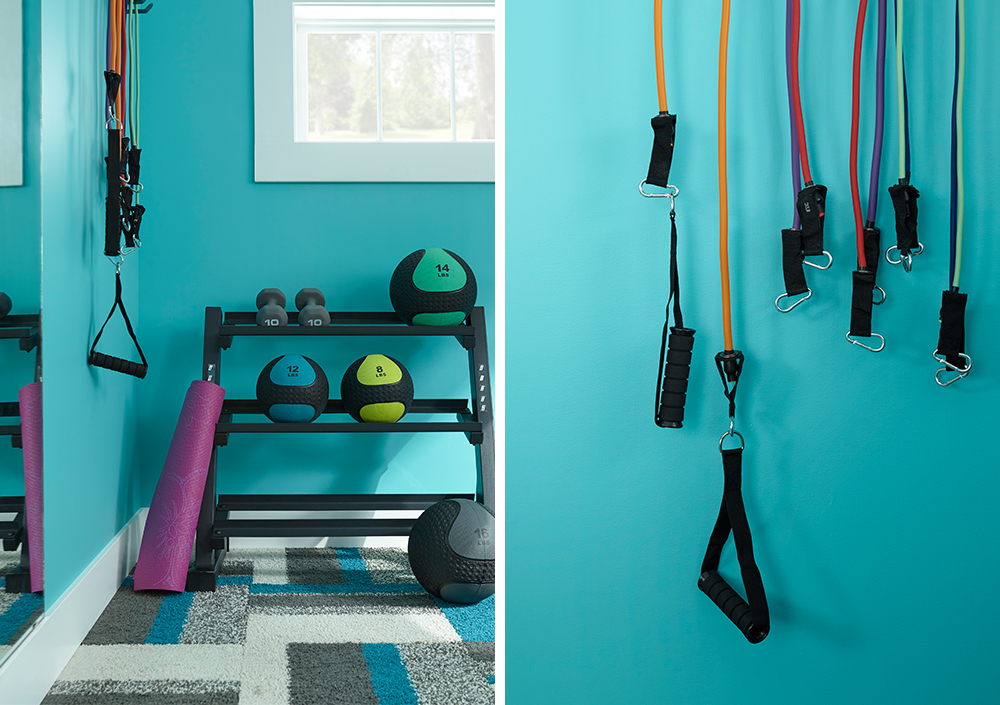
Once we were finished, we decided hands-down that the paint color made all the difference and was the real winner here, proving once again a layer of primer and coat of paint can transform a room from a dull dud into a sizzling firecracker.
Always remember to refer to our website kilz.com or product back labels for additional information on which primer is right for your project and detailed instructions on how to apply our products.
Creative Ways to Carve Out Functional Spaces
March 23, 2021The home office is becoming as standard as the laundry room. With more people working from home than ever before, often alongside children who are distance learning, people have been forced to get creative with their living/working/study spaces. Rather than trading in your dining table for a desk, try one of these ideas that empower multifunctional spaces and add some design flair to your home at the same time.
Here’s how you can fit everything in your life comfortably into your home.
Carving Out Office Nooks
The “corner office” has taken on new meaning. If you feel like your office is quite literally crammed into the first corner made available in your home, it’s time to take a look around and see if you can give yourself an upgrade.
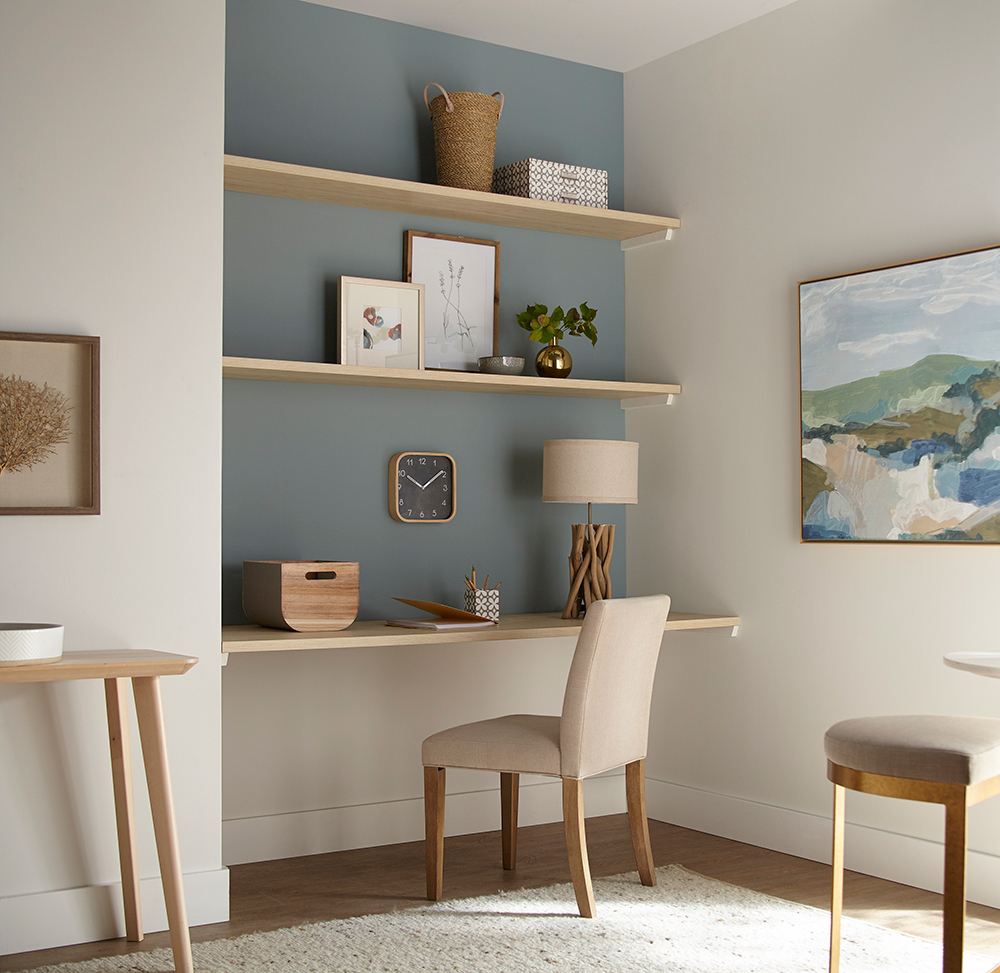
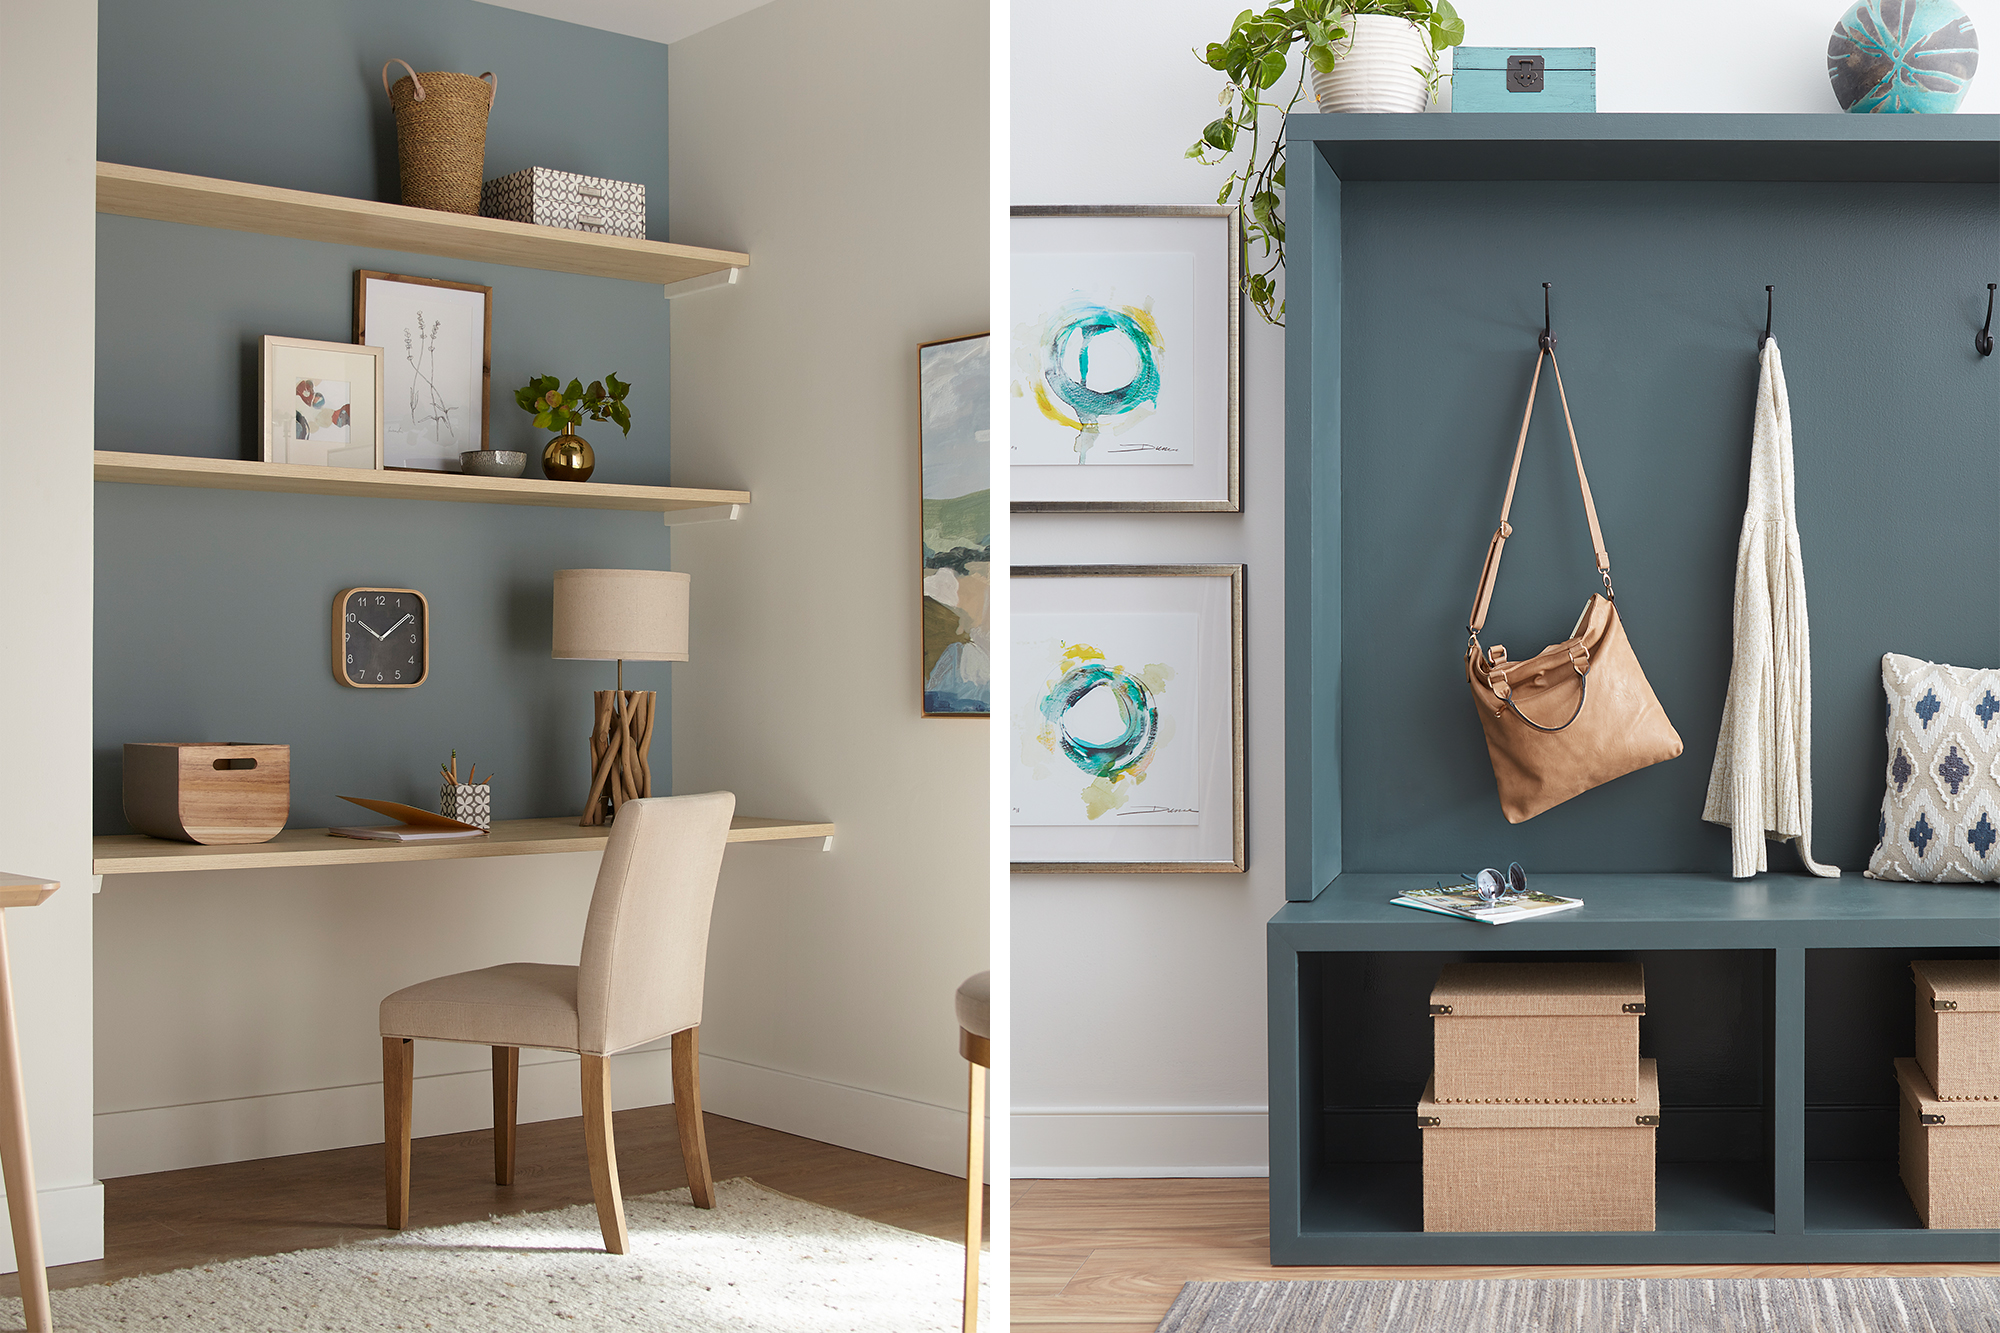
For some households, having a workspace in the main living area isn’t a big deal — especially if you have a laptop that you can easily fold away to make room for other things when work is over. However, if you need more room to spread, out or you just work better at an actual desk, there are creative ways to fit it in and make it look great. Take this small-space office nook for example – with KILZ 2® All-Purpose Primer, a fresh coat of paint and built-in shelves, we converted a neglected nook into a pretty WFH space. See the full transformation here.
Building in Organization
Building organization into your house is essential for reducing all clutter that inevitably comes with spending more time at home. When things have a place at the end of each day, they’ll be out of your way. You might decide to relocate things around the house as you find new storage spaces, whether it’s under-the-bed, behind the couch, on top of the kitchen cabinets, or in the hall closet. The key to avoiding the look and feel of clutter is to have some rhyme and reason behind what you put where.
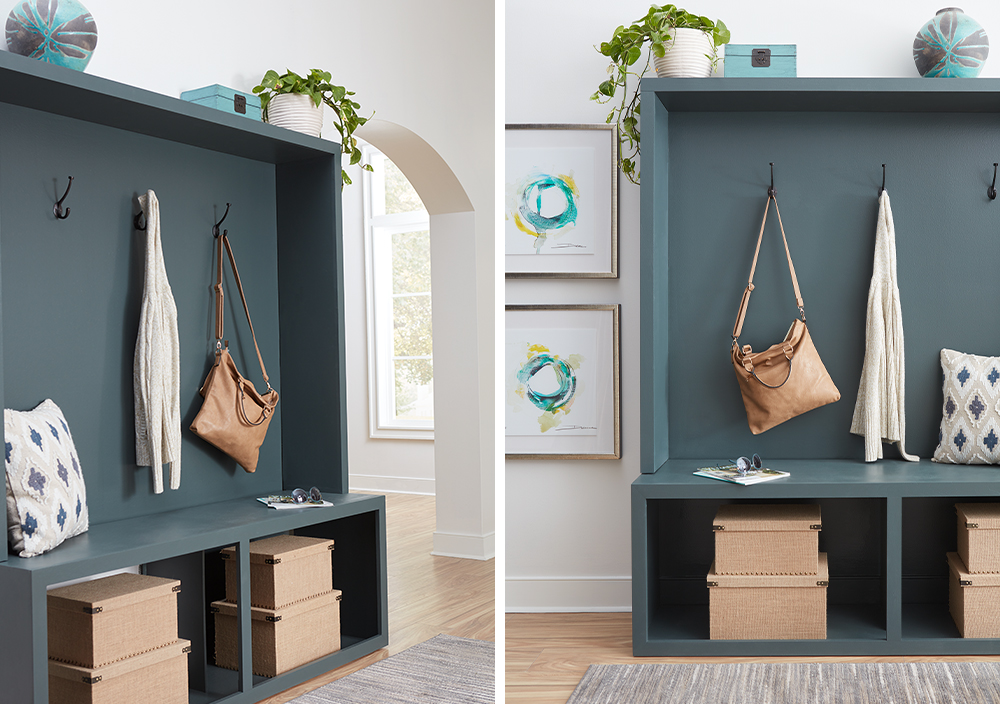
Adding some storage to your entryway or mudroom is a practical (and pretty!) way to keep the mess at bay. For this entryway storage center, KILZ Primer was the essential first step in transforming a boring wood bench into a statement piece. After priming the bare wood with KILZ 2® All-Purpose Primer, a fresh coat of pretty gray-green paint (KILZ Tribute® in Typewriter TB-70), completed the look.
Pretty baskets and bins, like the boxes in our entryway project, keep things aesthetically pleasing. Consider going the extra mile with labels to help everything find its way back to its rightful place.
Visually Divide Multipurpose Spaces
If you’ve found yourself using words like “multifunctional” more than you ever thought you would, you’re not alone. Putting up walls and partitions may be infeasible and is less than preferable. So, when it comes to squeezing more living (and working) out of the living space you already have, there’s a trick: divide them visually instead of physically.
One of the best tricks to keep things pleasing to the eye and mentally in their place is to visually divide your spaces with the use of intentionally placed paint colors. These can be in the form of a full accent wall or a smaller arch or geometric design. The visual definition from a pop of color helps you define a space a within a space.
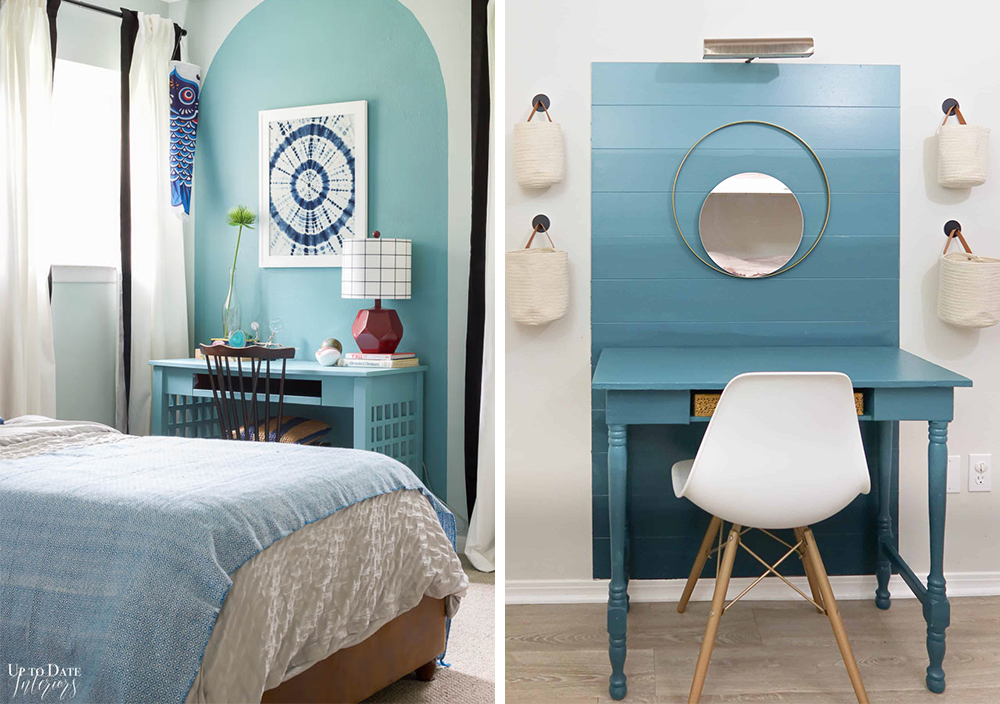
We’ve partnered with a few design savvy influencers in recent months who used primer and a coat of paint used to define their workspaces, and they are sure to inspire. Kathryn, from the blog Up to Date Interiors, used KILZ 2® All-Purpose Primer and KILZ® Paint to create a soothing blue arch behind her desk. Another fun and functional workspace came from Lindsey at Repurpose and UpCycle. Her ombre accent wall/desk combo came to life with the help of KILZ 3® Premium Primer and KILZ® Paint.
These visual dividers are pleasing to the eye and can even make your home feel larger when done right. Plus, it’s something you can do yourself. With primer and a coat of paint, KILZ can help you get more out of your home and make use of the space you already have.
Always remember to refer to our website kilz.com or product back labels for additional information on which primer is right for your project and detailed instructions on how to apply our products.
Mid-Century Modern Living Room Makeover
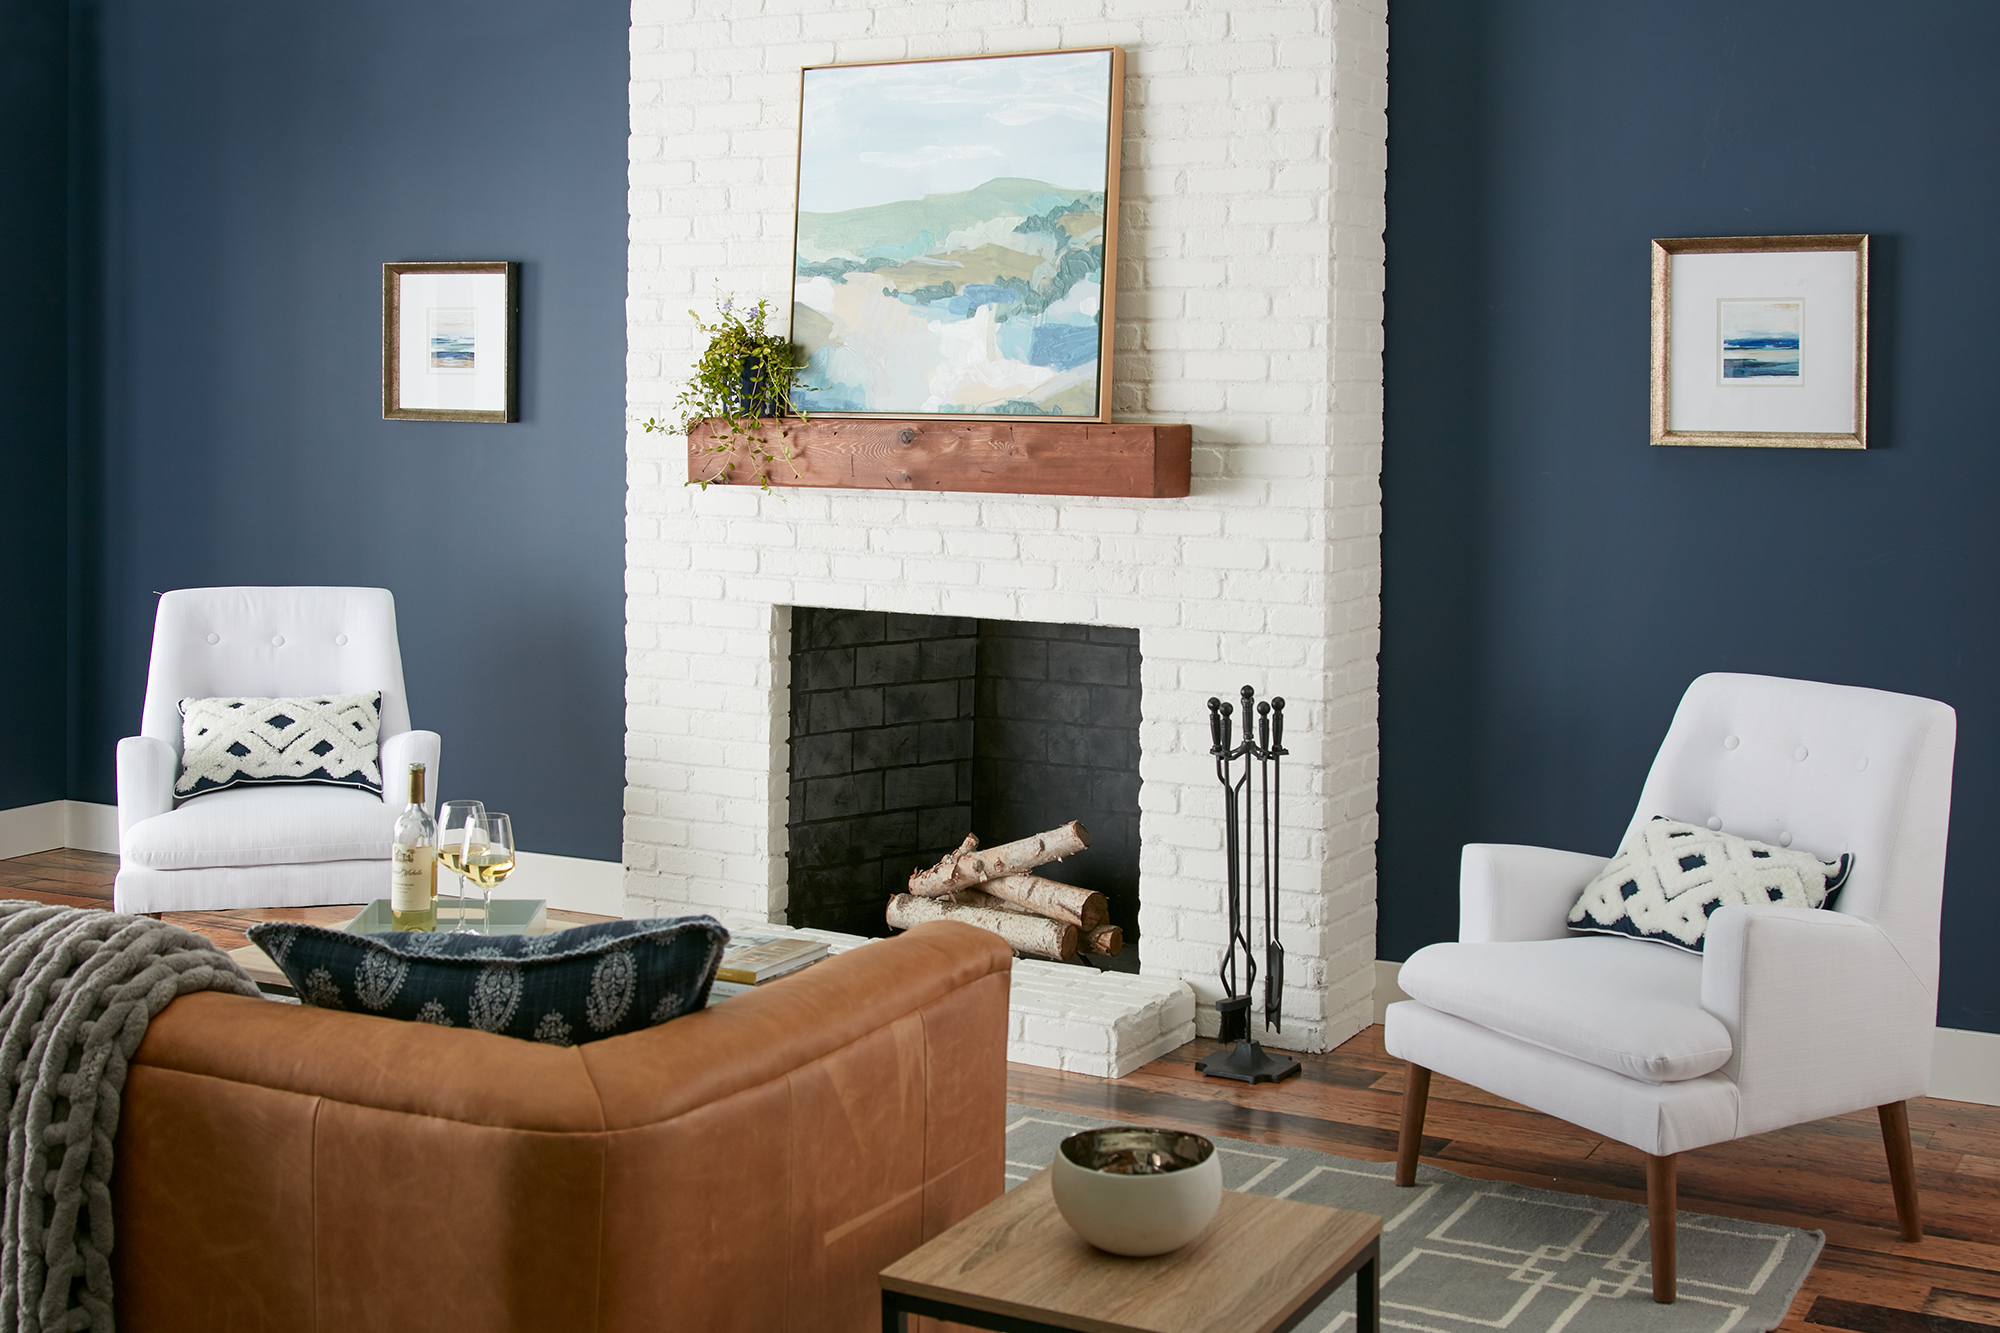
January 19, 2021A lackluster living room is warmed up with new modern design elements, including a spark of mid-century style and a freshly primed and painted fireplace that pops against on-trend navy walls. For this painting project that includes sealing porous brick and covering an old wall color, KILZ 2® All-Purpose primer is perfect for the job as it’s formulated for a variety of surface types.
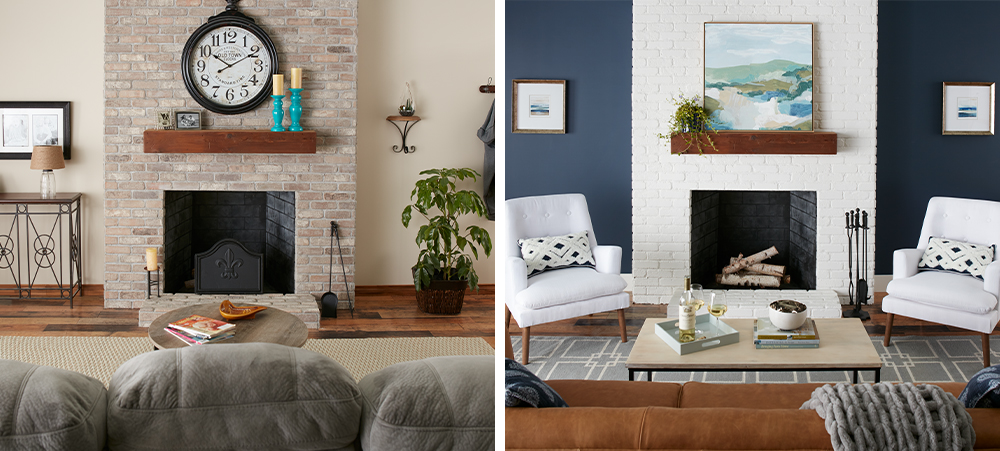
Brick is a naturally porous surface and will typically soak up a lot of paint if not properly sealed with the right primer, making proper prep essential when painting a fireplace. KILZ 2 All-Purpose is the right choice for the job, as the versatile multi-surface sealer is able to work overtime and coat both the fireplace and walls. Even when painting a darker color over a light color, it is essential to prime first to ensure that the new dark shade appears as the exact color you’re expecting.
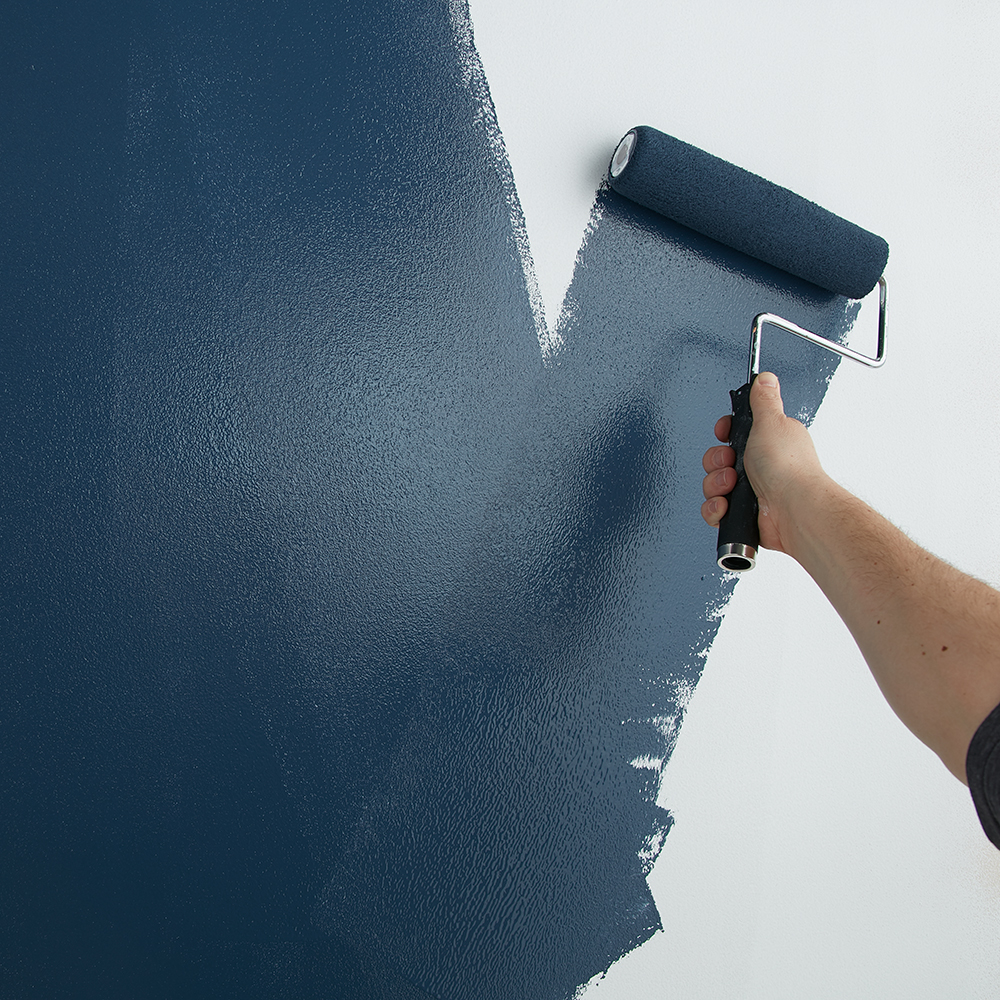
Once the fireplace and walls are properly primed and allowed to dry, it’s time for paint! KILZ Tribute® in Architectural White TB-08 transforms the fireplace into a creamy white focal point for the large living room, highlighted by walls painted in a stylish navy shade – Ruling Royalty TB-50.
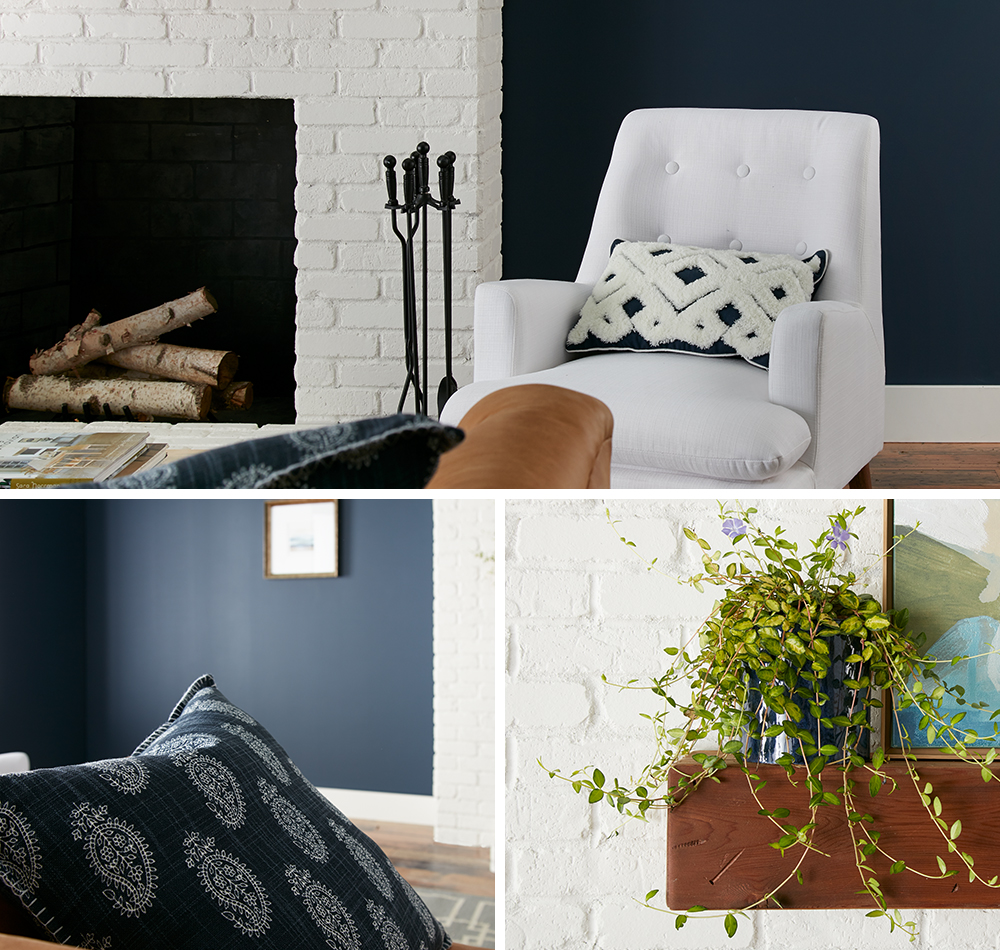
Primer and paint make a huge impact in this living room makeover and create the perfect setting for contemporary furniture and décor. A warm leather couch and two snowy-white armchairs flanking the freshly painted fireplace evoke a mid-century feel, while pops of navy in pillows and artwork are the perfect companion for the new navy walls.
Read on below for step-by-step instructions to prime and paint living room walls and a brick fireplace.
WALLS
Step 1:
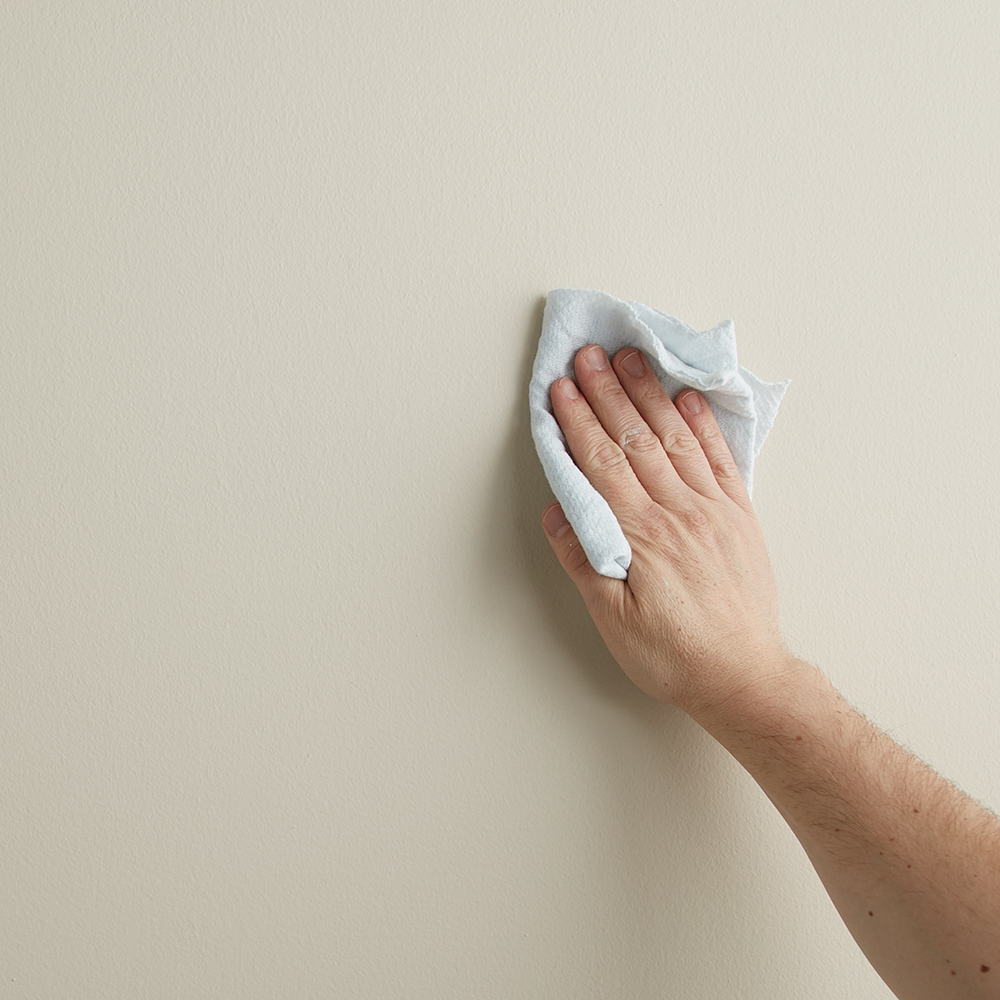
Wipe down walls with a damp cloth to ensure they are clean and free of dust. Allow to dry.
Step 2:
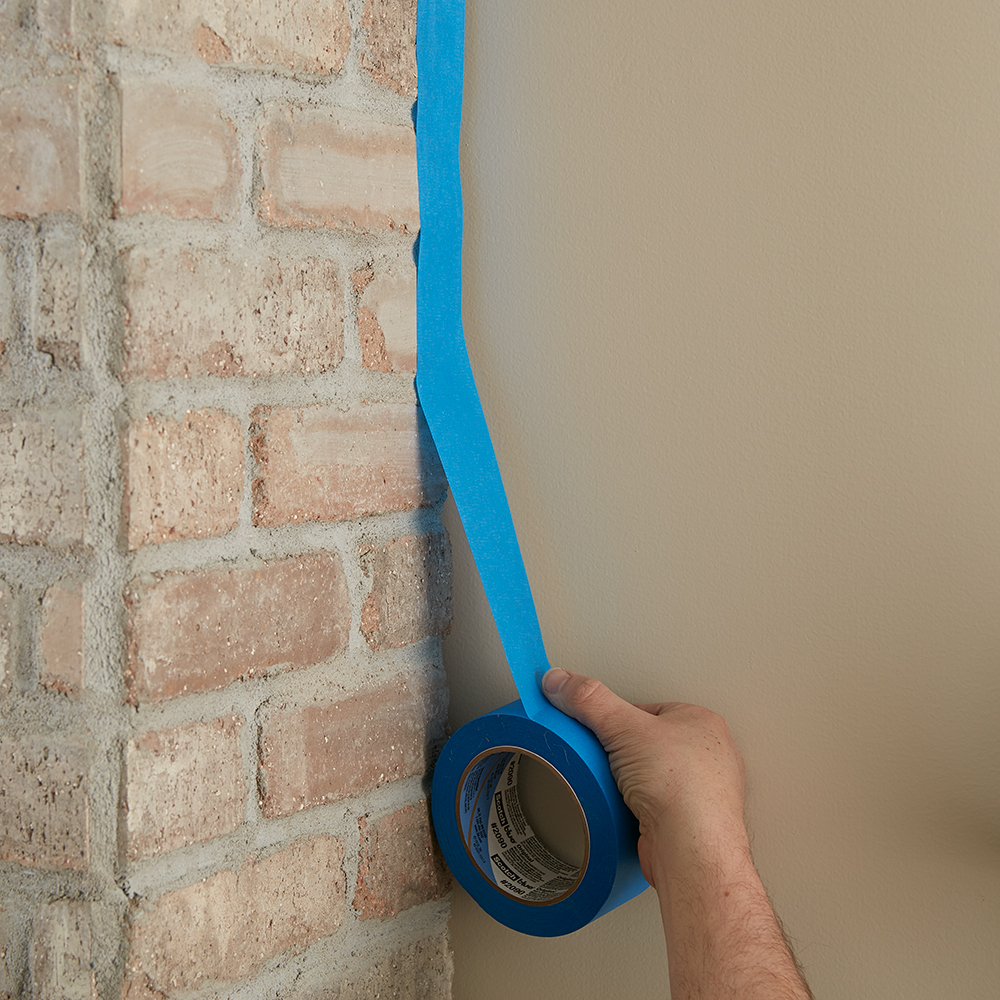
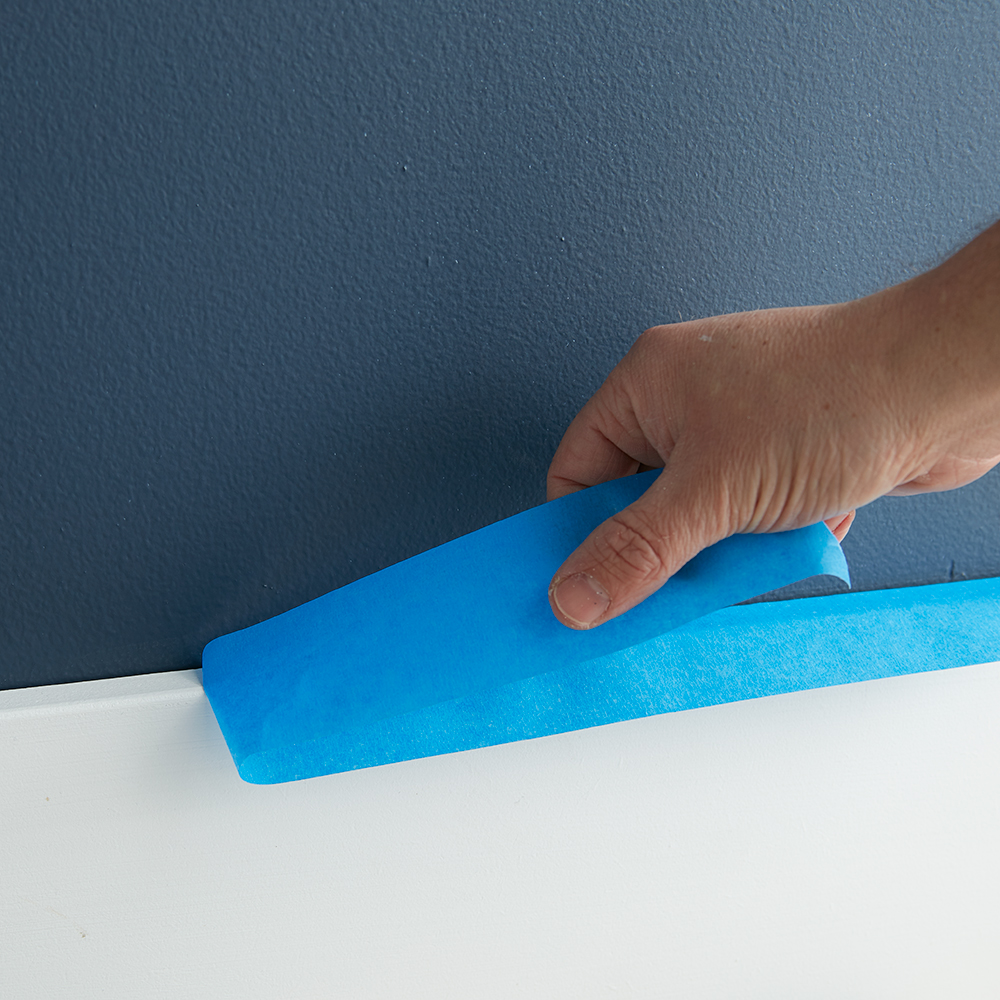
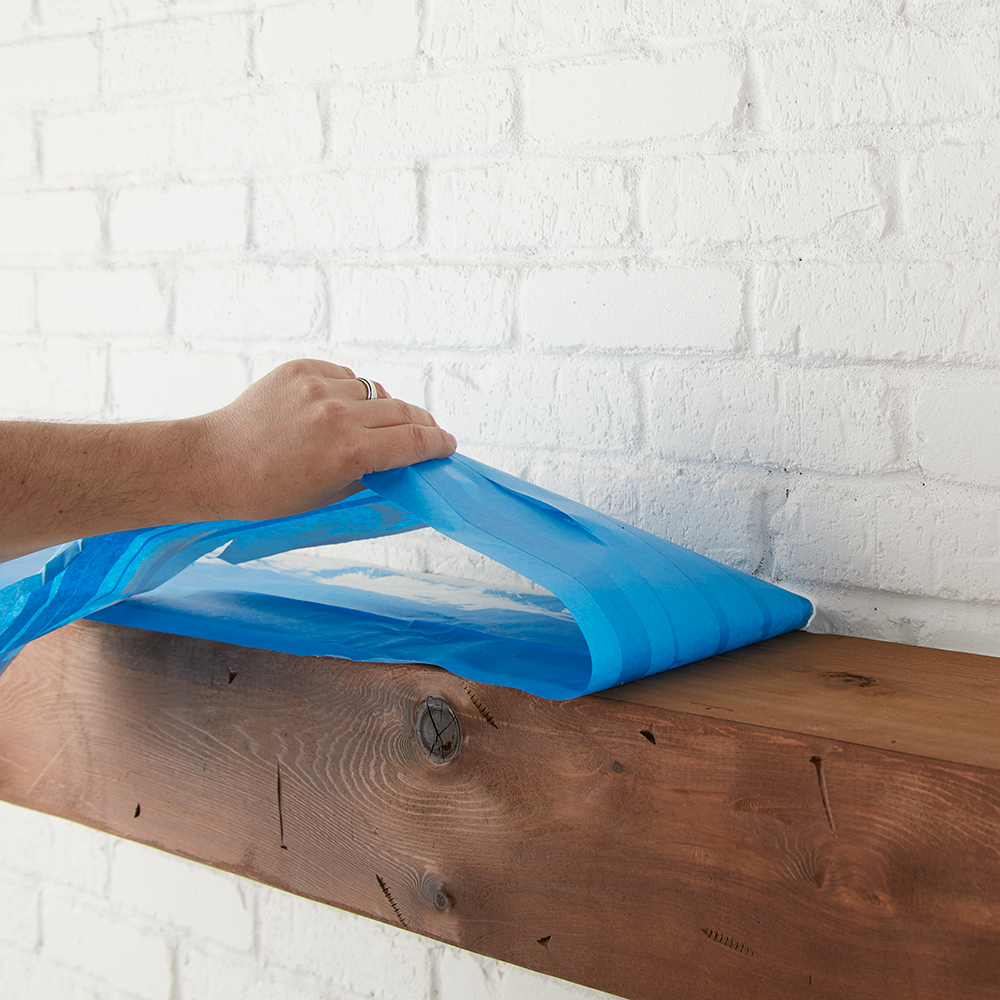
Tape around the fireplace, baseboards and moldings with painter’s tape to ensure you don’t get primer or paint where you don’t want it!
Step 3:
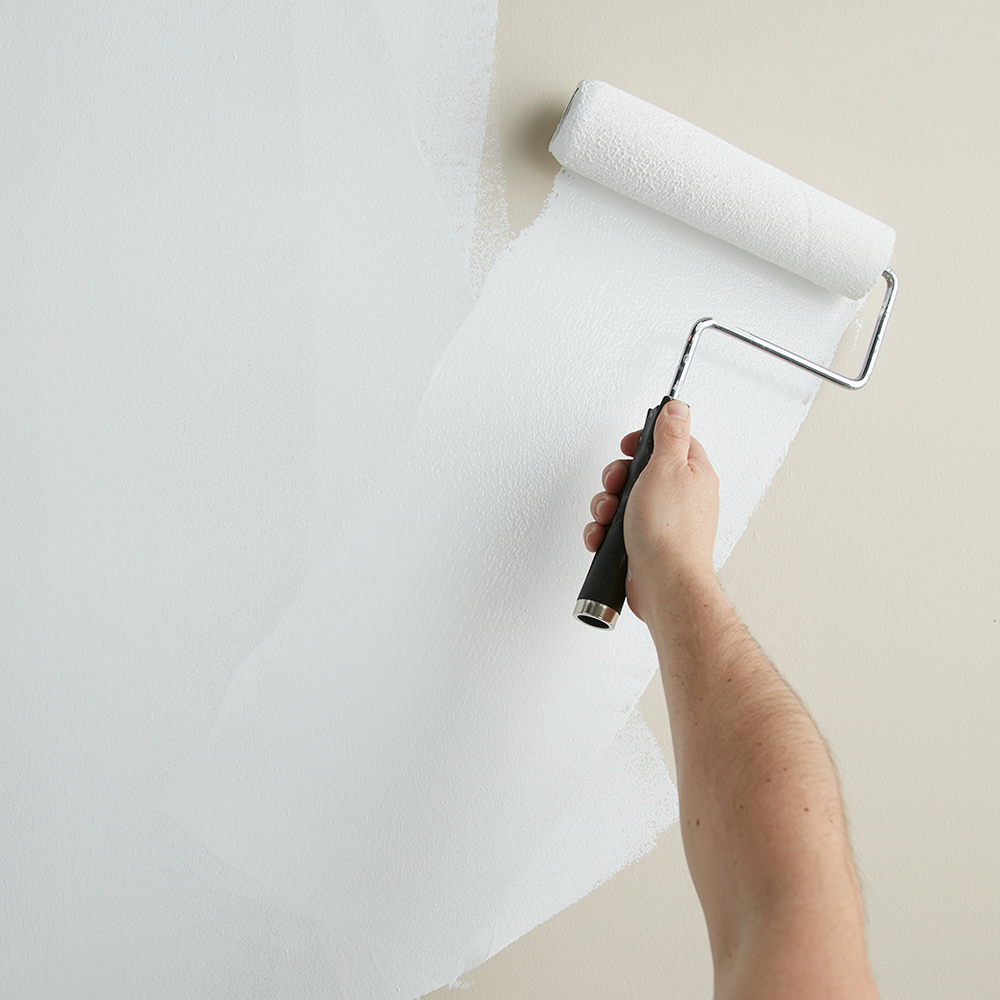
Next, apply 1 coat of KILZ 2® All-Purpose (stirring thoroughly before and occasionally during use) to the walls and allow to dry. Apply primer using a brush first to “cut in” around the edges, then use a roller to fill in.
Step 4:
Once primer is dry, apply KILZ Tribute® in Ruling Royalty using the same application method as the primer (using a brush first to cut in around the edges 4 to 6 feet at a time, then use a roller to fill in those sections before moving along).
Step 5:
Remove the tape before the paint is fully dry.
FIREPLACE
Step 1:
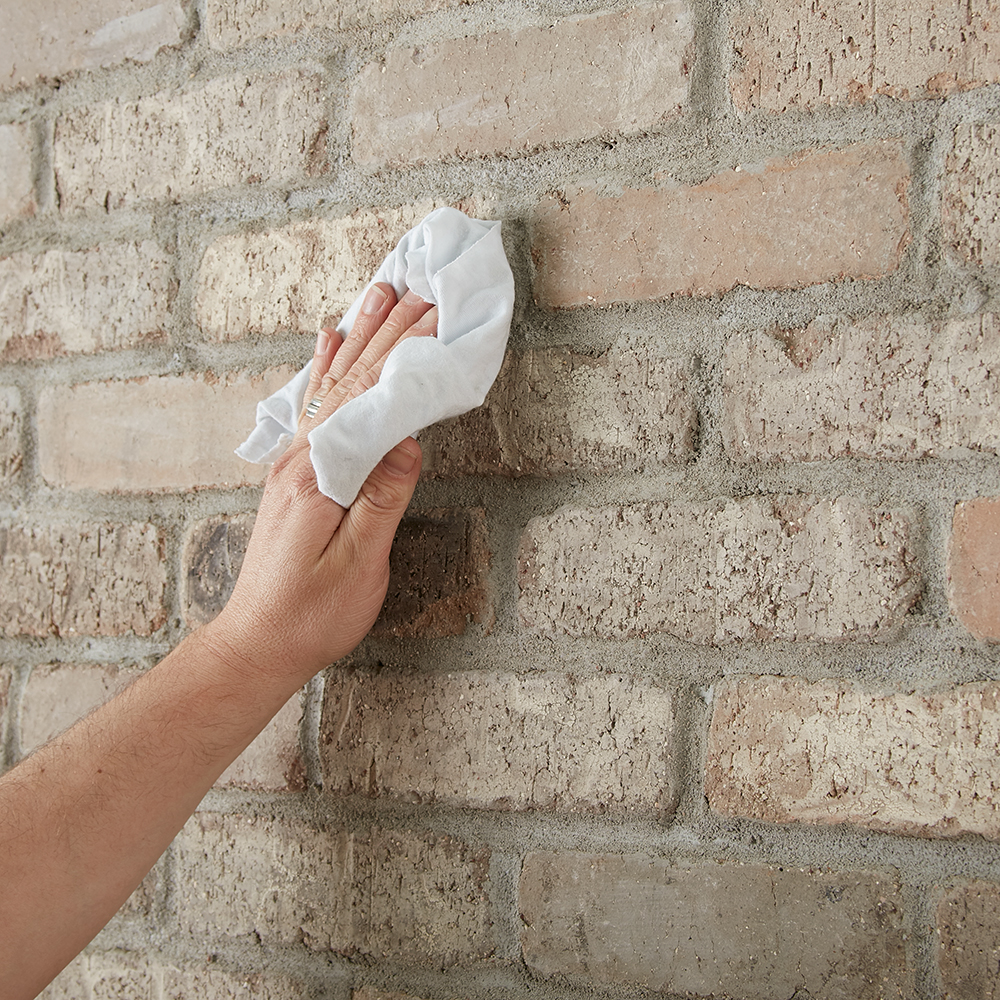
First, you’ll want to clean the old brick fireplace. If it’s extra dirty, start with a vacuum and use the crevice tool attachment to clean between the bricks. Next, wipe down the fireplace with a damp cloth to ensure all surfaces are clean and free of any lingering dust. Allow to dry.
Step 2:
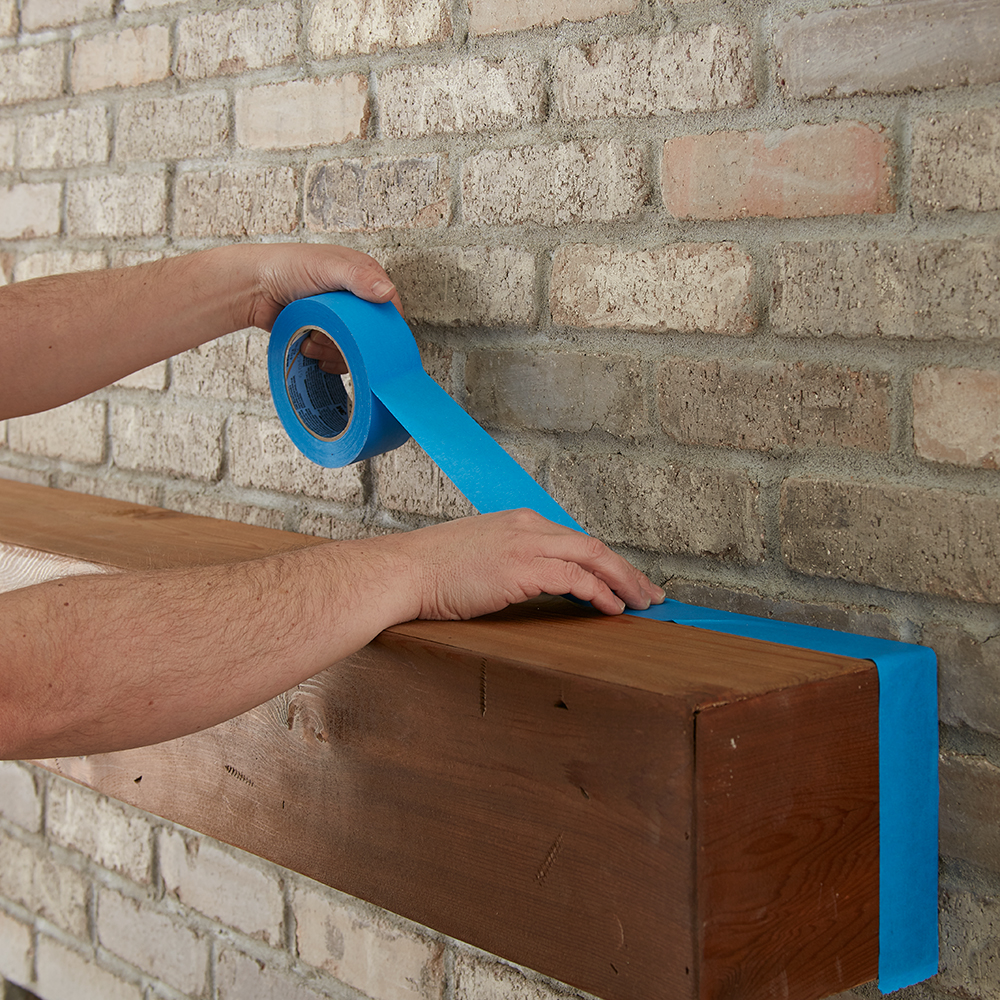
Tape around the fireplace to protect the walls and floor. Also tape around the mantel and where the brick meets the firebox (the inside where the wood goes!) to keep that area protected from paint and primer.
Step 3:
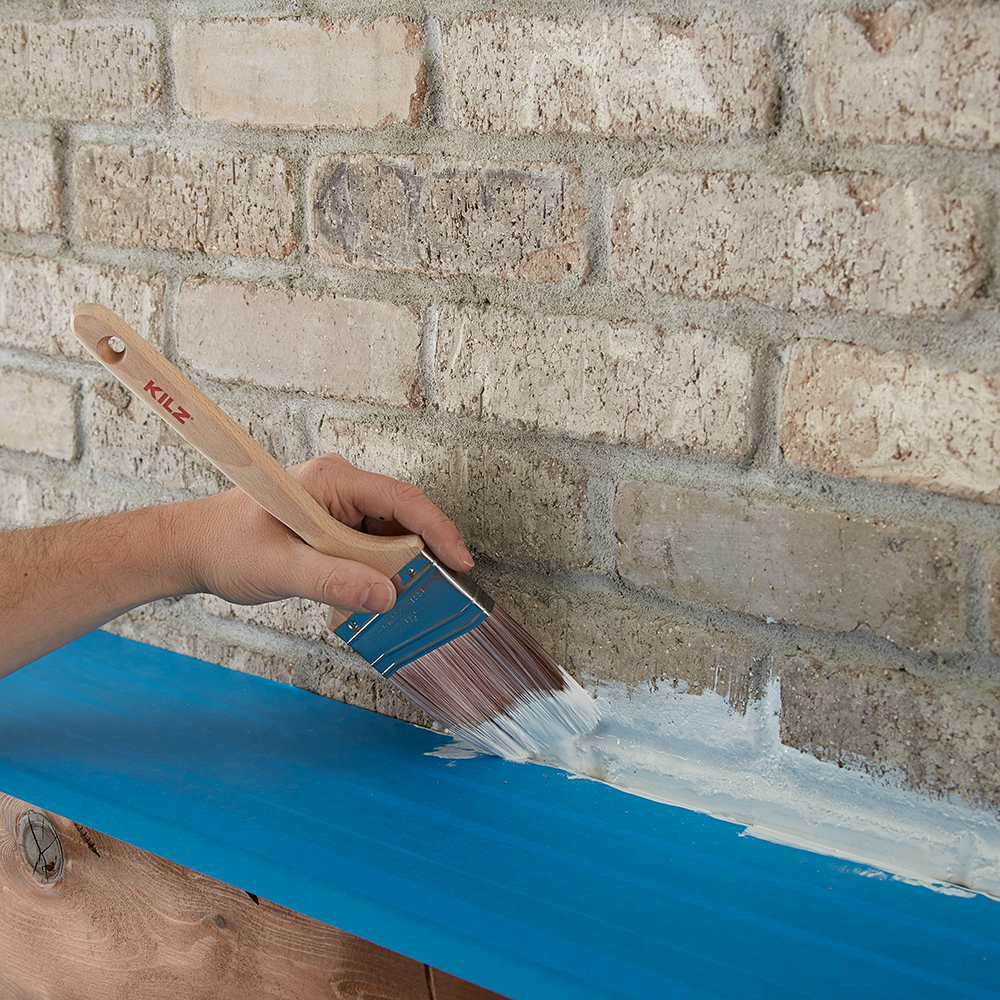
Now it’s time to prime! Using KILZ 2® All-Purpose primer, start with an angled brush to cut in around the mantle.
Step 4:
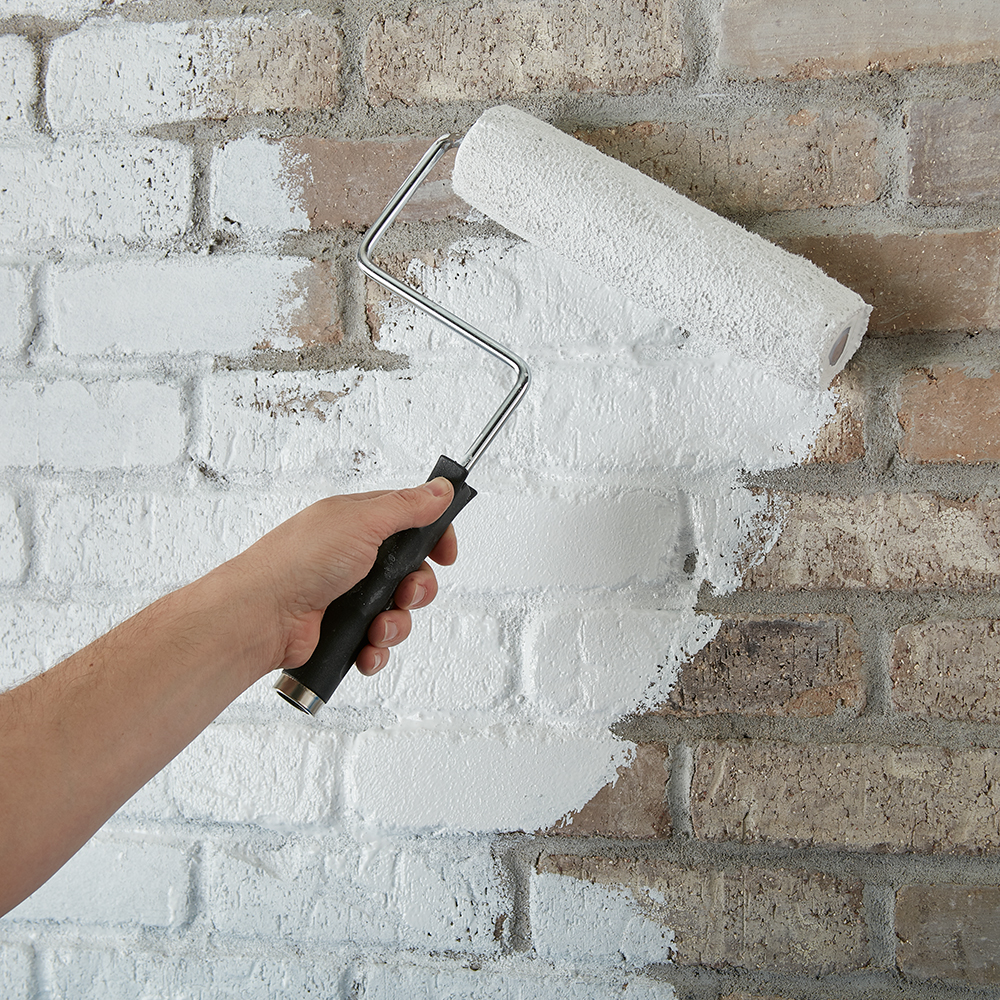
Next, use a roller to cover the brick faces with primer. If needed, go back with a small angled brush to fill in any remaining grout areas. Allow to dry.
Step 5:
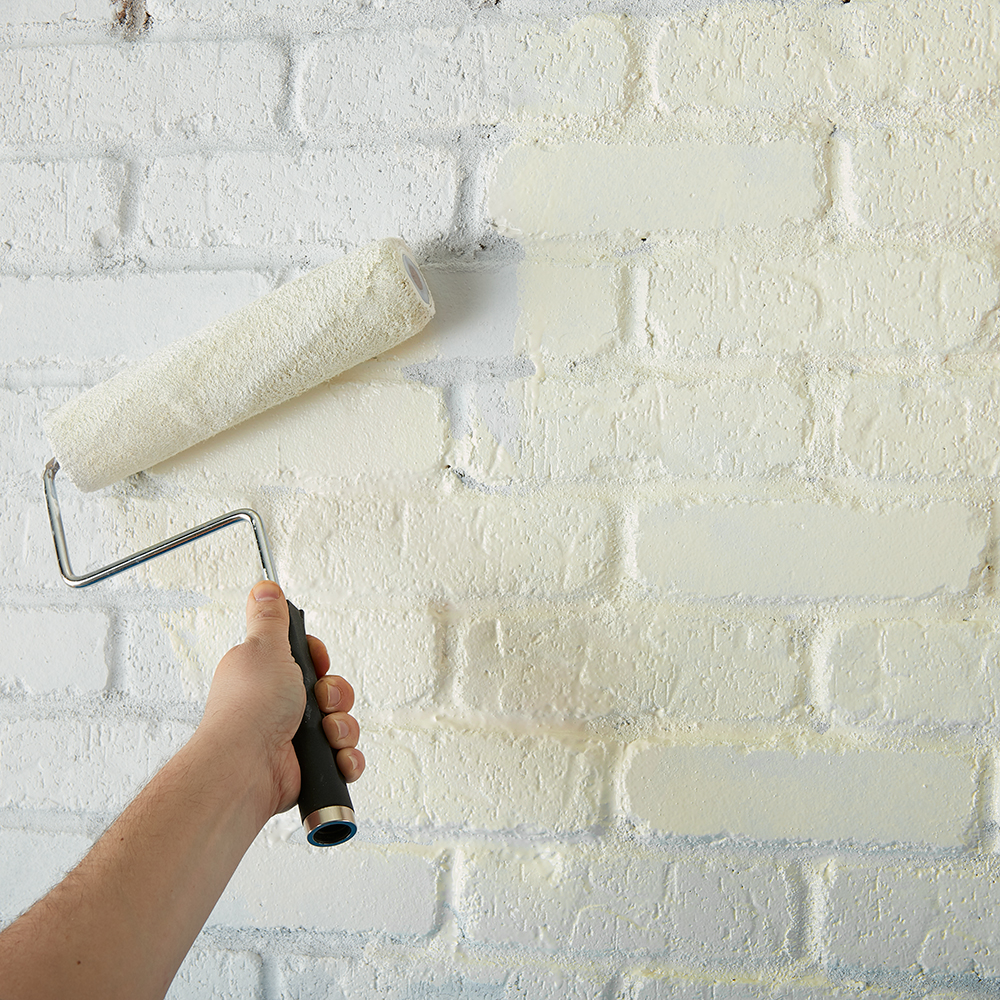
Once your primer is dry, apply KILZ Tribute® in Architectural White using the same application method as the primer (use a brush first to cut in and then use a roller).
Step 6:
Remove the painter’s tape before your paint is fully dry.
Always remember to refer to our website kilz.com or product back labels for additional information on which primer is right for your project and detailed instructions on how to apply our products.
Dining Room Debate: Light or Bright?
August 11, 2020Is your dream dining room serving up pops of bright color, fun fabrics and fixtures? Or perhaps neutral tones and coastal inspired textures are your preferred dining room design menu? That is the question of this post, as we look at dining rooms styles from light to bright. No matter your style, we’re pretty sure there is one you will love!
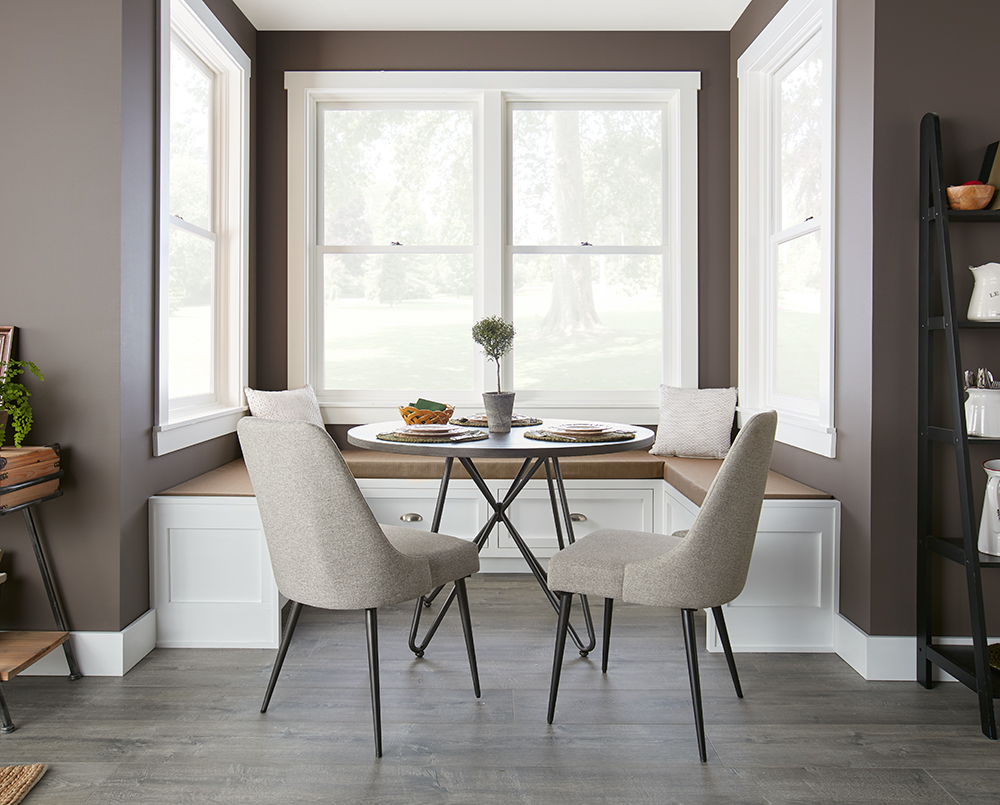
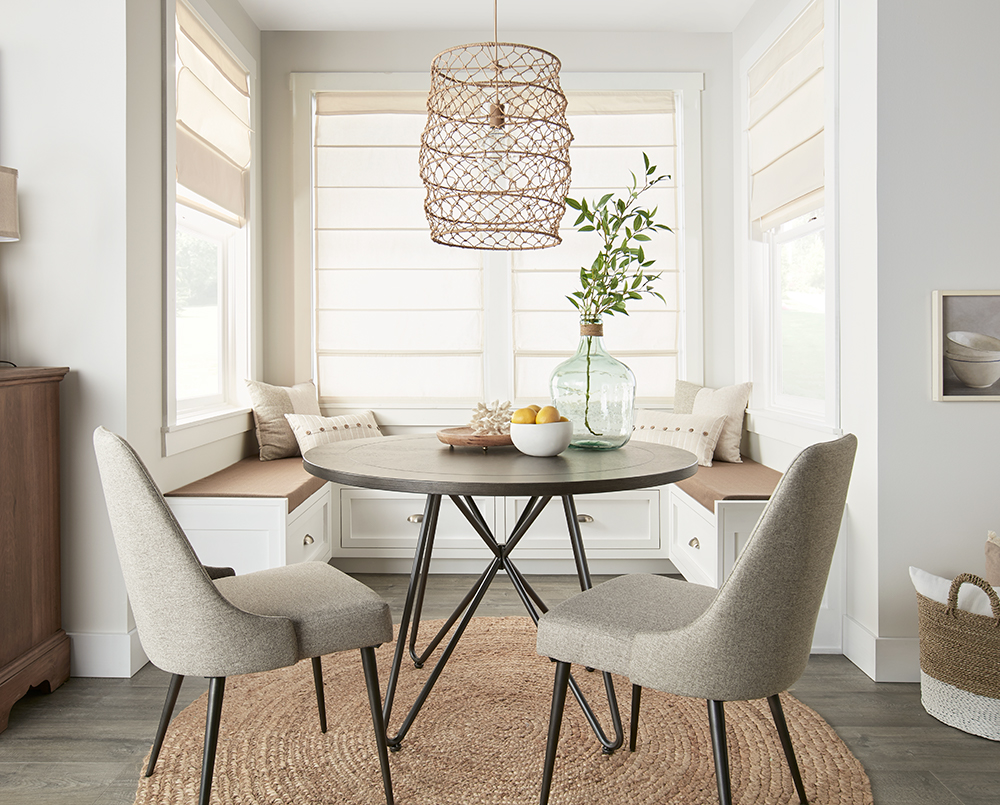
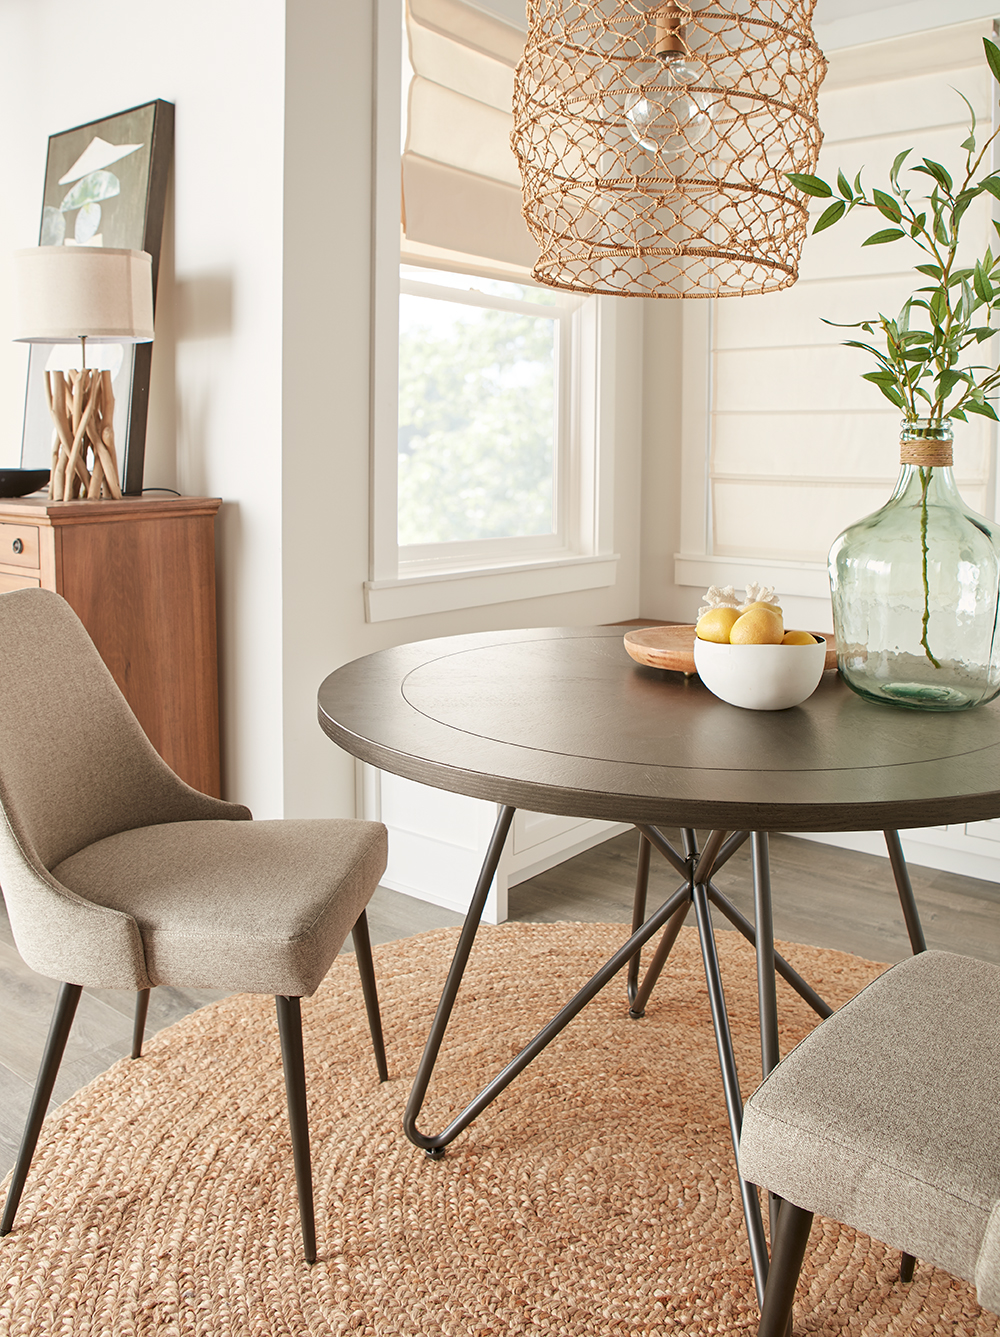
Our dining room debate arose as we started a project to refresh an adorable dining nook. We knew we wanted to take the walls from the current dirty brown shade to an airy white hue, so first it was time to prime. To cover the light brown paint color, we chose KILZ 2® All-Purpose primer. This water-based primer offers excellent adhesion and easily covers light to medium colors. After properly priming the walls (and allowing them to dry!), we top coated with KILZ Tribute® Paint in Architectural White. This sugar white shade has a cotton underdone and appears as a soft white in most light. For full step-by-step directions on covering both light and dark paint colors head over to our post Pro Tips for Painting Over a Dark or Light Wall.
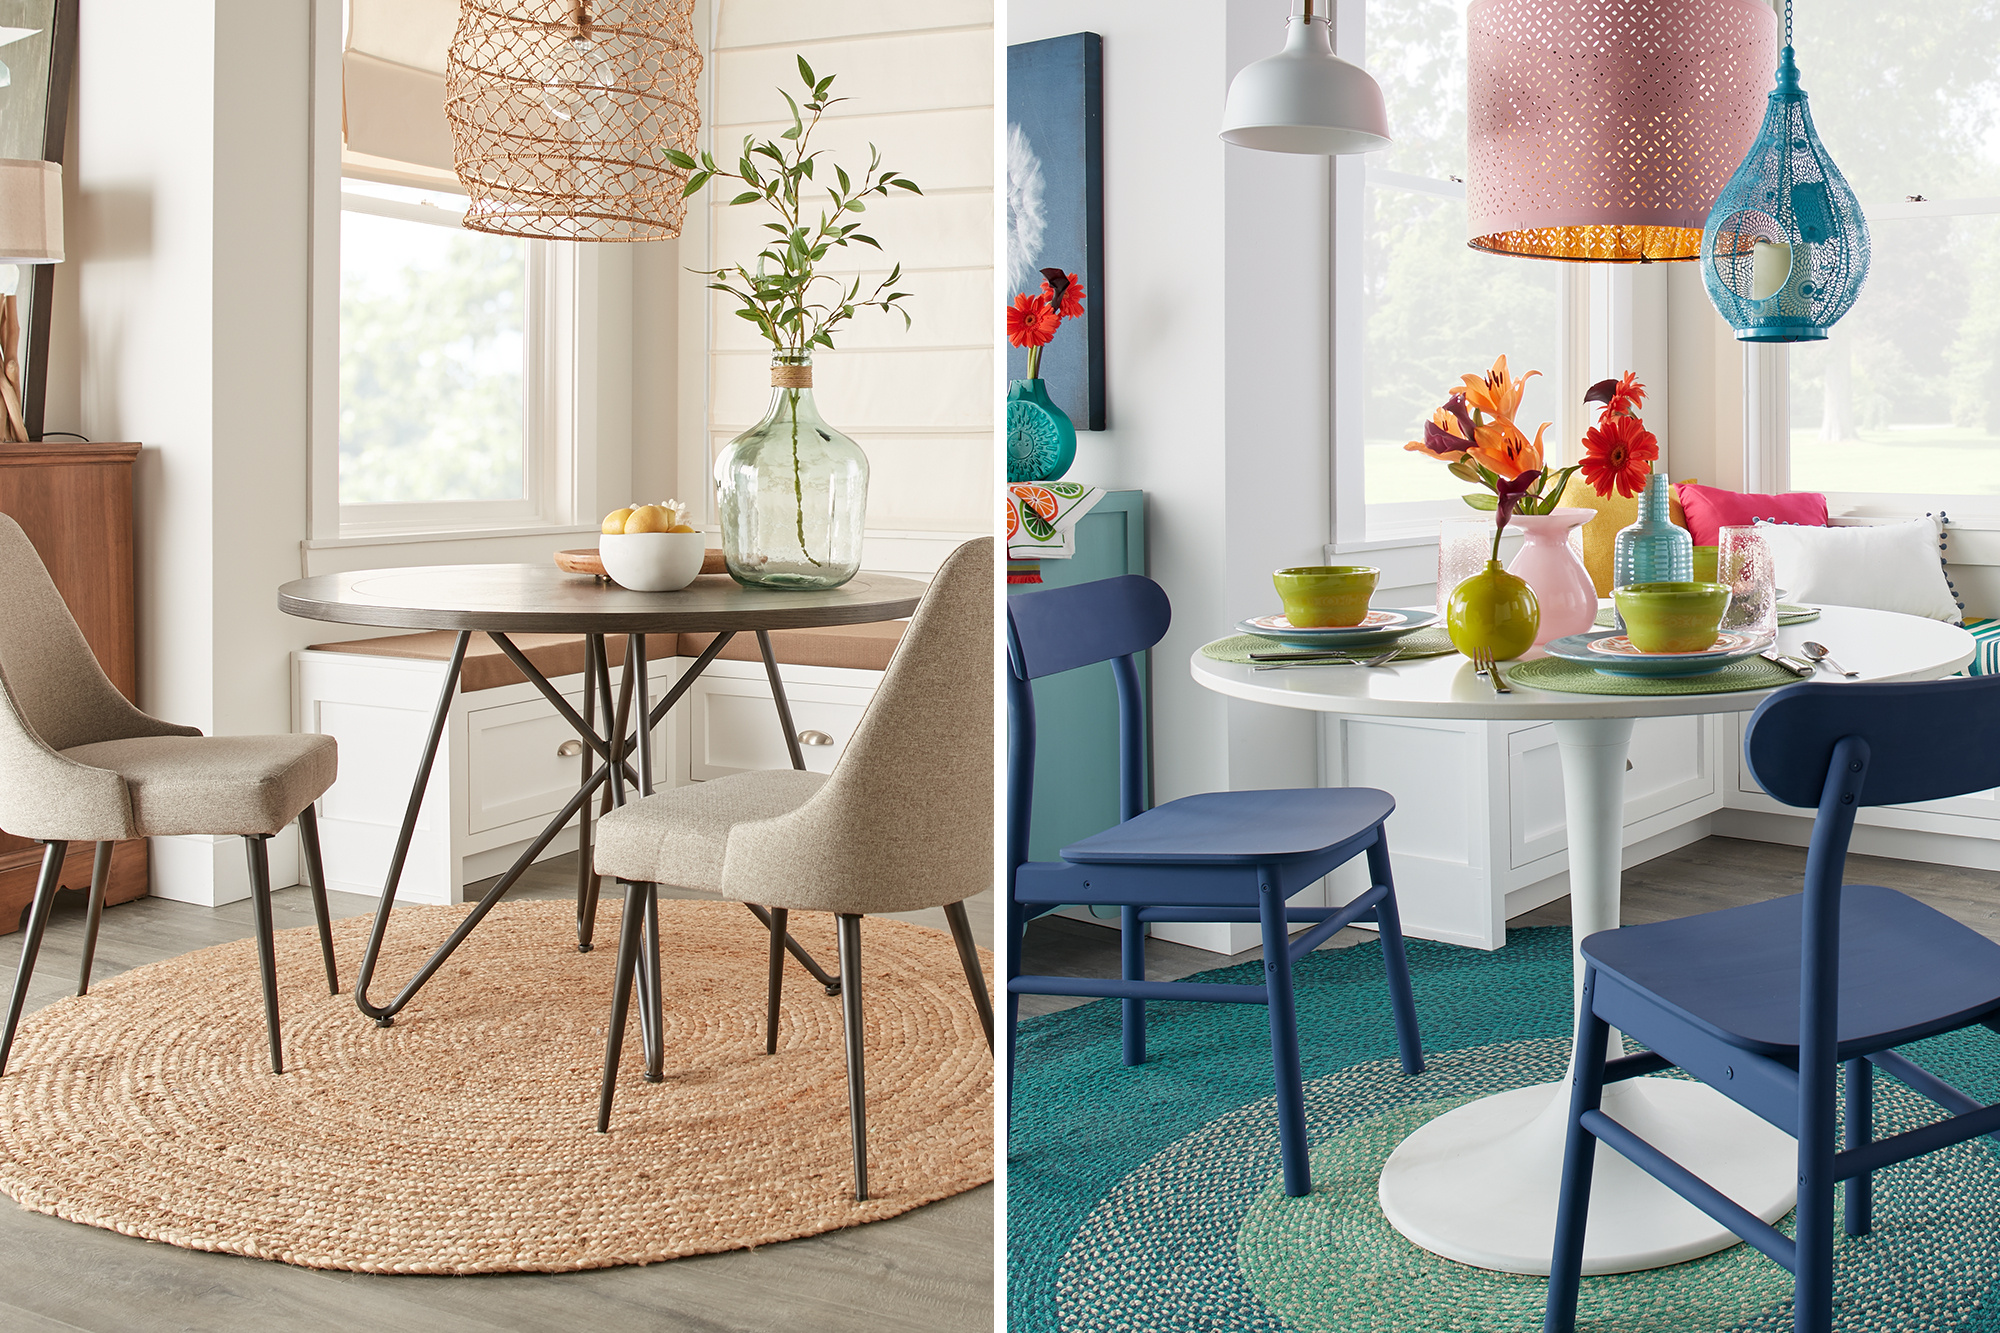
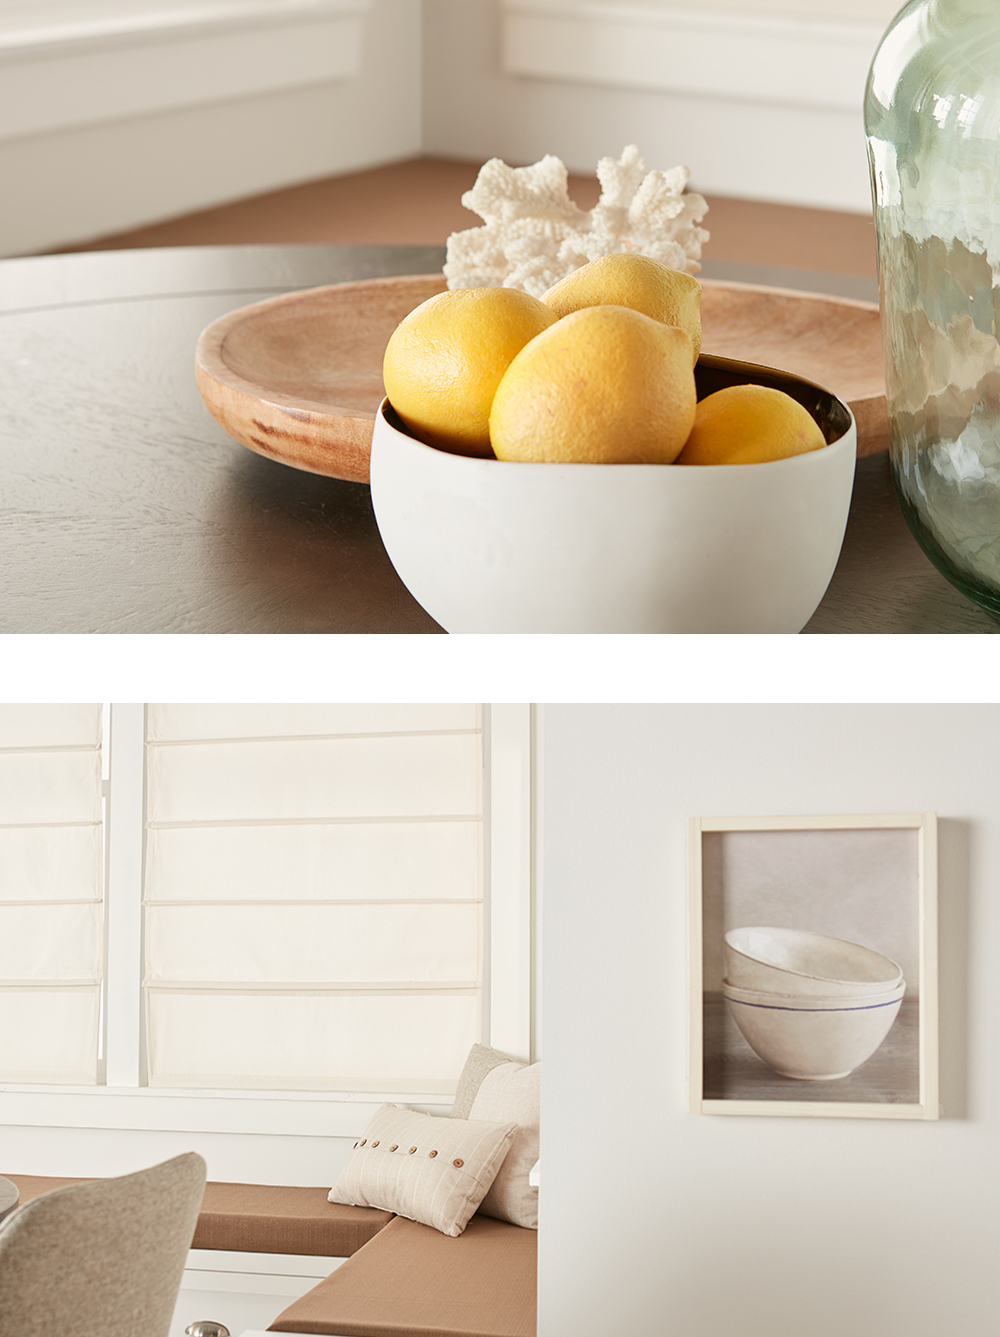
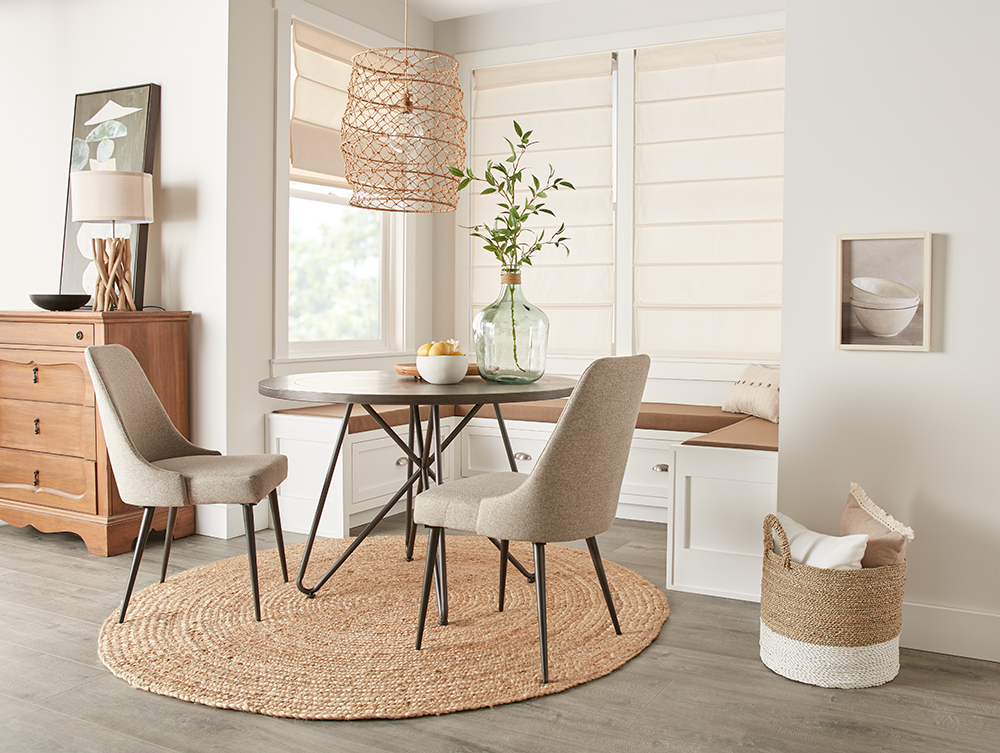
The fresh white walls created a perfect blank canvas that could easily be the backdrop for a variety of color palettes. Inspired by the existing table and chairs, we started with a California Casual design style and played with neutral tones and textures. A new jute rug under the table anchored the space, while a fun basket-weave chandelier, sea-glass colored vase and ocean-inspired accessories completed the look.
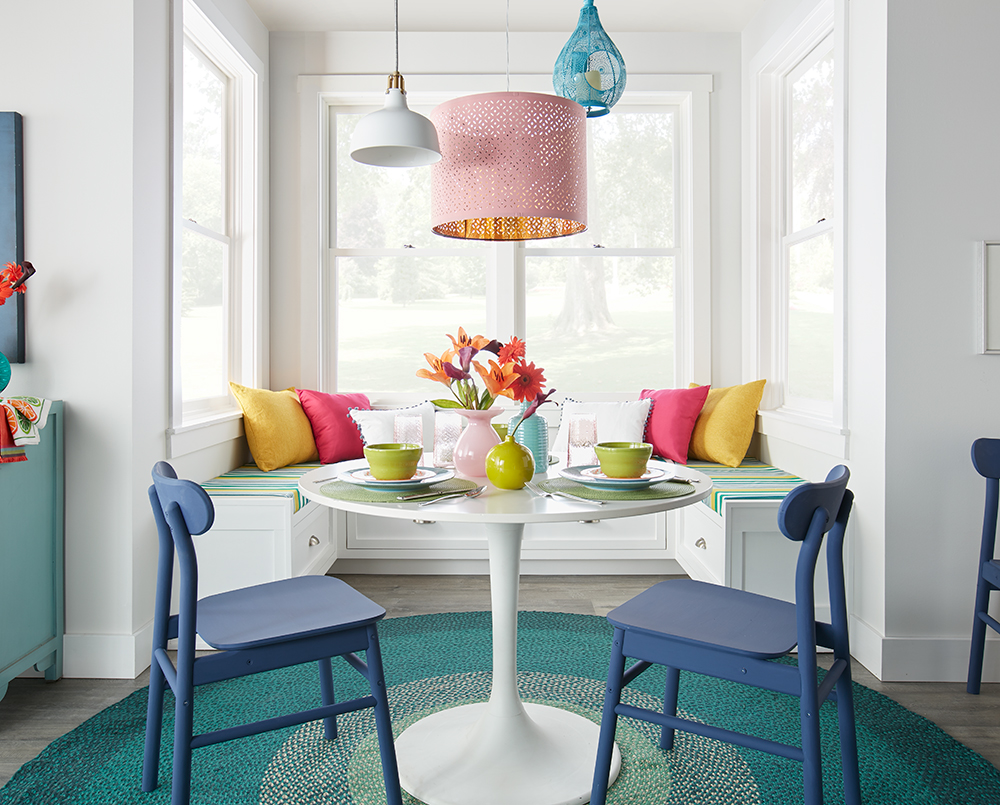
Next up, it was time to turn this style on its head and go from light to bright! We brought in a bright white table and chalk-painted blue wooden chairs and an over-sized teal rug. Striped cushions and colorful brightened up the dining bench, while an array of three playful chandeliers came together to create a fun statement chandelier.
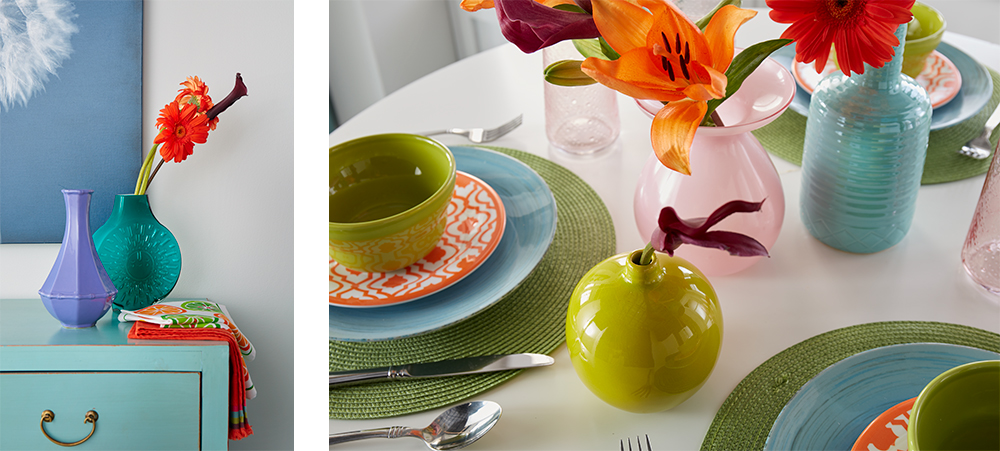
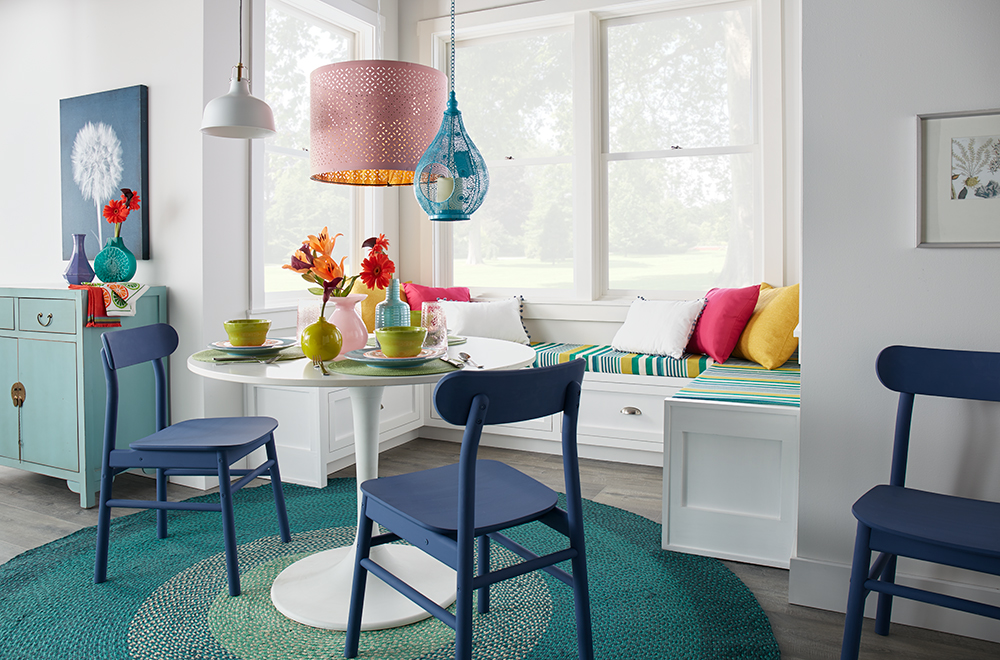
The newly primed and painted walls were the perfect backdrop for these two design styles, proving that white walls are far from boring. From bold and colorful, to sophisticated and neutral, the right white shade on your walls can open up a space to a myriad of design possibilities. Which style spoke to you?
Always remember to refer to our website kilz.com or product back labels for additional information on which primer is right for your project and detailed instructions on how to apply our products.
Moody Master Bathroom Makeover
May 1, 2020For this month’s inspiration post we’re introducing a brand new KILZ® Primer that will help us transform a dated bathroom into a moody and dramatic retreat. The original bathroom’s design was living in the past, and not in a good way! An old wooden vanity and unattractive laminate flooring needed to go, but before a new vanity could be brought in, we needed to do something about those boring beige walls.
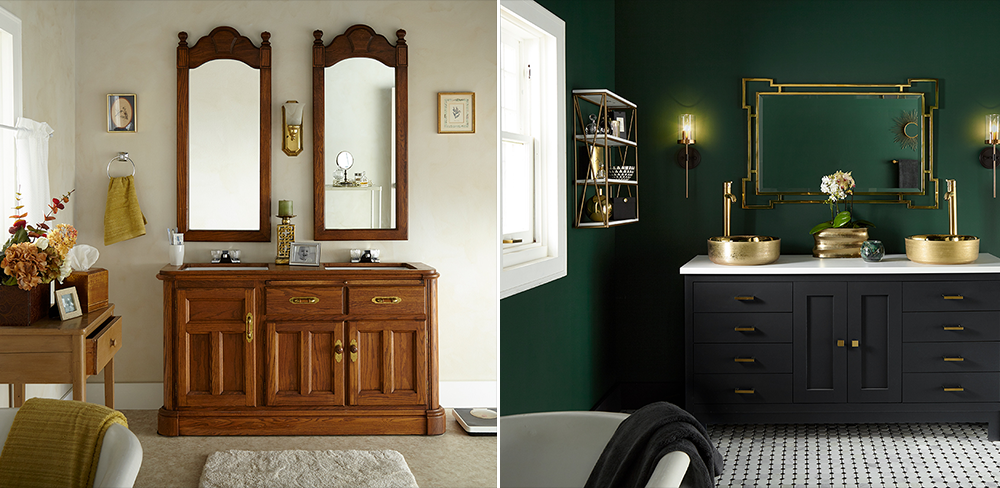
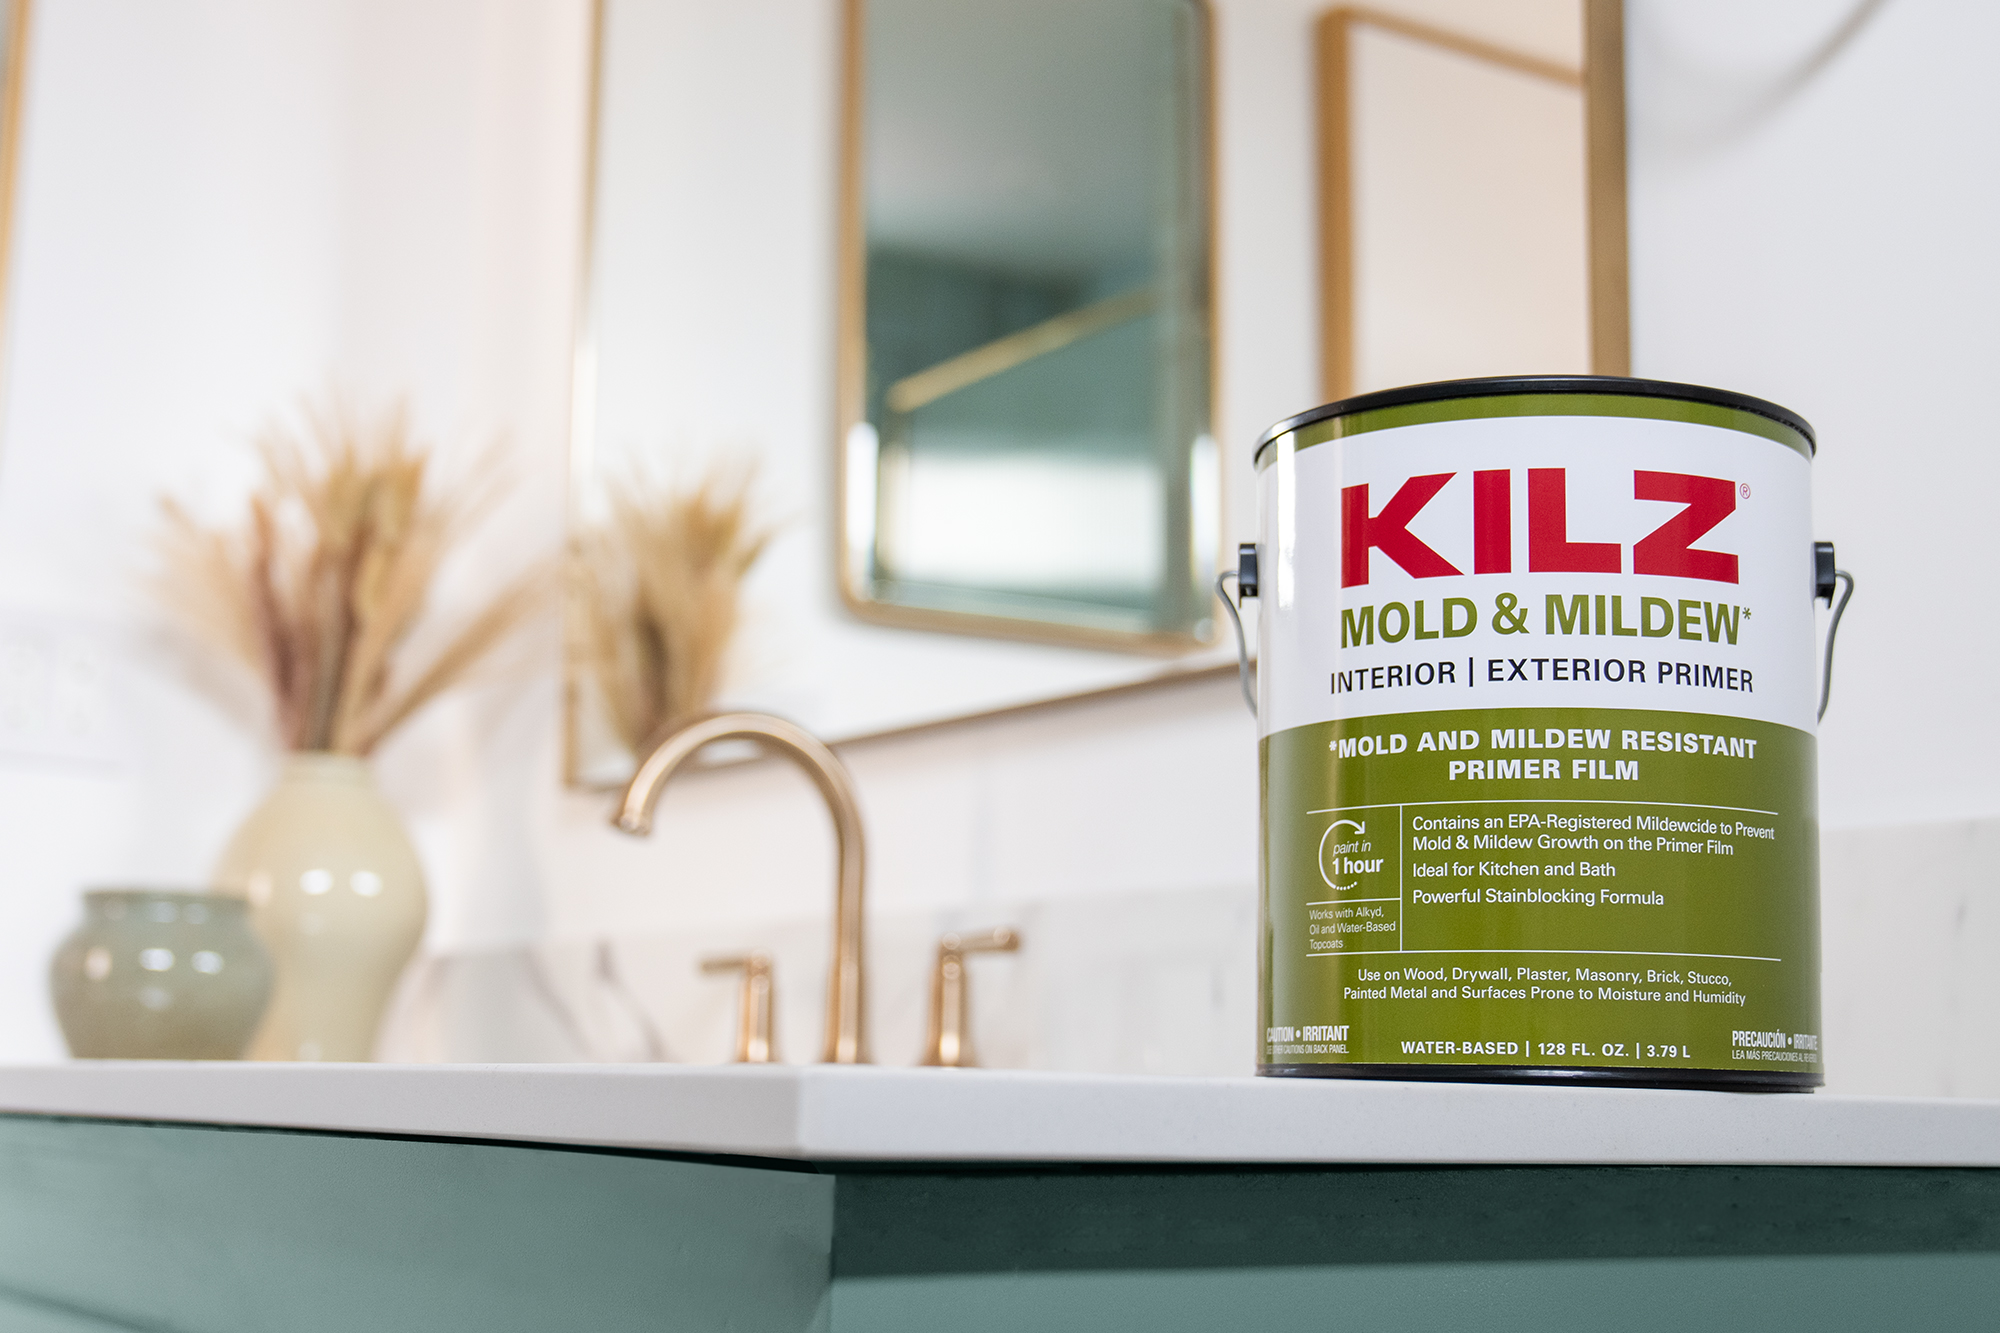
Creating a dramatic new space was the goal, so we knew a dark paint color would be used on the walls. And even though we were painting over a lighter color, priming first before painting was a crucial step. In addition to helping to ensure a truer color from our chosen topcoat, the primer used in this project offered a bathroom-essential benefit. We used the new KILZ® Mold & Mildew Primer for this bathroom makeover, as it creates a mold and mildew-resistant primer film that protects the primer film from mold and mildew growth.
This water-based primer-sealer-stainblocker is specially designed for high humidity, moisture and temperature environments such as kitchens, bathrooms, powder rooms and laundry rooms. It offers excellent adhesion to both interior and exterior surfaces and provides a sound anchor for paints.
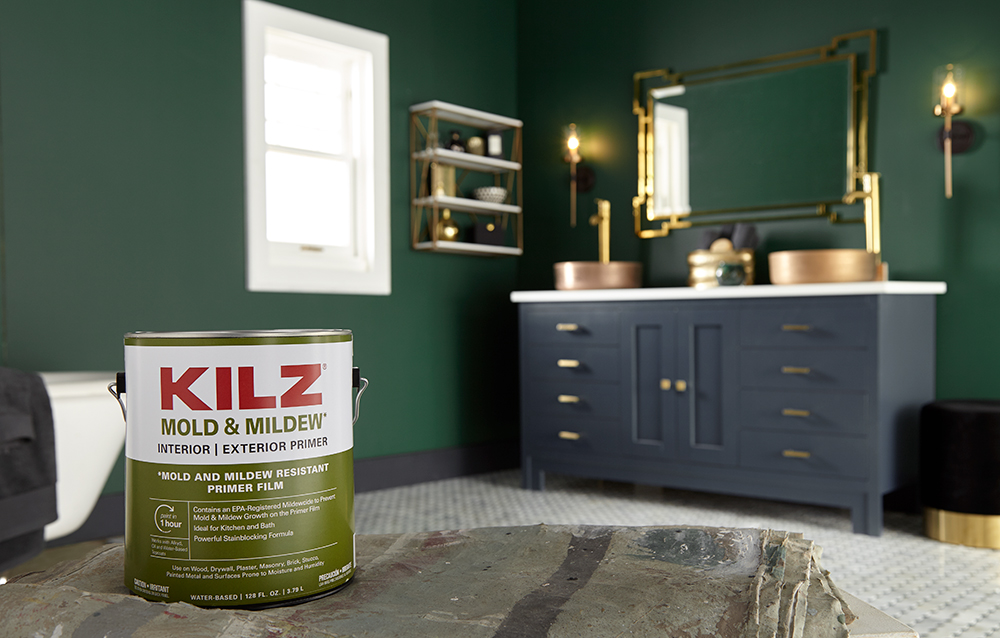
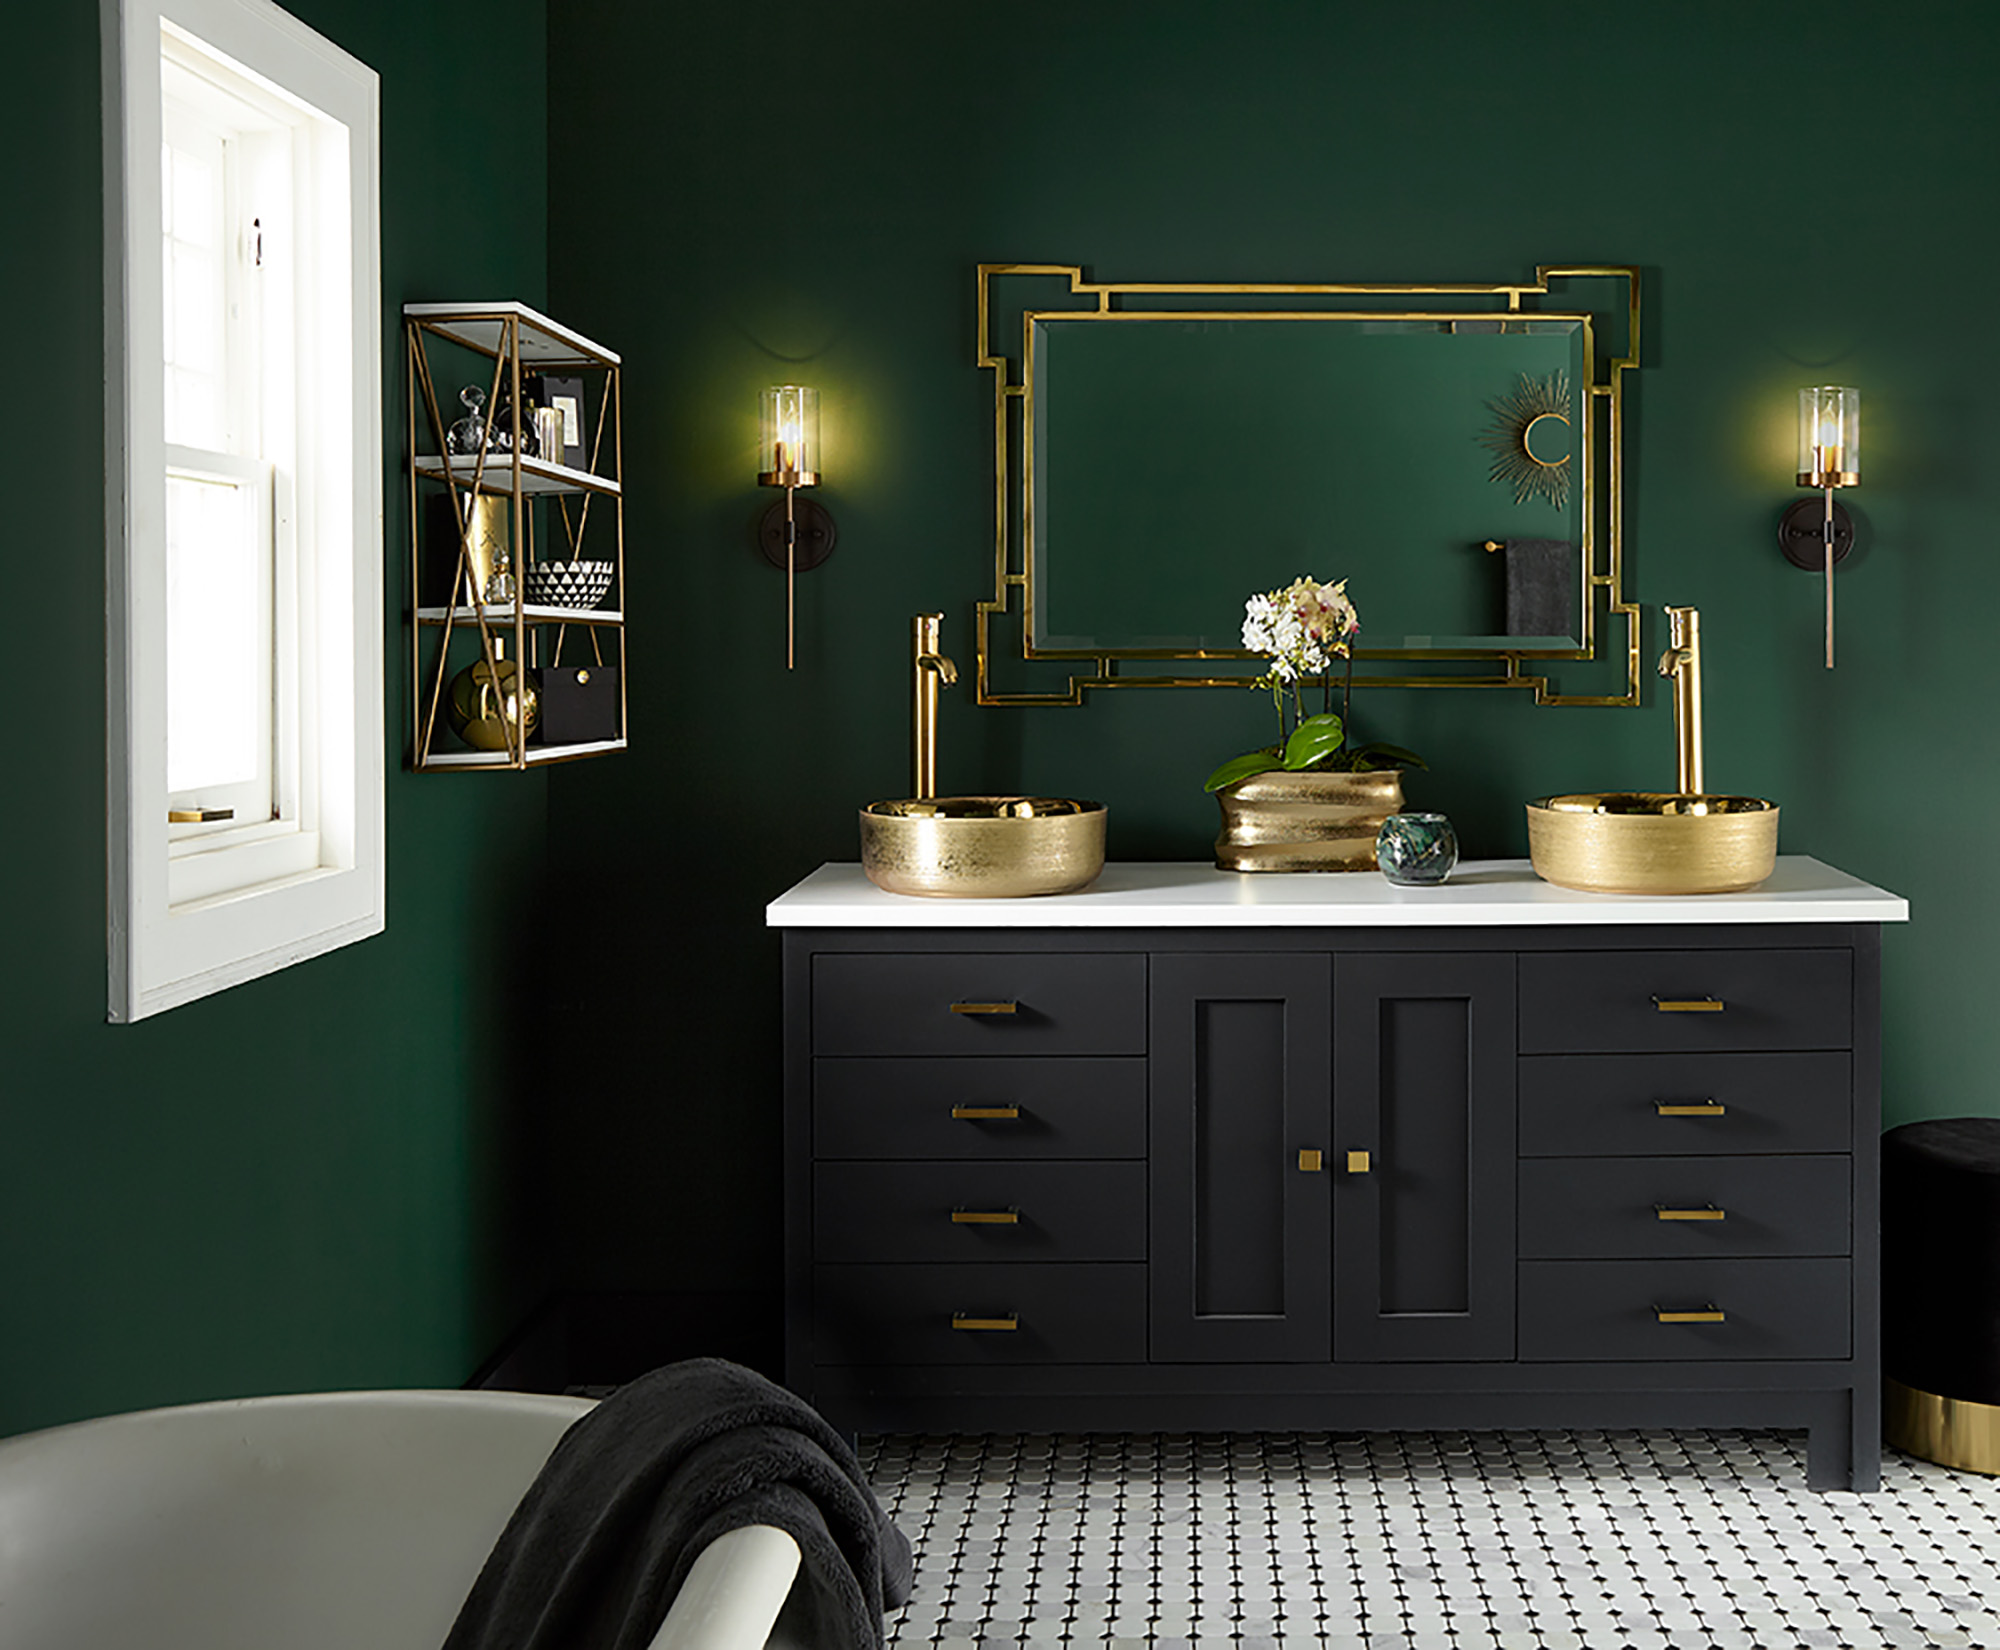
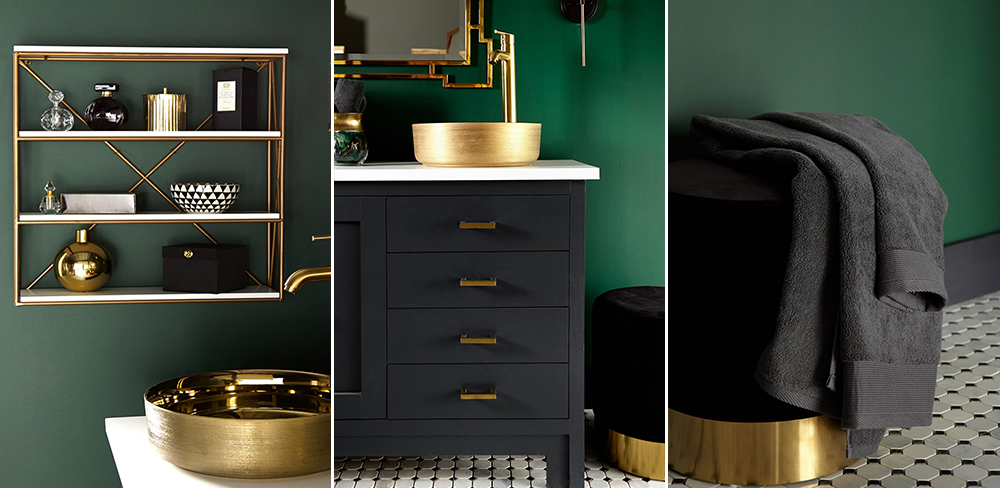
Once the walls were properly primed with KILZ® Mold & Mildew and allowed to dry, it was time to paint. A deep emerald green was the perfect paint color for the walls and complemented the new black vanity. Brushed gold sinks, black and white tile and an oversized art deco-inspired mirror added sophistication to the space and completed the master bathroom transformation.
Always remember to refer to our website kilz.com or product back labels for additional information on which primer is right for your project and detailed instructions on how to apply our products.
Pretty in Pink Bathroom Makeover
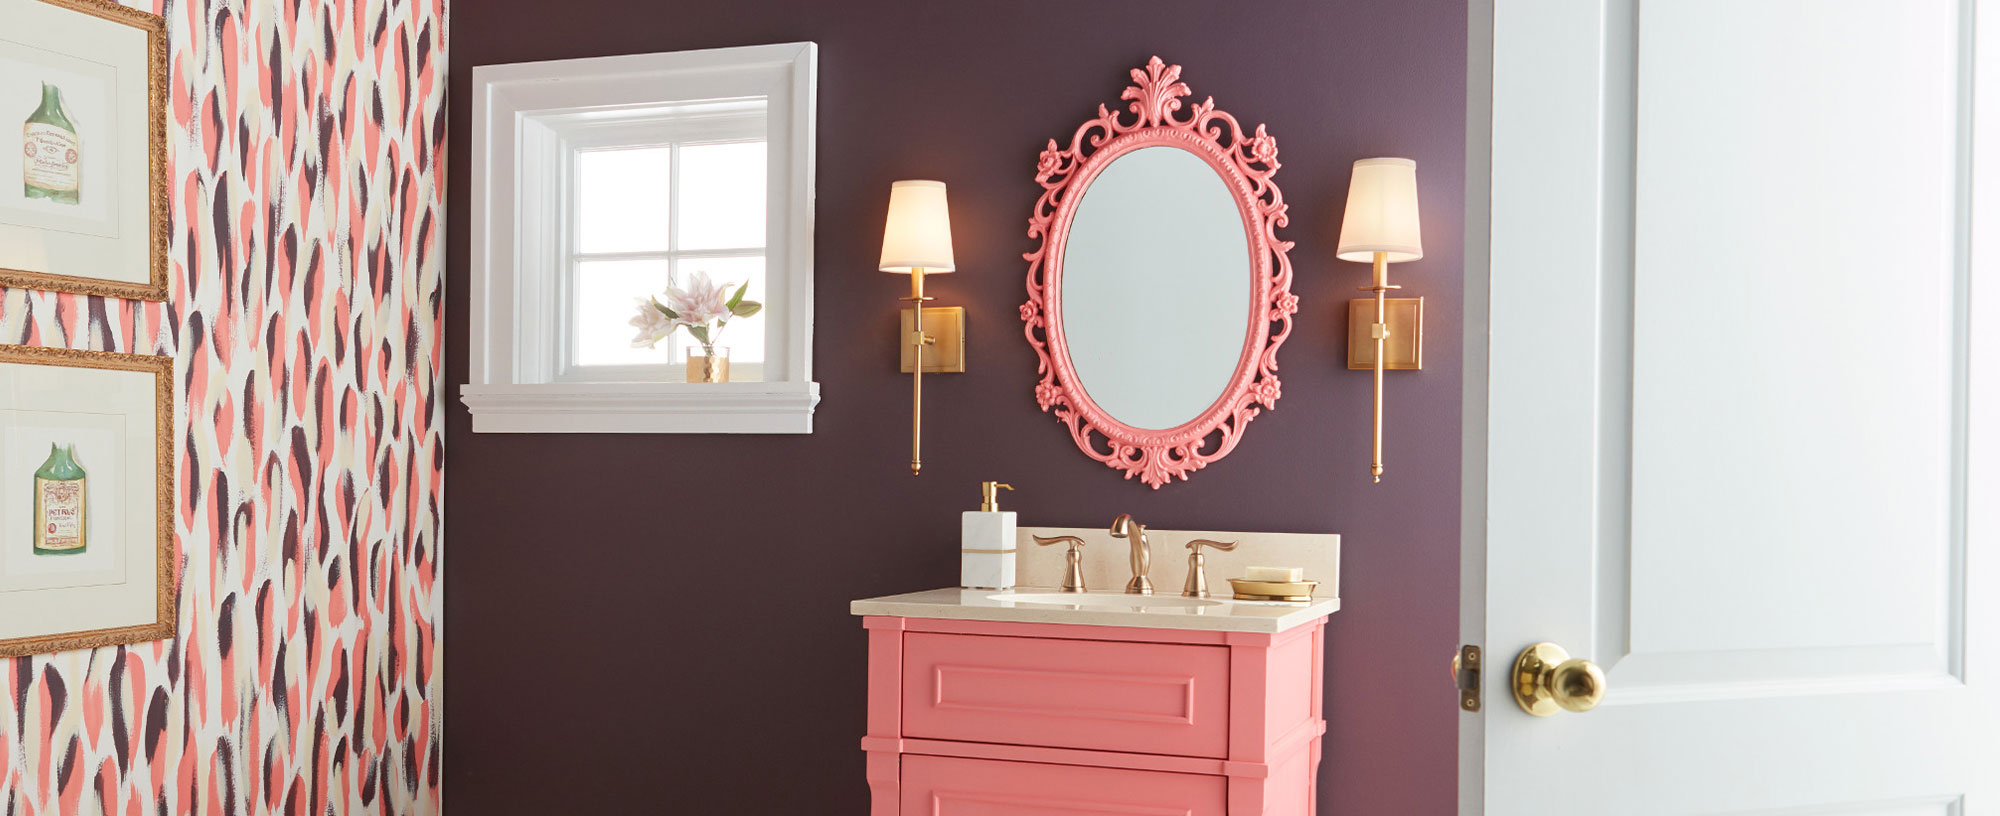
February 12, 2020It’s February, which means Valentine’s Day and all things pink are top of mind. This month we’re talking about colors and spaces you can fall in love with, including this pretty in pink bathroom. A once boring bathroom was given new life with painted faux wall paper, a bright pink vanity (with matching mirror!) and a dark accent wall. And just as important as picking the right vibrant colors for this small space renovation, was the prep work that went in before we painted to ensure that this makeover would last for years to come.
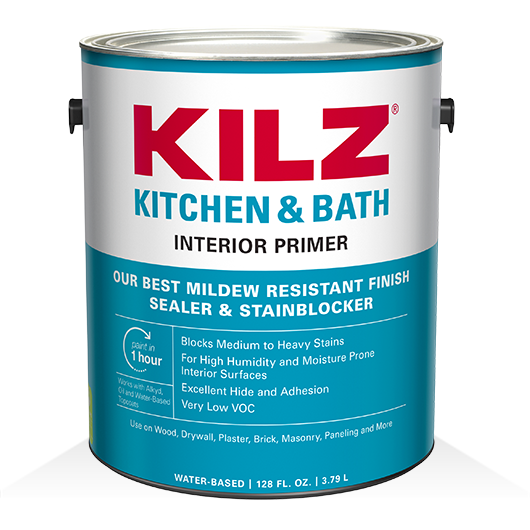
Before the paint went on, we wanted to ensure that our hard work would withstand a bathroom’s typical humidity, moisture and changing temperatures so we primed the walls with KILZ® Kitchen & Bath Primer. This water-based primer is specially designed for residential surfaces exposed to humidity, moisture and fluctuating temperatures such as kitchens, bathrooms, powder rooms and laundry rooms.
Proper priming also provides a solid anchor for paints – in this case a deep purple wall and coral-hued bath vanity. A painted “wall paper” accent wall and pink mirror complete the space. For this bathroom makeover, BEHR Premium Plus® in Watermelon Punch, KILZ Tribute® in Spanish Fortress and Beetroot Purple were used as accent colors over a white wall to create the fun faux wallpaper. Beetroot Purple was also used for the dramatic dark wall behind the vanity, with Watermelon Punch coating the vanity and matching mirror.
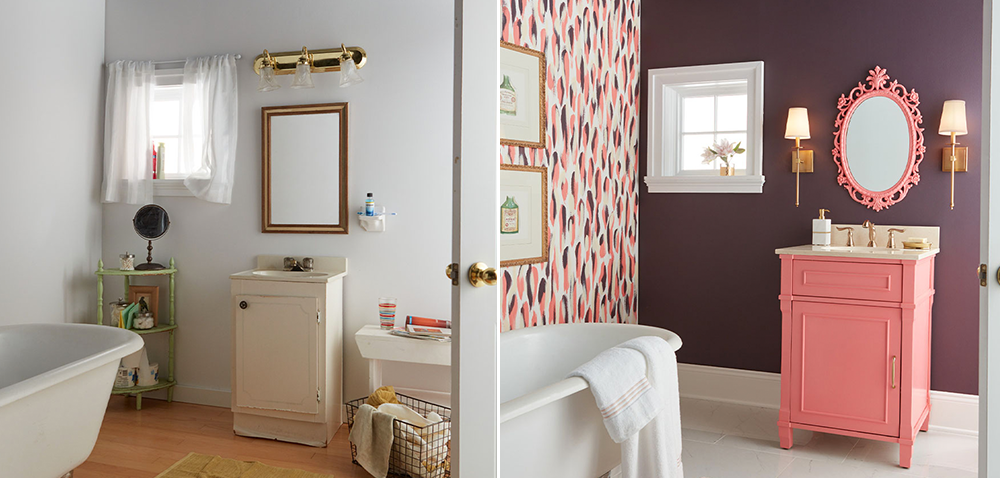
An everyday space gets a coat of unexpected flair in this stylish bathroom makeover. Read on for step by step directions to complete this paint project at home including the dark accent wall, painted “wall paper”, bathroom vanity and matching mirror.
The Dark Accent Wall
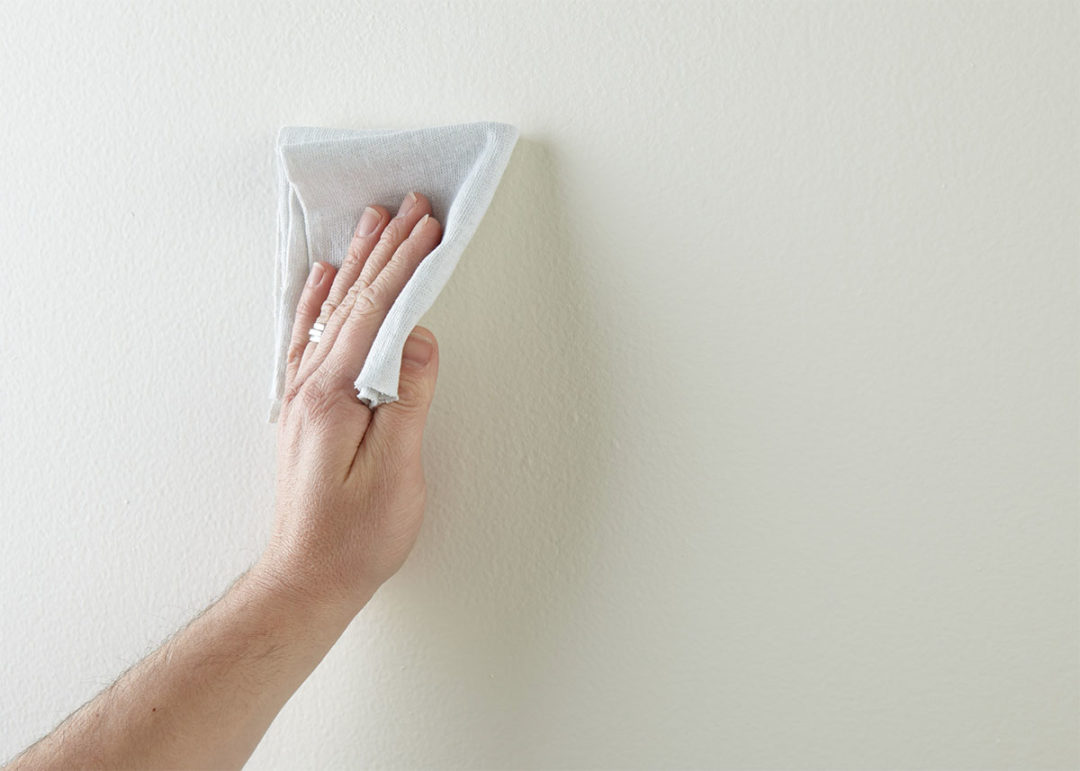
Step 1: Wipe down the chosen accent wall with a damp cloth to ensure it is clean and free of dust and allow the surface to dry.
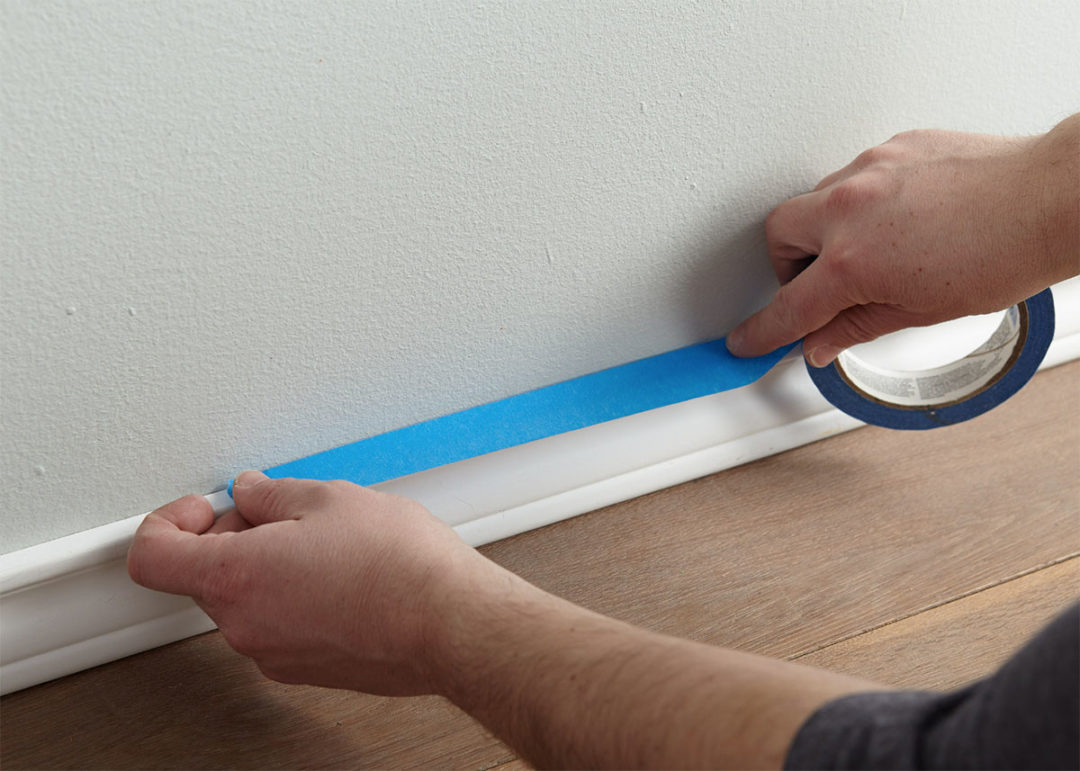
Step 2: Once dry, tape around the baseboards, trim and moldings.
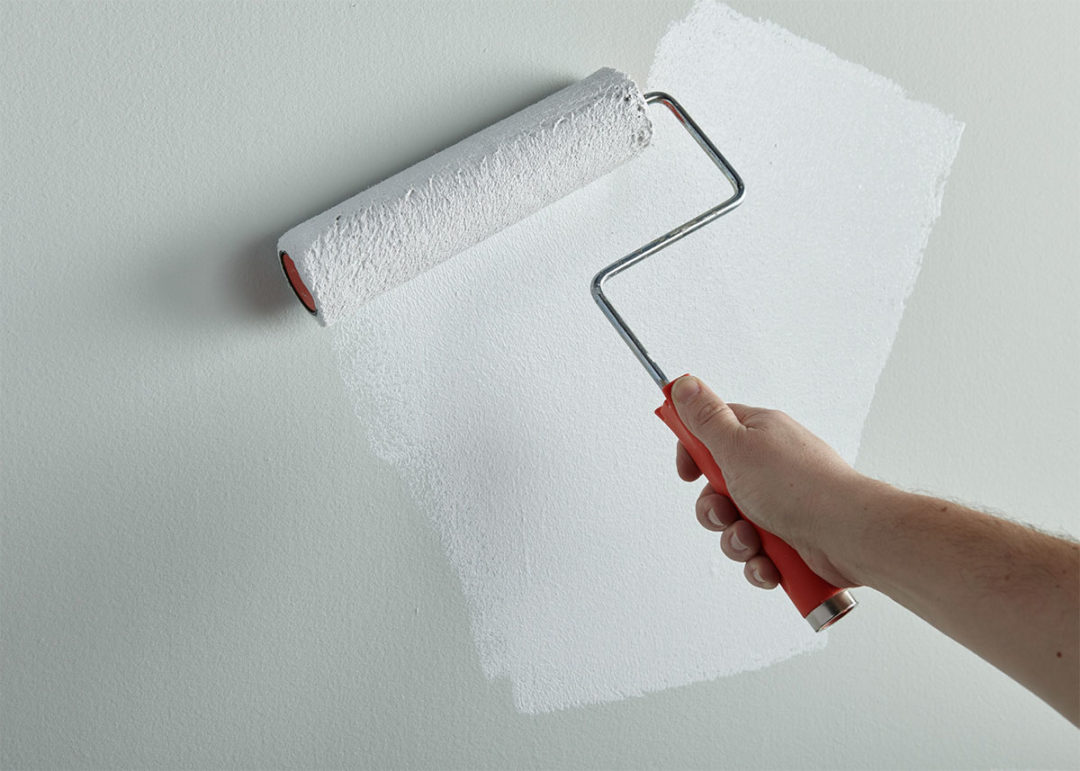
Step 3: Apply 1 coat of KILZ Kitchen & Bath (stirring thoroughly before and occasionally during use) and allow to dry. Apply primer using a brush first to “cut in” around the edges, then use a roller to fill in.
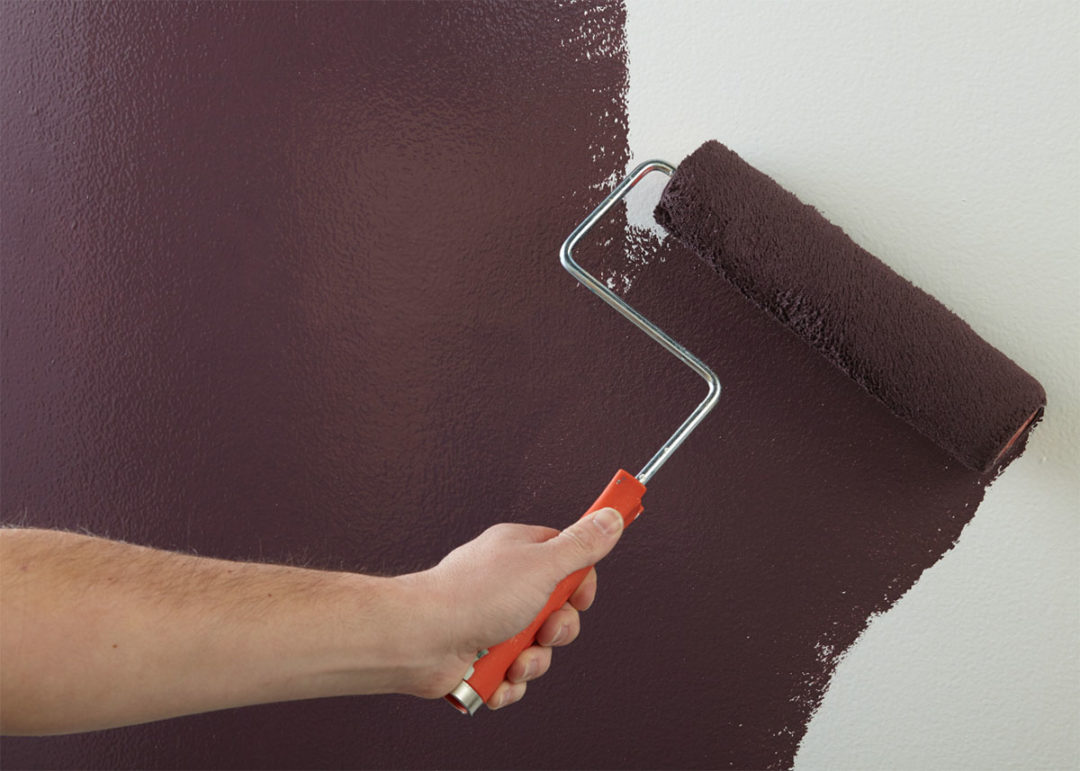
Step 4: Once primer is dry, apply KILZ Tribute in Beetroot Purple using the same application method as the primer (using a brush first to cut in around the edges 4 to 6 feet at a time, then use a roller to fill in those sections before moving along).
Step 5: Remove tape before paint is fully dry.
The Painted “Wallpaper”
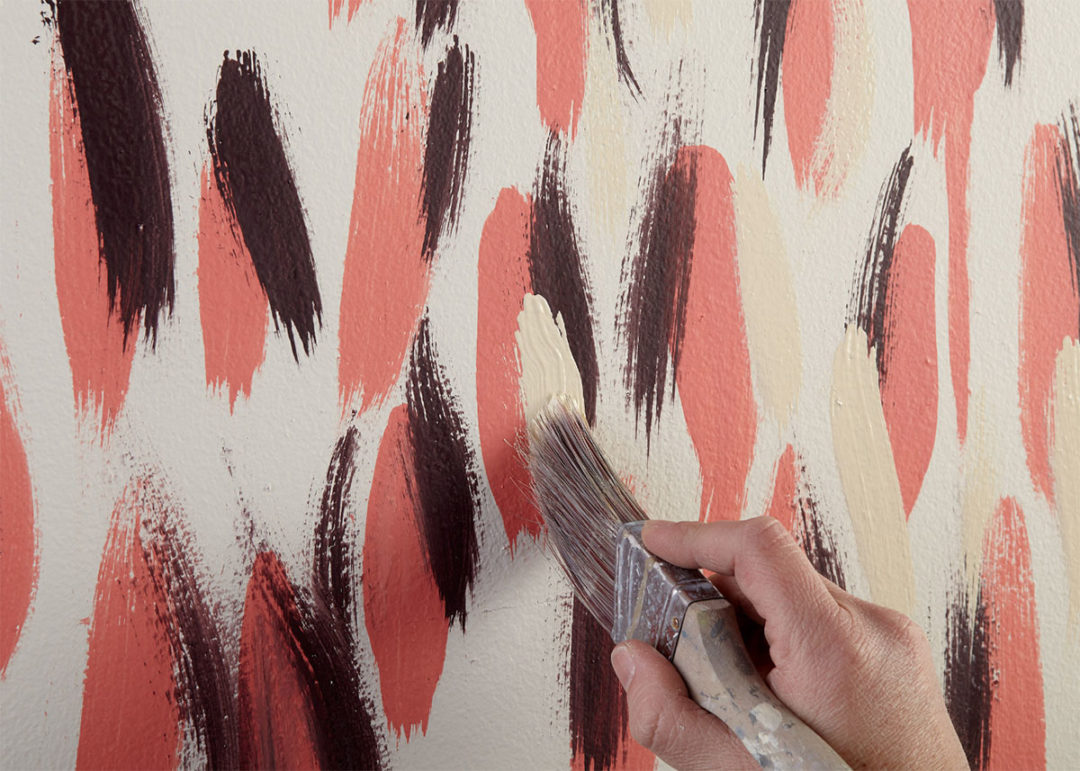
Step 1: Once the wall is primed (use same method as above), apply base color.
Step 2: Starting with BEHR Premium Plus in Watermelon Punch, use a brush and apply vertical strokes across entire wall. Once dry, use KILZ Tribute in Beetroot Purple and repeat, slightly overlaying the vertical strokes across the first pink strokes. Allow to dry and repeat with KILZ Tribute in Spanish Fortress.
The Vanity
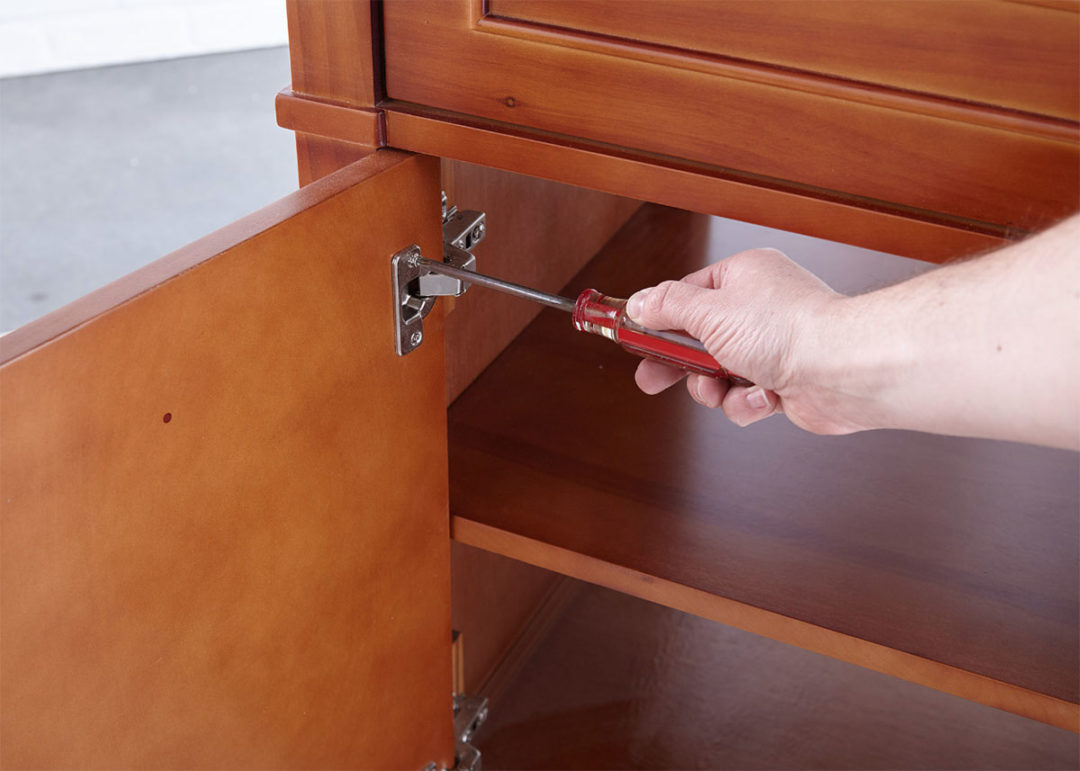
Step 1: Remove drawers and hardware. Put the screws back into the hardware, then seal the hardware and screws in painter’s tape and label it. It’s always best to put every screw back exactly where it came from. That will put the least amount of stress on the wood.
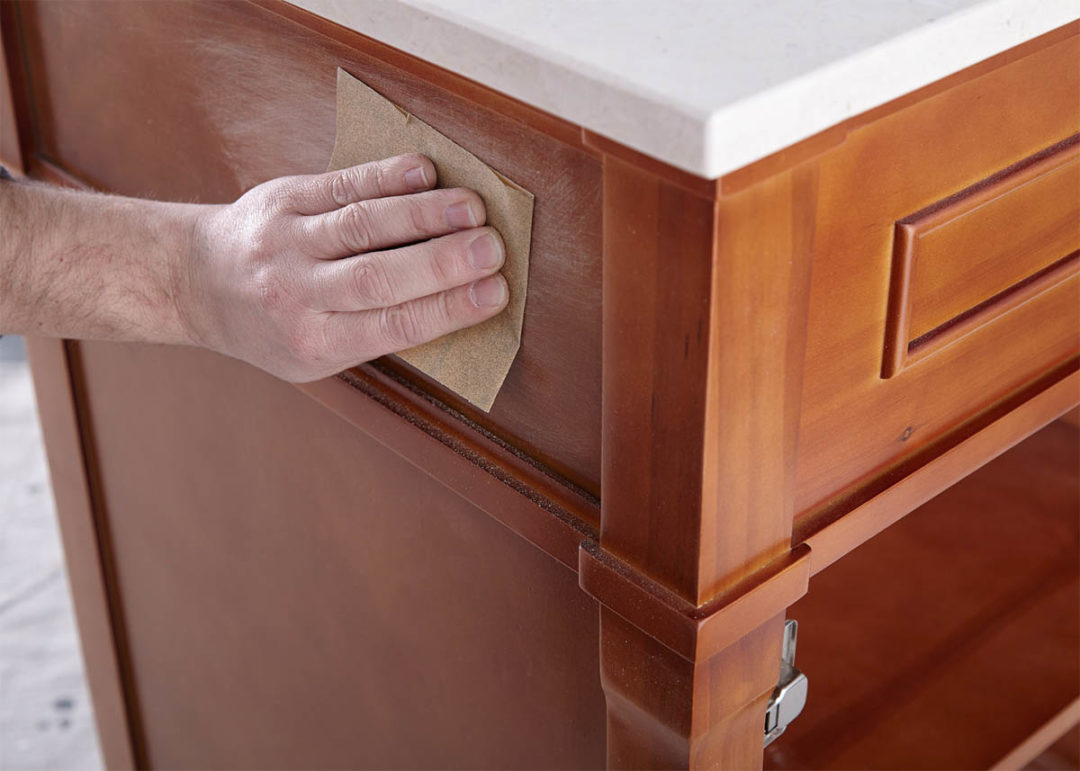
Step 2: Sand the surface; do a first pass with 100-150 grit sandpaper then finish with a second pass of 180-220 grit sandpaper.
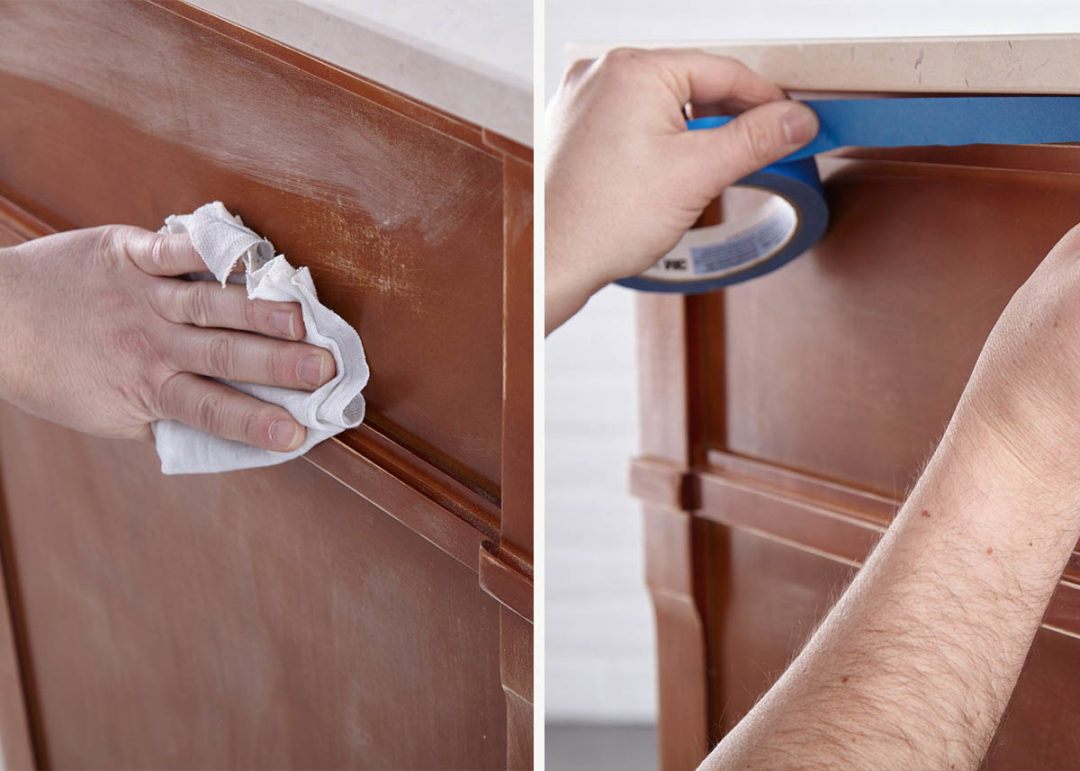
Step 3: After sanding, wipe down the surface with a damp cloth to remove any dust or residue and allow the surface to dry. Once dry, apply painter’s tape around the countertop edges.
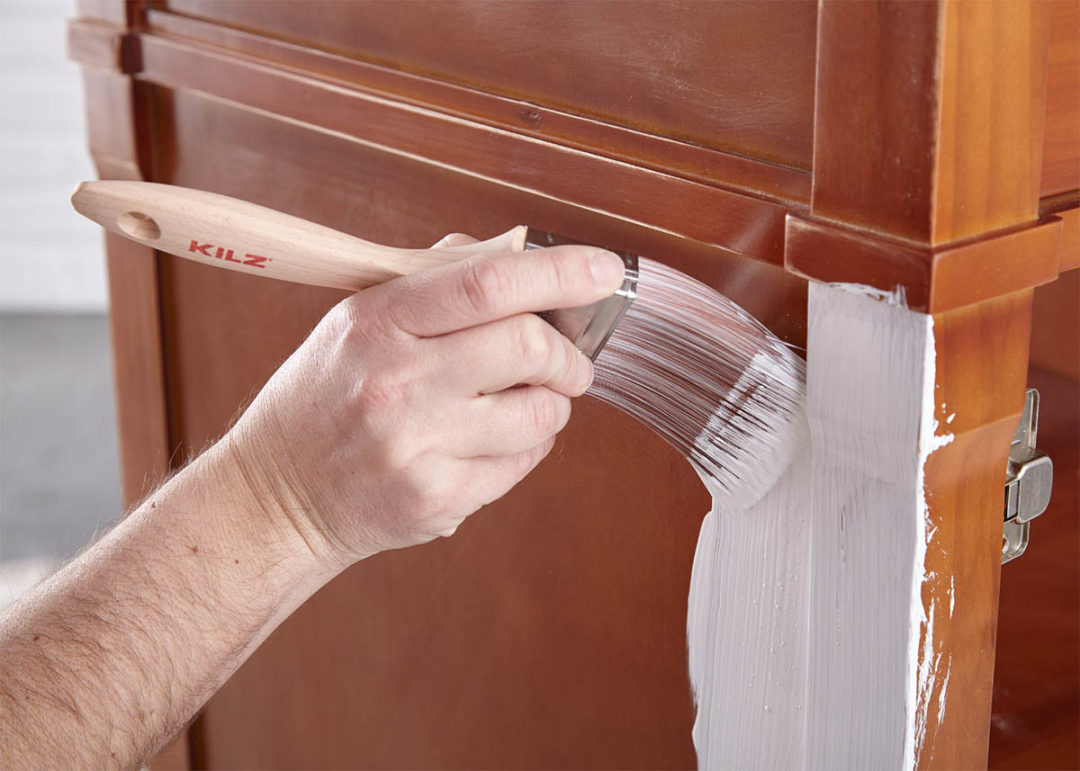
Step 4: Apply KILZ Kitchen & Bath (stirring thoroughly before and occasionally during use), moving in the same direction as the wood grain for best results. Allow primer to dry for 1 hour.
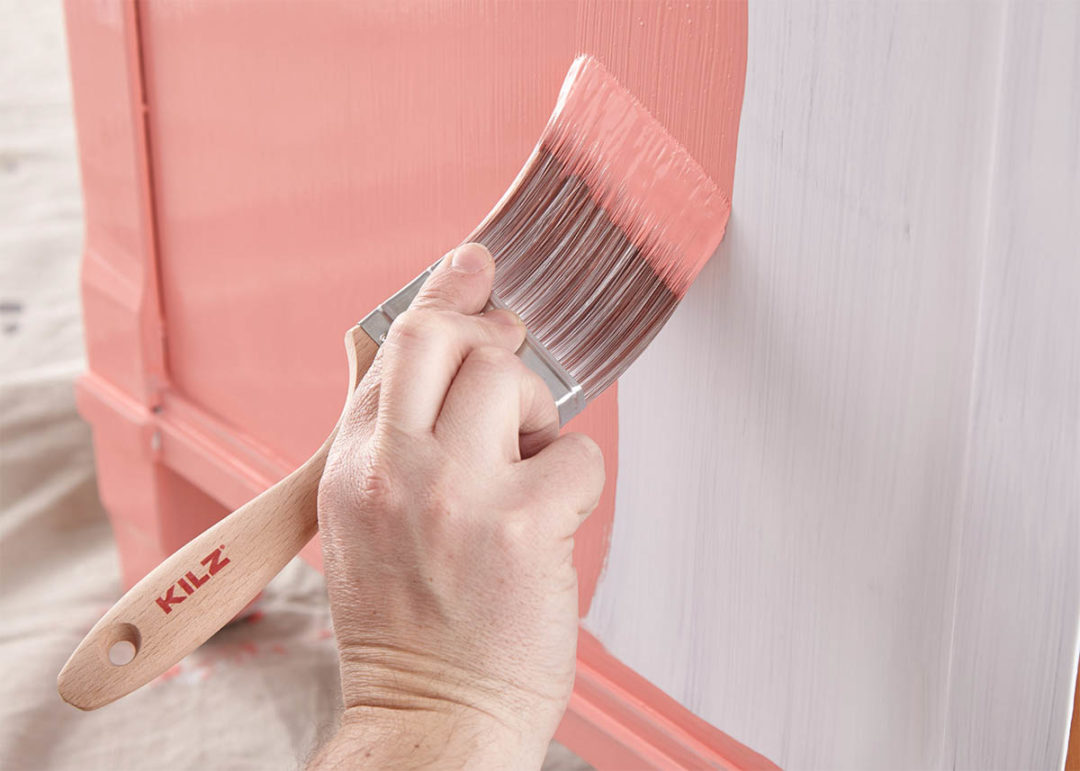
Step 5: Next it’s time for a pop of pink! Apply BEHR in Watermelon Punch (a satin or semi-gloss finish is recommended for superior mildew resistance). Remove the painter’s tape before the paint is fully dry.
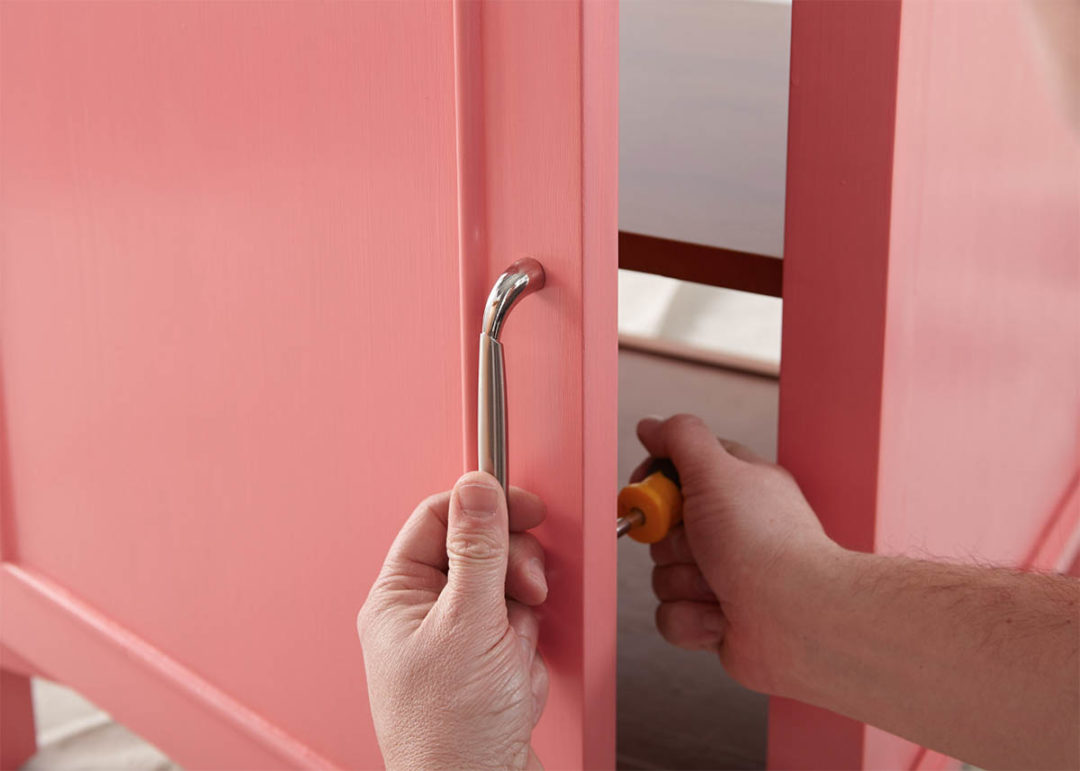
Step 6: Once the vanity is dry, reattach your hardware and you’re done!
The Mirror
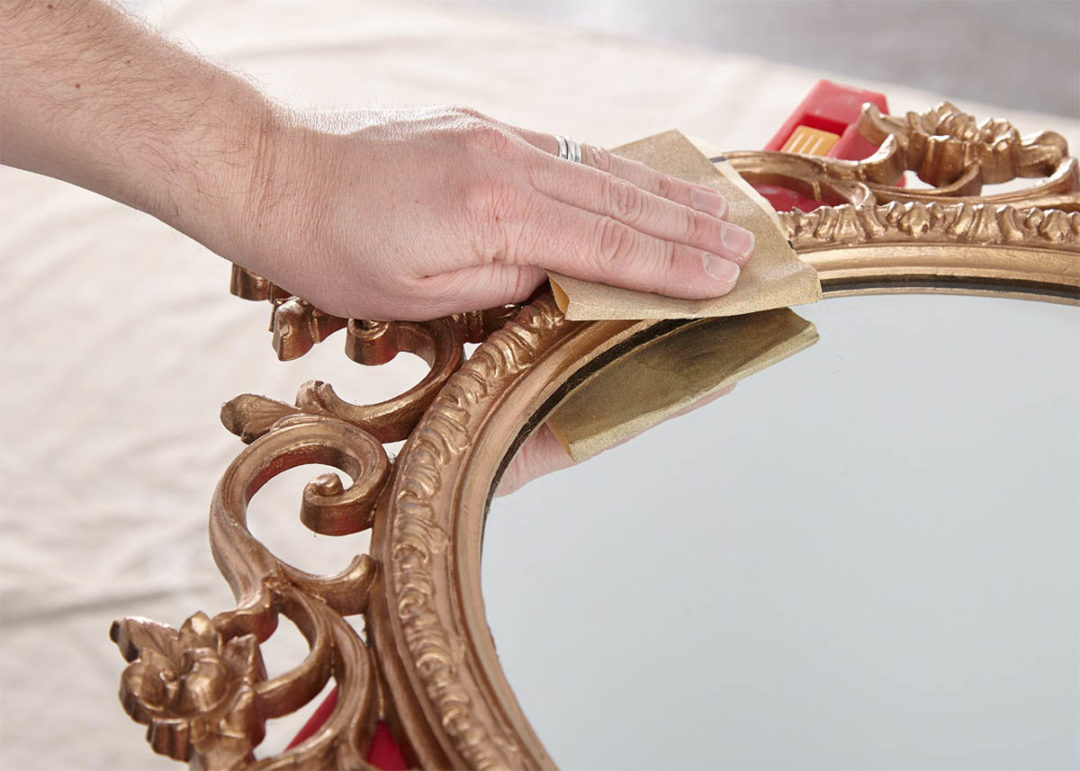
Step 1: Sand the mirror frame, first with 100-150 grit sandpaper and then finish with a second pass of 180-220 grit sandpaper.
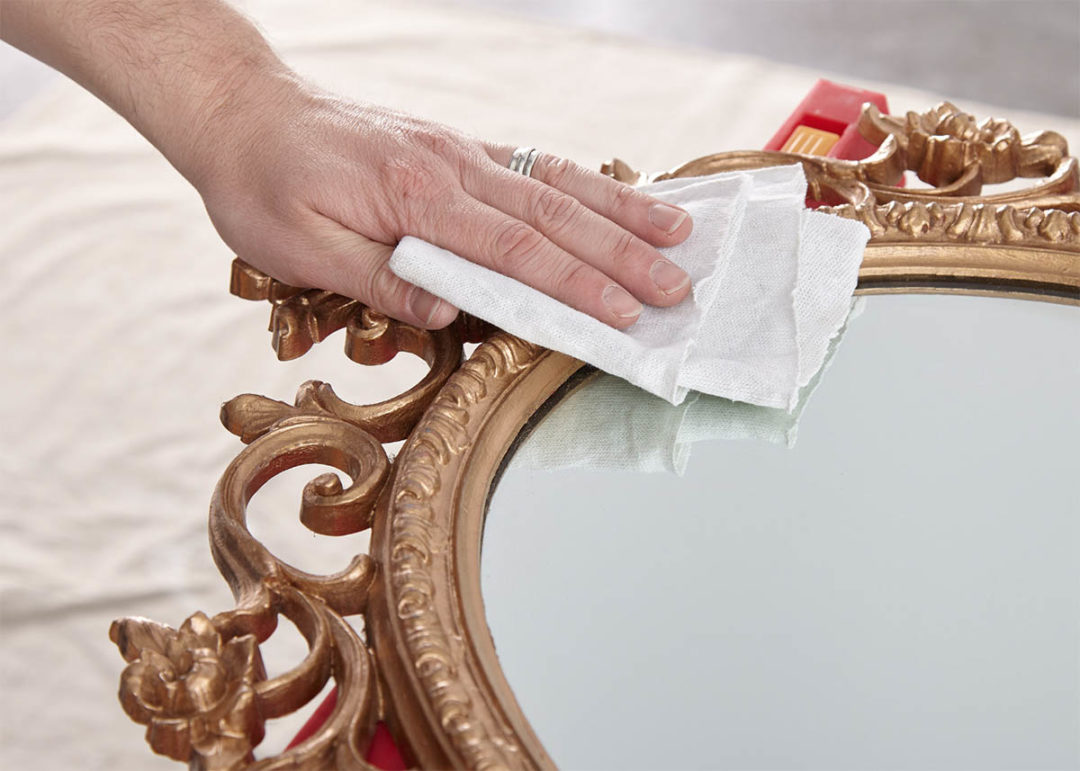
Step 2: After sanding, wipe down the surface with a damp cloth to remove any dust or residue and allow the surface to dry.
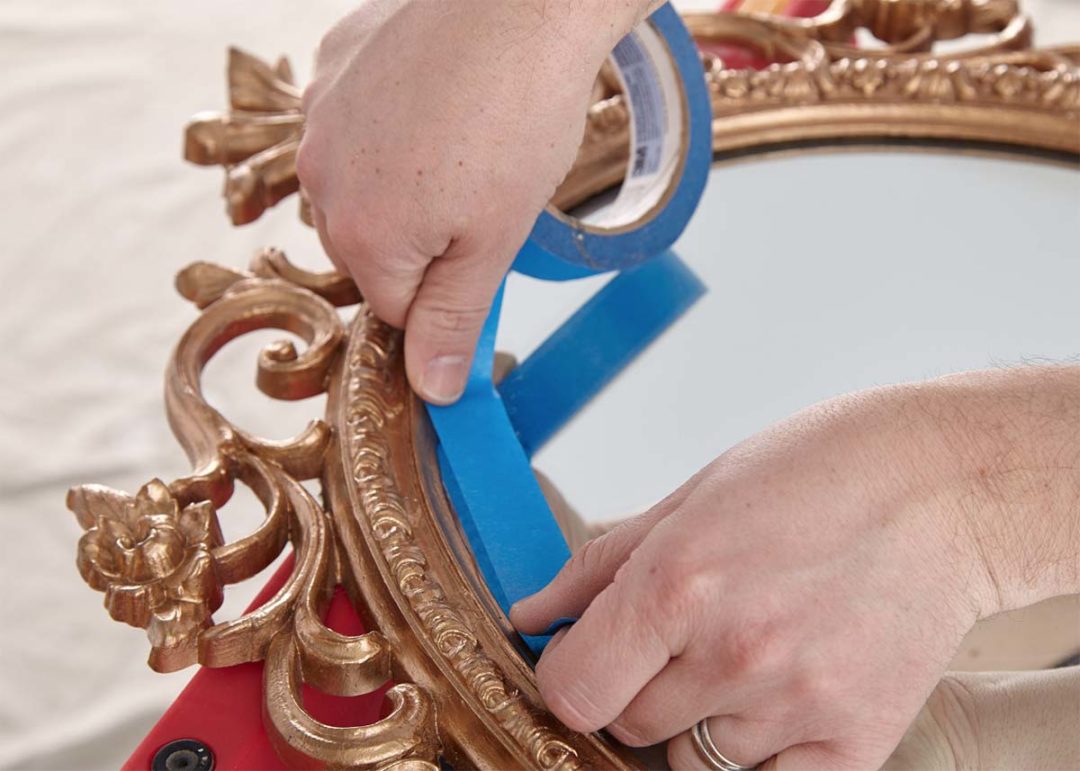
Step 3: Apply painter’s tape to the interior edges of the frame to protect the glass.
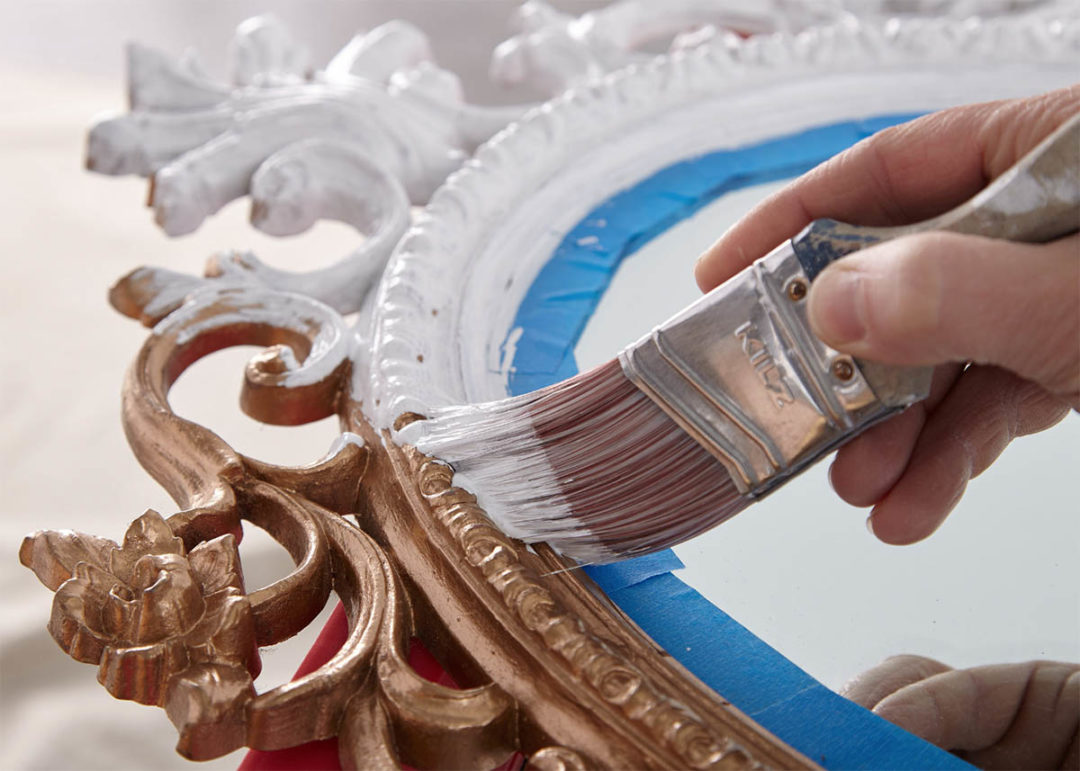
Step 4: Apply KILZ Kitchen & Bath primer with a small paint brush. Allow primer to dry for 1 hour.
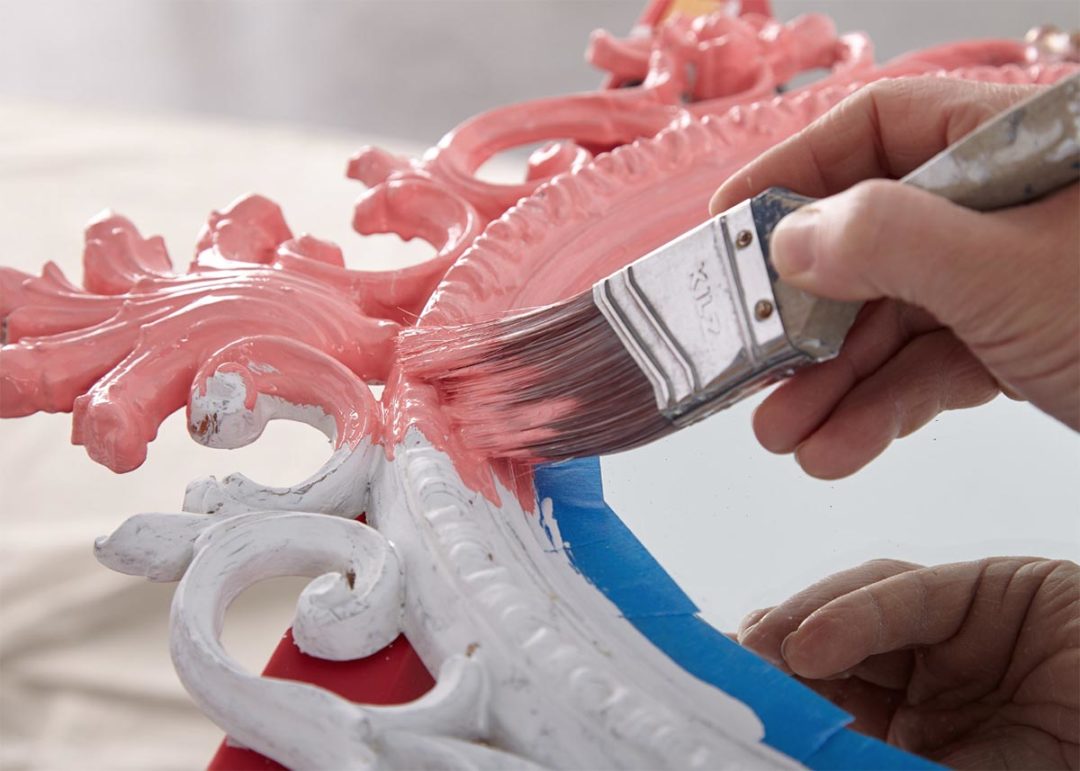
Step 5: Next, apply BEHR Premium Plus in Watermelon Punch (a satin or semi-gloss finish is recommended to ensure superior mildew resistance) using a nylon or polyester brush. Remove the painter’s tape before paint is fully dry.
Always remember to refer to our website Kilz.com or product back labels for additional information and instructions on how to apply our products.



join the conversation:
SHARE this post: